API key: connect another system to your studio
What it is
Section titled “What it is”An API key lets another system (an ERP, an automated spreadsheet, a website, or your own app) read and write data in your studio without anyone having to enter it manually. Each key acts like a studio user: it can do exactly what that user can, and nothing more.
When to use it
Section titled “When to use it”- A management system needs to read the day’s sales for accounting.
- Your own website or app needs to add customers or look up your catalog.
- An automation needs to enter expenses or check accounts receivable.
Before you start
Section titled “Before you start”Only someone who administers the studio (with full access or permission to edit Profiles and Users) can create, edit, and revoke keys. If you can’t create a key, ask the studio owner to grant you access in Access → Profiles.
We recommend creating a separate user for the integration first, with a profile that grants access only to the screens the other system needs. The key inherits that user’s permissions.
Step by step
Section titled “Step by step”Step 1 — Open the API Key tab
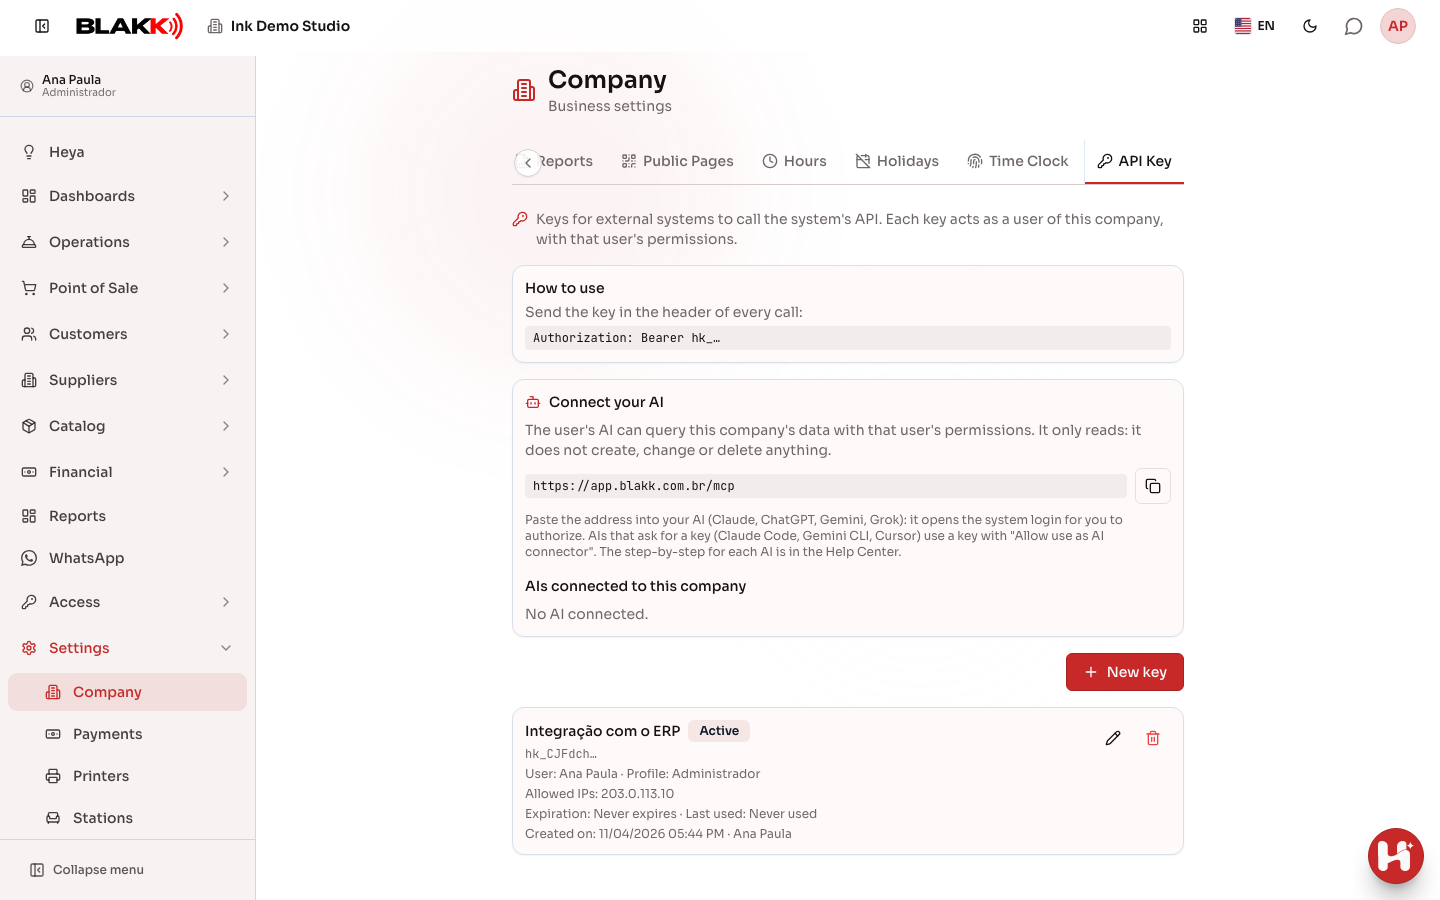
Section titled “Step 1 — Open the API Key tab”Go to Settings → Company and open the API Key tab. It lists the keys already created, along with each key’s user, Allowed IPs, Expiration, and Last used.
Step 2 — Create a key
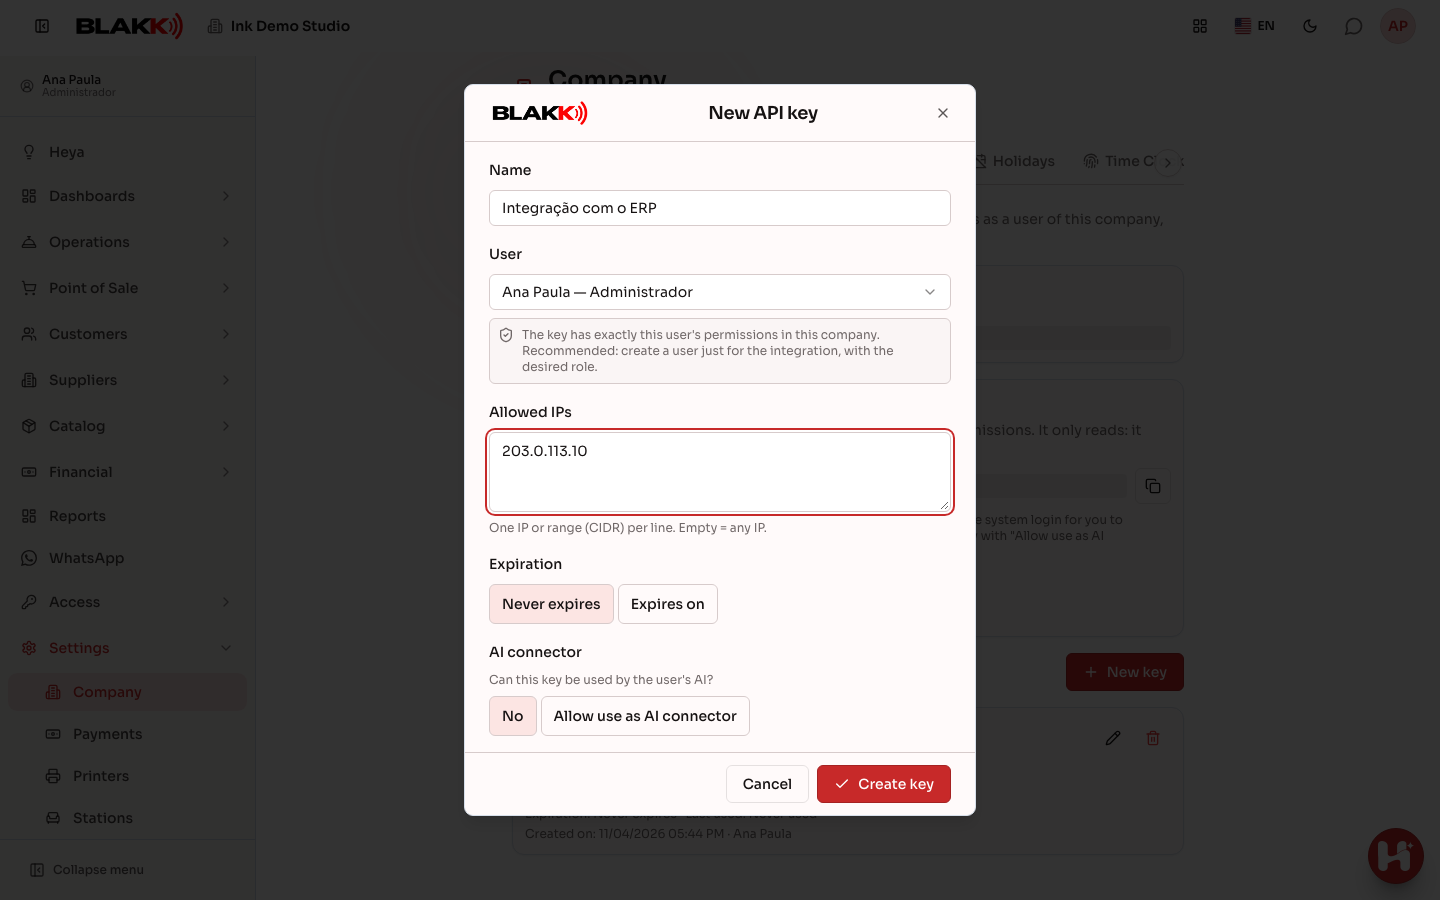
Section titled “Step 2 — Create a key”Click New key, enter the Name, and choose the User. Under Allowed IPs, enter one IP address or range per line to allow calls only from those addresses (leave it blank to allow any IP). Under Expiration, choose Never expires or Expires on and select a date: the key remains valid until the end of that day. Click Create key and copy the key using the copy button. It won’t be shown again.
The other system sends the key with every call in the Authorization header, like this:
Authorization: Bearer hk_... (replace hk_... with the full key).
To use the key with an AI tool (Claude Code, Gemini CLI, Cursor), also check Allow use as AI connector under AI connector. Without this option, the key works for integrations but not with the connector. See the AI Connector article.
Step 3 — Revoke a key
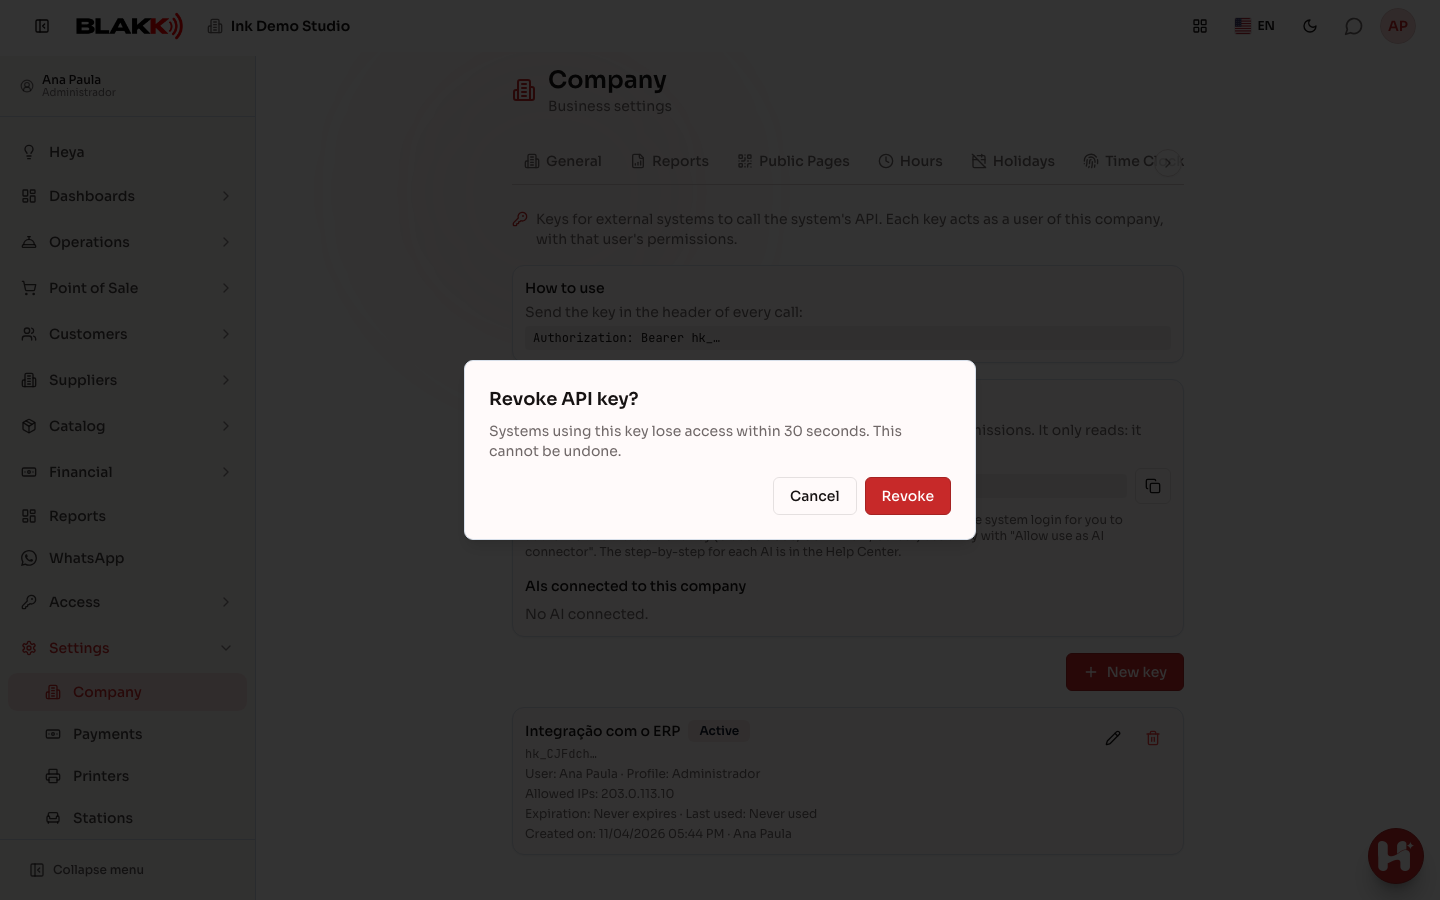
Section titled “Step 3 — Revoke a key”In the list, click the key’s trash icon and confirm by clicking Revoke. The system using the key will lose access within 30 seconds. To change the name, IPs, or expiration, use the pencil icon.
What happens next
Section titled “What happens next”- Everything the other system changes using the key appears in the Audit Log with the source API key, under the name of the key’s user.
- The key stops working automatically when it expires or when its user is deactivated in the studio. In the list, it appears as Expired or Inactive user.
- A key never grants access to another company, even if its user also works for that company.
Common mistakes and questions
Section titled “Common mistakes and questions”Q: Can the key do everything in the system? A: No. It has the permissions of its user, and only in this studio. Some areas never accept API keys, even from a user with full access: signing in and switching companies, the API key page itself, user and invitation management, Heya, support, dashboards, general Company settings (logo, business hours, holidays, domain, report email), and platform pages. If you have multiple integrations, create a separate user for each one. In the Audit Log, changes appear under the key user’s name.
Q: I lost the key. Can I view it again? A: No. The system stores only a fingerprint of the key, never the key itself. Revoke the old key and create a new one.
Q: The other system shows “This IP is not authorized to use this API key.” What should I do? A: The IP address it uses to make calls isn’t listed under Allowed IPs. Edit the key and add the IP, or leave the list blank to allow any IP.
Q: The other system shows “This route can’t be used with an API key.” Why? A: It’s calling an area that doesn’t accept API keys (see the first question). These operations must be performed by a person in the app.
Q: Can I change the user for a key? A: No. Revoke the key and create a new one for the new user.
Q: Why is the user list empty when I create a new key? A: Platform team members can’t have API keys, so they don’t appear in the list. Add a user from your own studio (preferably one just for the integration) and create a key for that user.