Sign-up: How to create your studio account on Blakk
What it is
Section titled “What it is”This guided sign-up creates your studio account on Blakk. It takes about 5 minutes and gets the system ready for your first day: your administrator access, service type, payment methods, team, and schedule.
When to use it
Section titled “When to use it”- You’re opening a new studio and have never used Blakk before.
- Someone recommended Blakk, and you want to try the system before deciding whether to use it — sign-up doesn’t require a credit card or commitment.
Before you start
Section titled “Before you start”You don’t need anything in advance — sign-up asks for information as you go, and you can skip almost every step and set it up later. If you’d like to fill everything out at once, it’s helpful to have your business owner’s CNPJ or CPF (or, outside Brazil, a local document such as an NIF), your studio’s postal code, and an idea of the prices for your main services.
Step by step
Section titled “Step by step”Step 1 — Start signing up
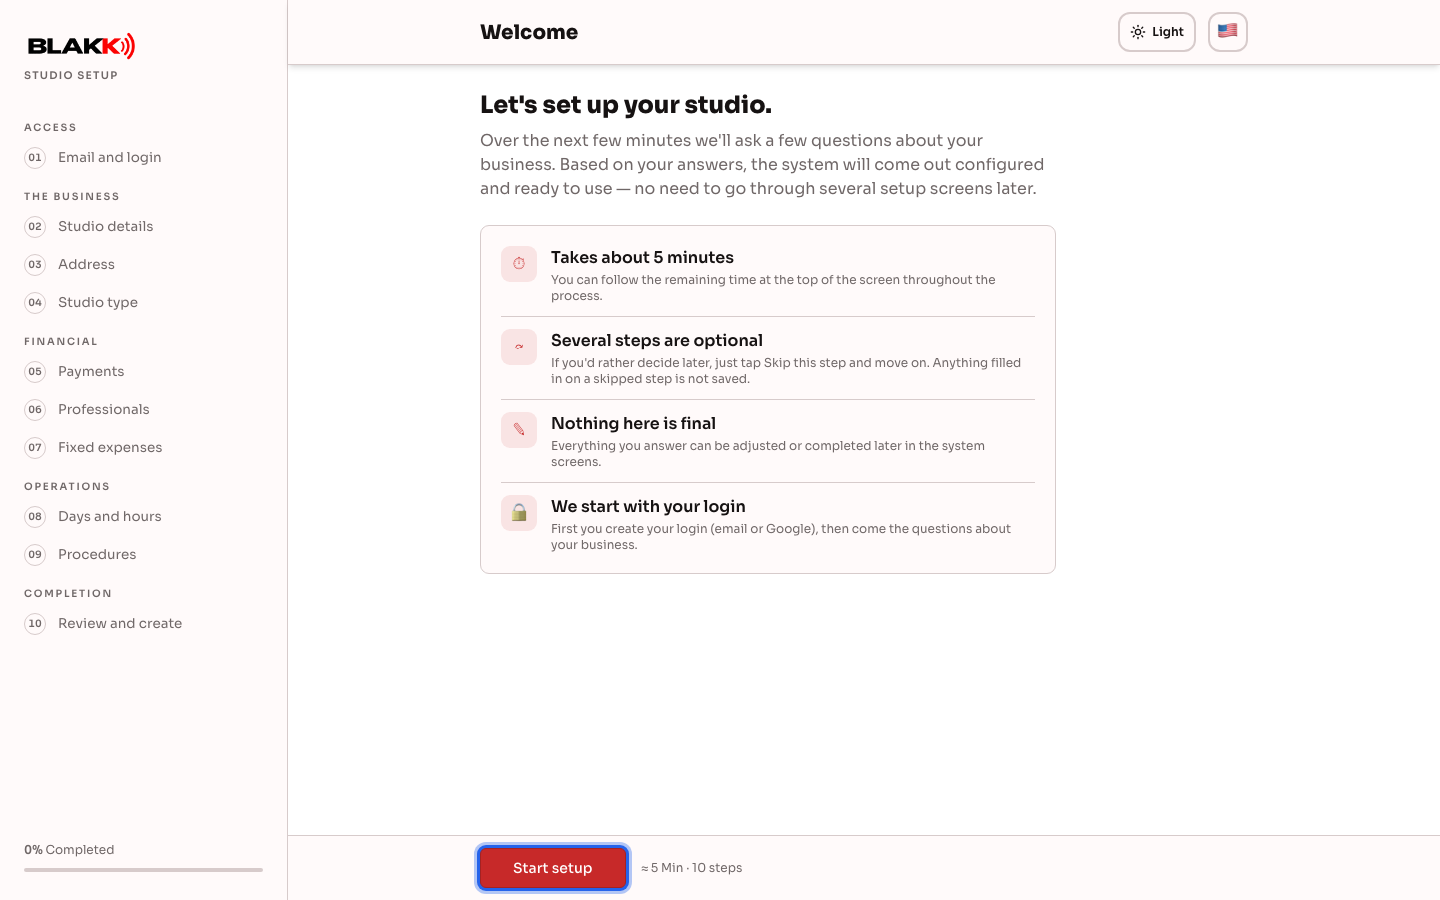
Section titled “Step 1 — Start signing up”Go to Blakk’s sign-up link and click Start setup. The screen shows how long it takes (about 5 minutes) and reminds you that several steps are optional — you can skip them and make changes later from the system screens.
Step 2 — Create your login
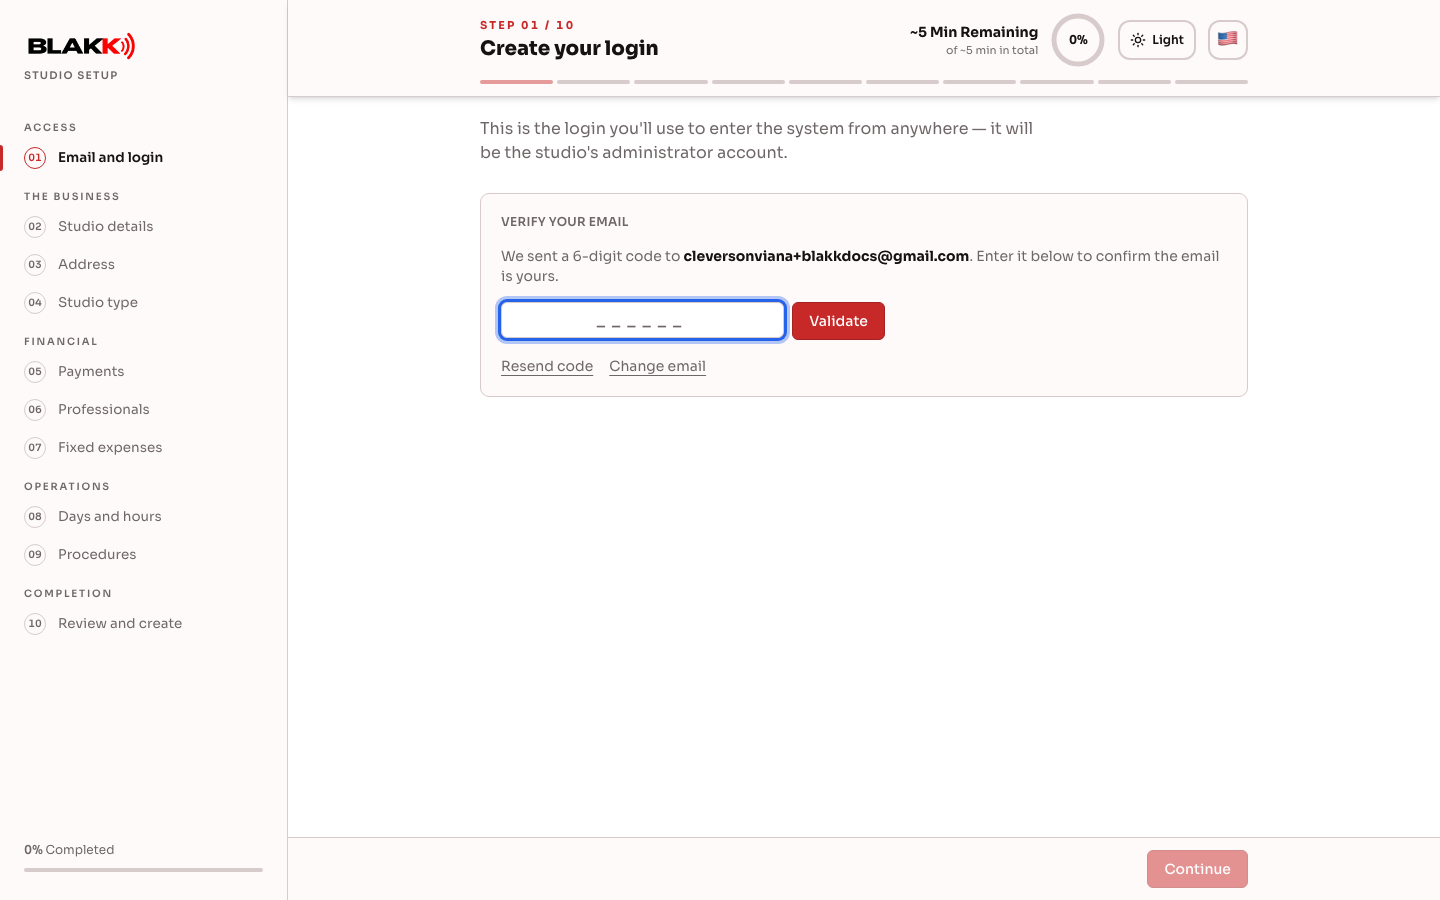
Section titled “Step 2 — Create your login”Enter your email and click Send verification code. You’ll receive a 6-digit code by email. Paste or enter the code, and it will be validated automatically once all 6 digits are entered, so you don’t need to click Validate.
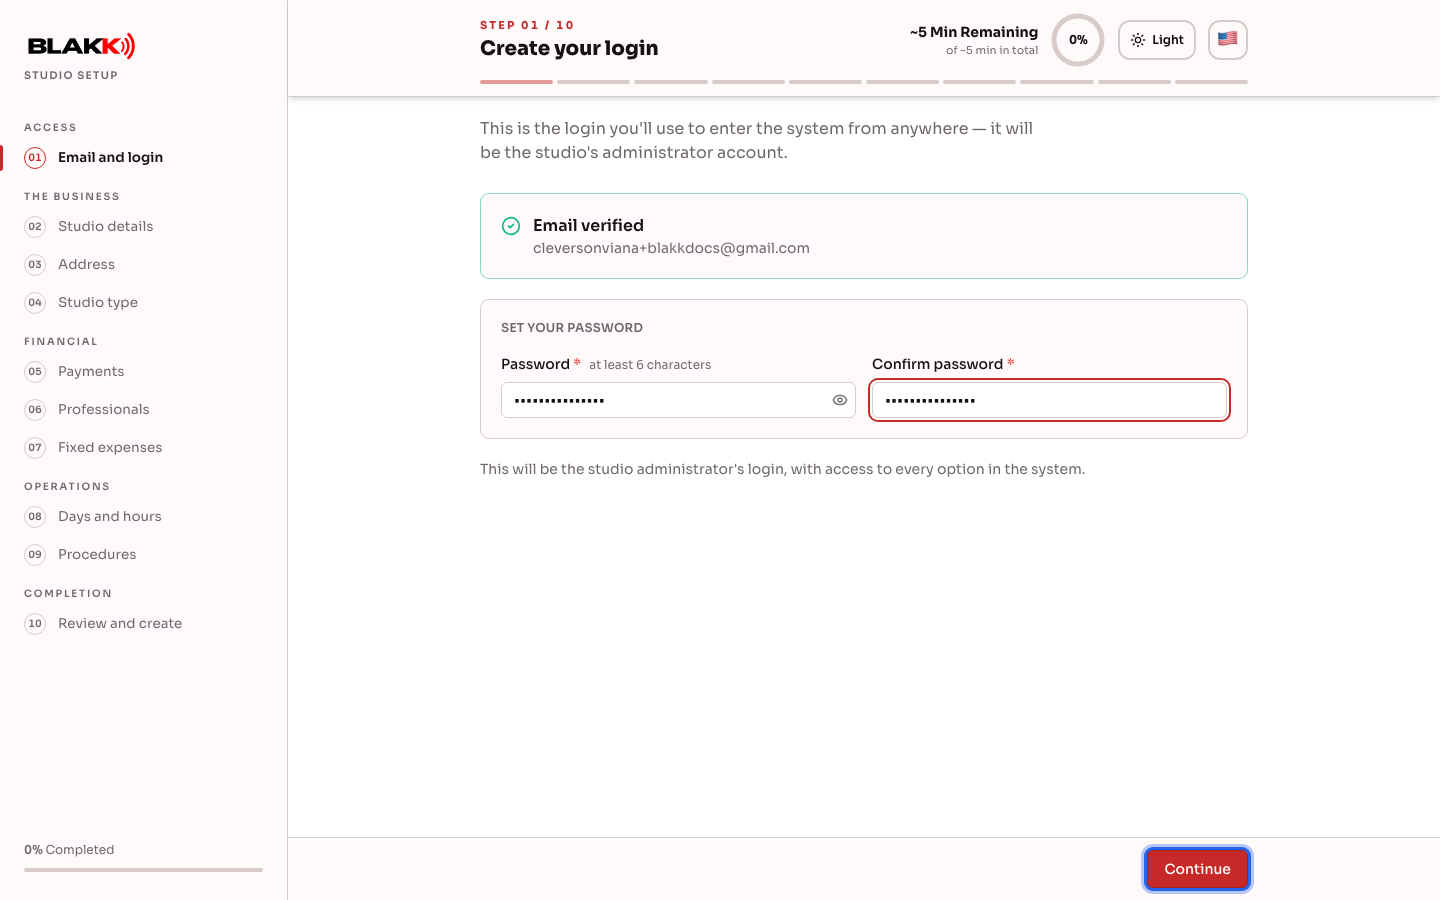
Once your email is confirmed, create a password for your login. Use this email and password to access the system from anywhere. Your account is automatically set up as your studio’s administrator, with access to all system features.
You can also sign in directly with Continue with Google — in that case, you don’t need to verify a code because Google has already verified your email. When the Continue with Apple button appears, it works the same way: confirm on Apple’s screen, and you’ll return to sign-up without a code or password.
Step 3 — Studio details
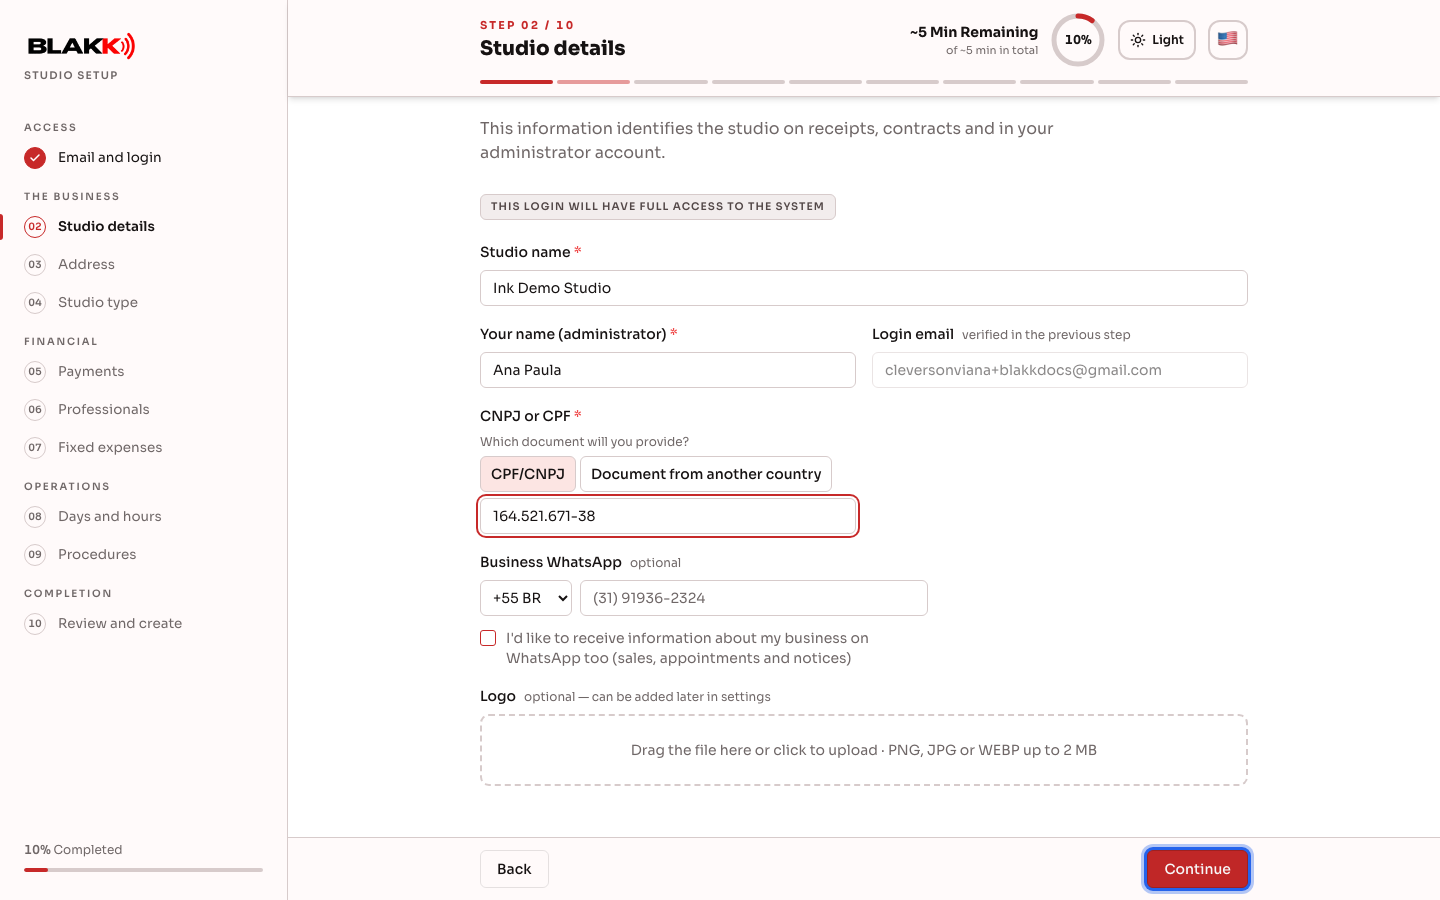
Section titled “Step 3 — Studio details”Enter your studio name, your name, and the business owner’s document. Under Which document will you provide?, keep CPF/CNPJ selected or choose Document from another country to enter, for example, a Portuguese NIF. If you live outside Brazil, you can use your CPF as usual; a document from another country is only accepted if you select a country other than Brazil in the next step. Your business WhatsApp number and logo are optional at this stage — you can add them later. If you enter a WhatsApp number, you can choose to receive business updates there too, including sales, appointments, and alerts.
Step 4 — Studio address
Section titled “Step 4 — Studio address”To fill everything in at once, tap Use my location and allow location access. Your country and address will be filled in using your device’s GPS. Review the fields, since the location may not match the studio’s exact entrance.
If you’d rather enter the address manually, check the Business country first. It defaults to the country associated with the WhatsApp country code you entered (or Brazil if you didn’t enter a WhatsApp number). This determines the account’s currency, number format, payment methods, and address format. Brazil, Portugal, Colombia, and the United States appear first; other countries are listed below in alphabetical order. Your selected country applies even if you skip this step.
In Brazil, enter your Postal Code and click Search. In most cases, the street, neighborhood, city, and state are filled in automatically, and you’ll only need to enter the street number. If your postal code isn’t found, the screen will let you know, and the fields will remain editable so you can enter the information manually.
In other countries, the fields follow the local format: in Portugal, a 0000-000 postal code, street address, parish, and district; in the United States, a 5-digit ZIP code and a single-line address; in Colombia, a 6-digit postal code and department; and in other countries, a free-form postal code. Enter the postal code and click Search. The city and region will be filled in automatically (and the street too, when the postal code identifies a street). Review the information and fill in anything else manually. This step is optional.
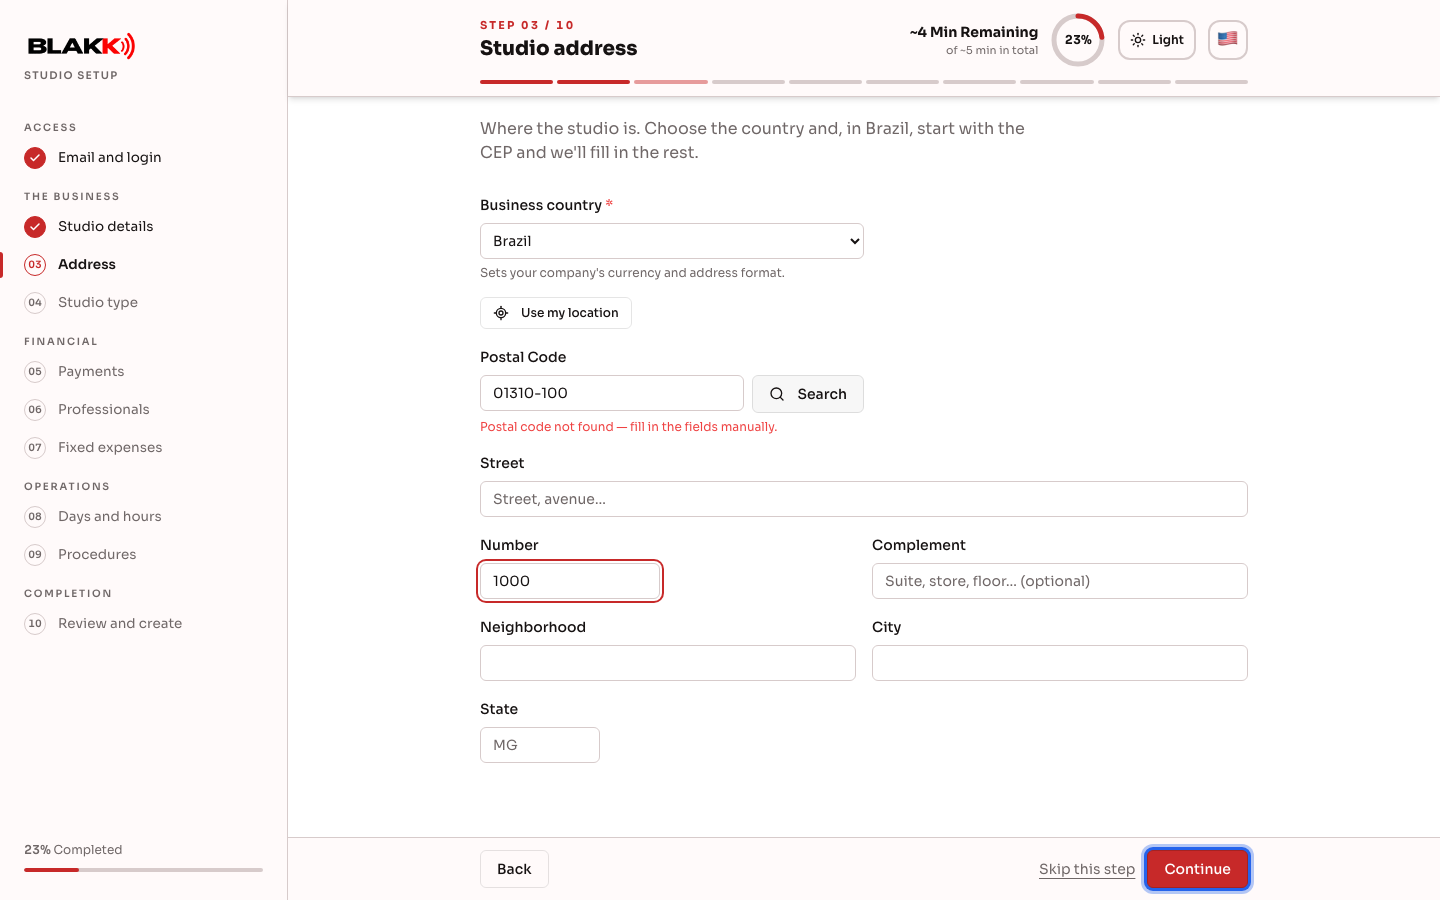
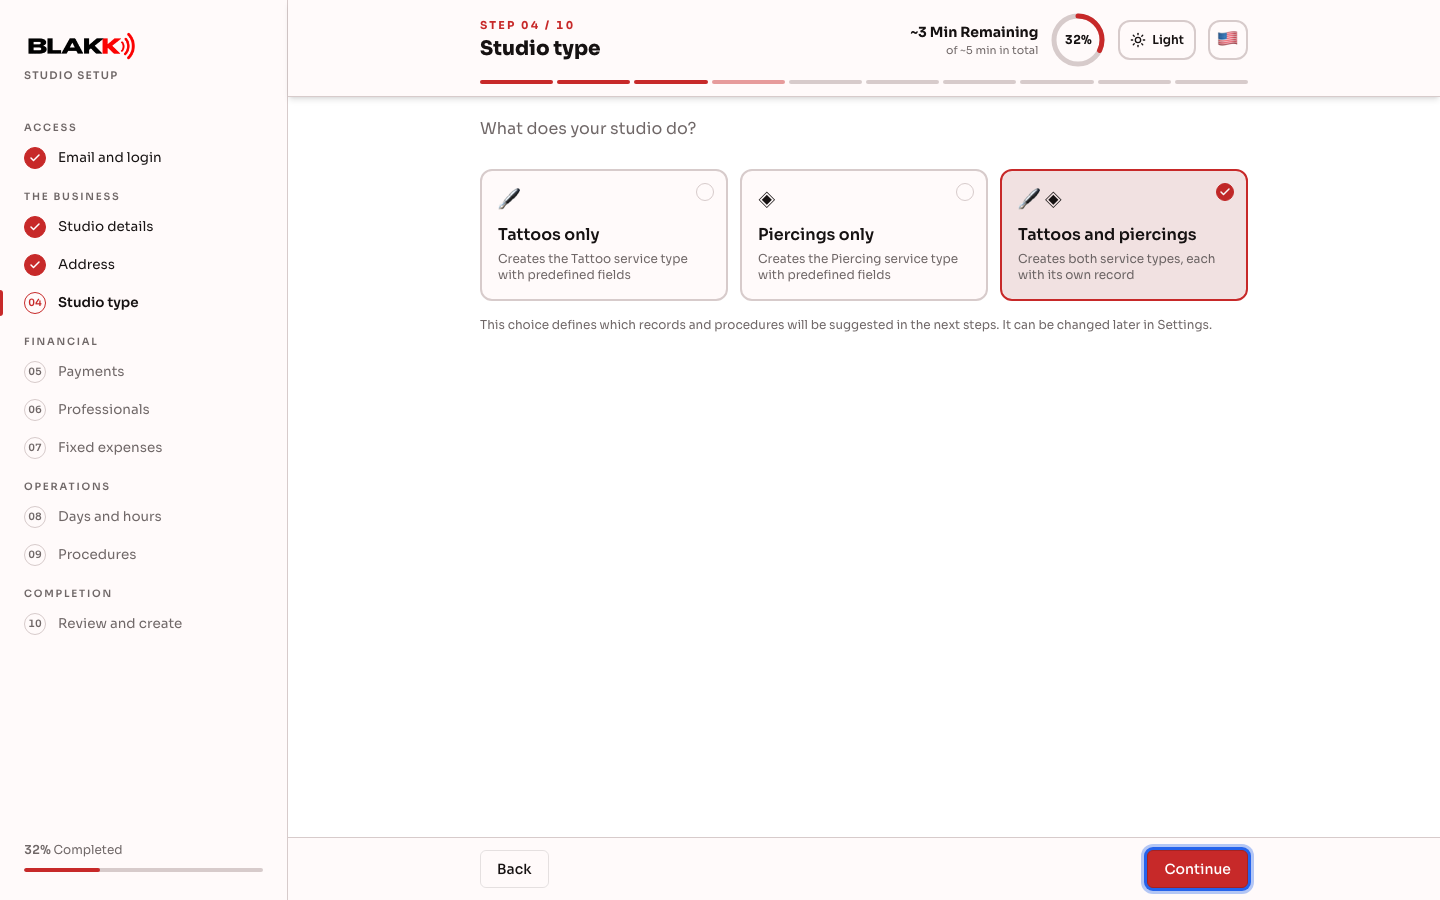
Step 5 — Studio type
Section titled “Step 5 — Studio type”Choose Tattoos only, Piercings only, or Tattoos and piercings. This choice determines which intake forms and suggested procedures appear in the next steps. You can change it later in Settings.
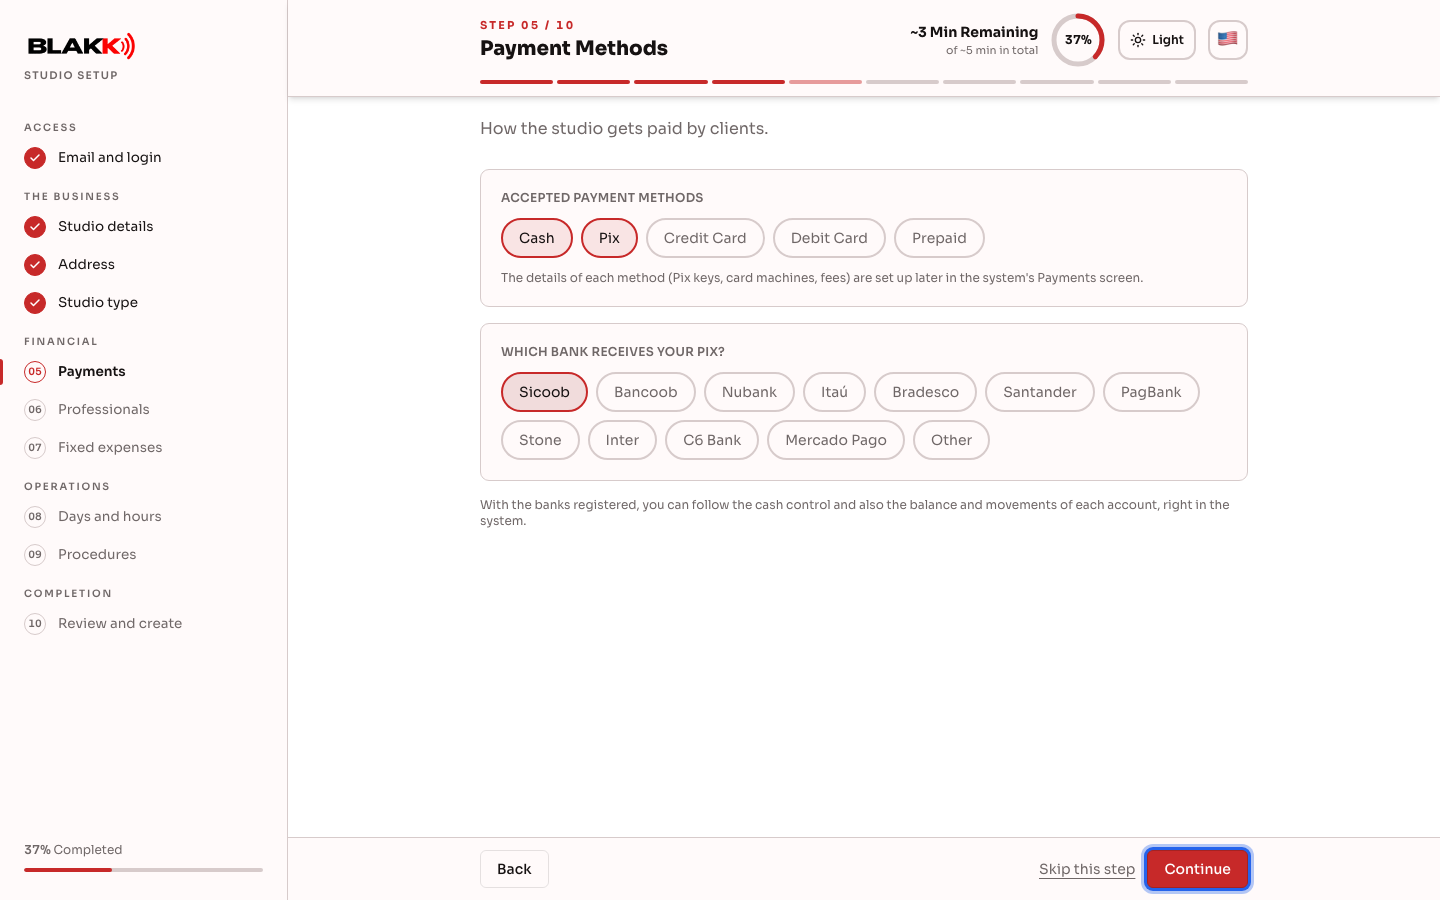
Step 6 — Payment methods
Section titled “Step 6 — Payment methods”Select the payment methods your studio accepts. In Brazil, if you select Pix or a card payment method, choose which bank each one goes to — it’s common for your card terminal and Pix payments to go to different accounts. Banks include Nubank, Itaú, Inter, Mercado Pago, PagBank, and others. If your bank isn’t listed, select Other and enter the bank name in the field that appears below. This name is used for the bank account in your financial records. Outside Brazil, Pix and the bank selection don’t appear. This step is optional — if you don’t select anything, the system will still allow cash payments.
After sign-up, complete this step with two more settings:
- Card terminal: To add your card terminal and the fees charged by the provider for each installment, see Payment methods.
- Pix key: Your Pix key is in the bank account details under Chart of Accounts.
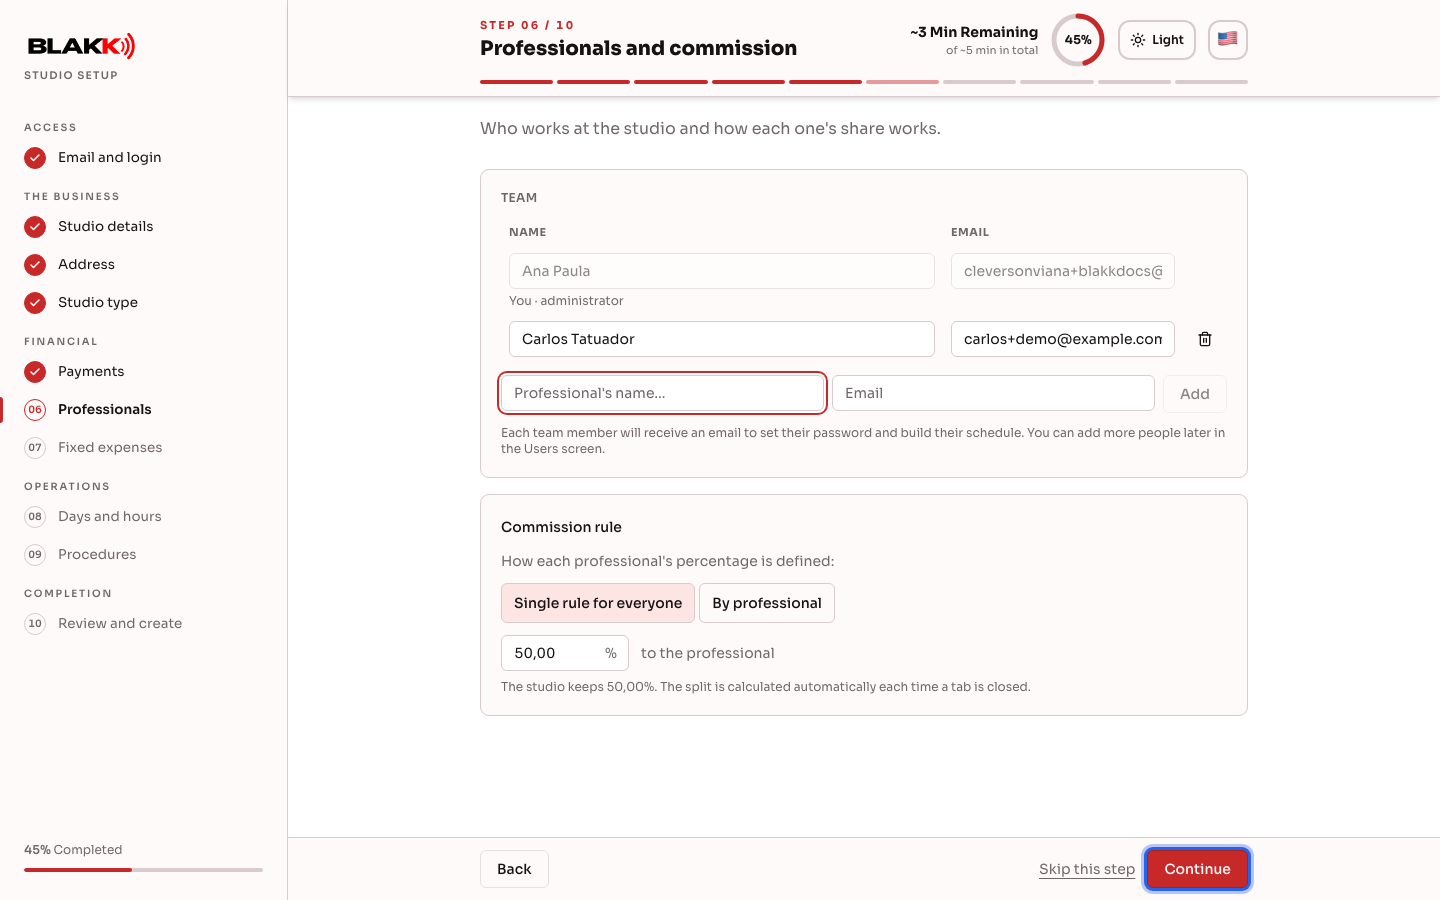
Step 7 — Professionals and commission
Section titled “Step 7 — Professionals and commission”You’re already set up as the administrator. To add other tattoo artists, enter their names and email addresses, then click Add. Each person will receive an email to set their own password. Choose either Single rule for everyone (one percentage for everyone) or By professional (a different percentage for each person). With a single rule, the screen suggests a 50% commission for the tattoo artist and shows how much the studio keeps. The split is calculated automatically each time a service ticket is closed. This step is optional — you can add your team later from the Users screen.
Step 8 — Recurring expenses
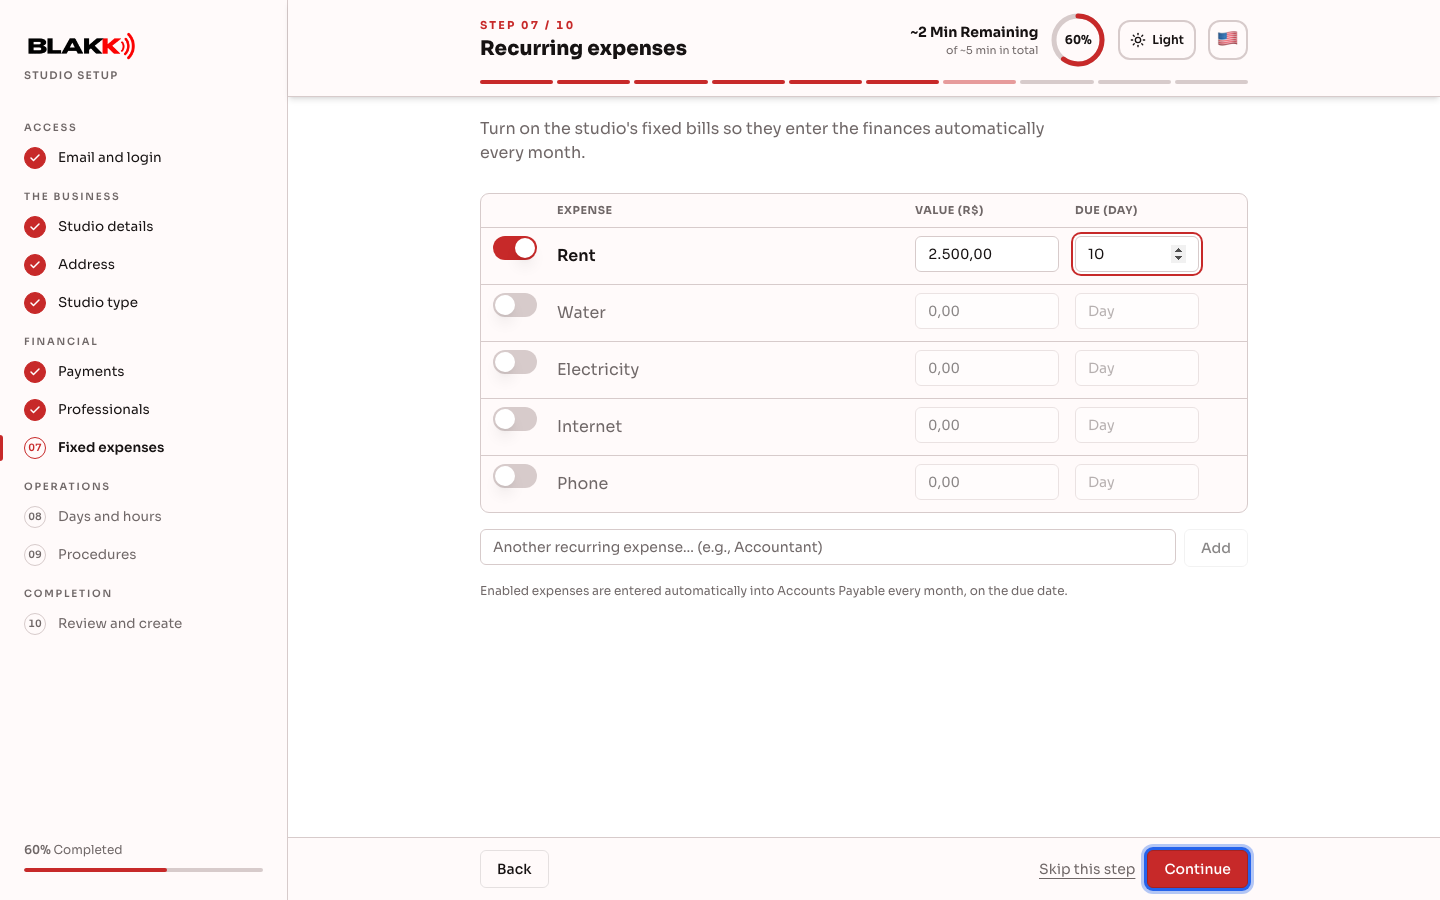
Section titled “Step 8 — Recurring expenses”Set up your studio’s recurring bills (rent, water, electricity, internet, phone, or another expense) by entering an amount and due date. Any bills you activate will be added to Accounts Payable automatically each month. This step is optional.
Step 9 — Business days and hours
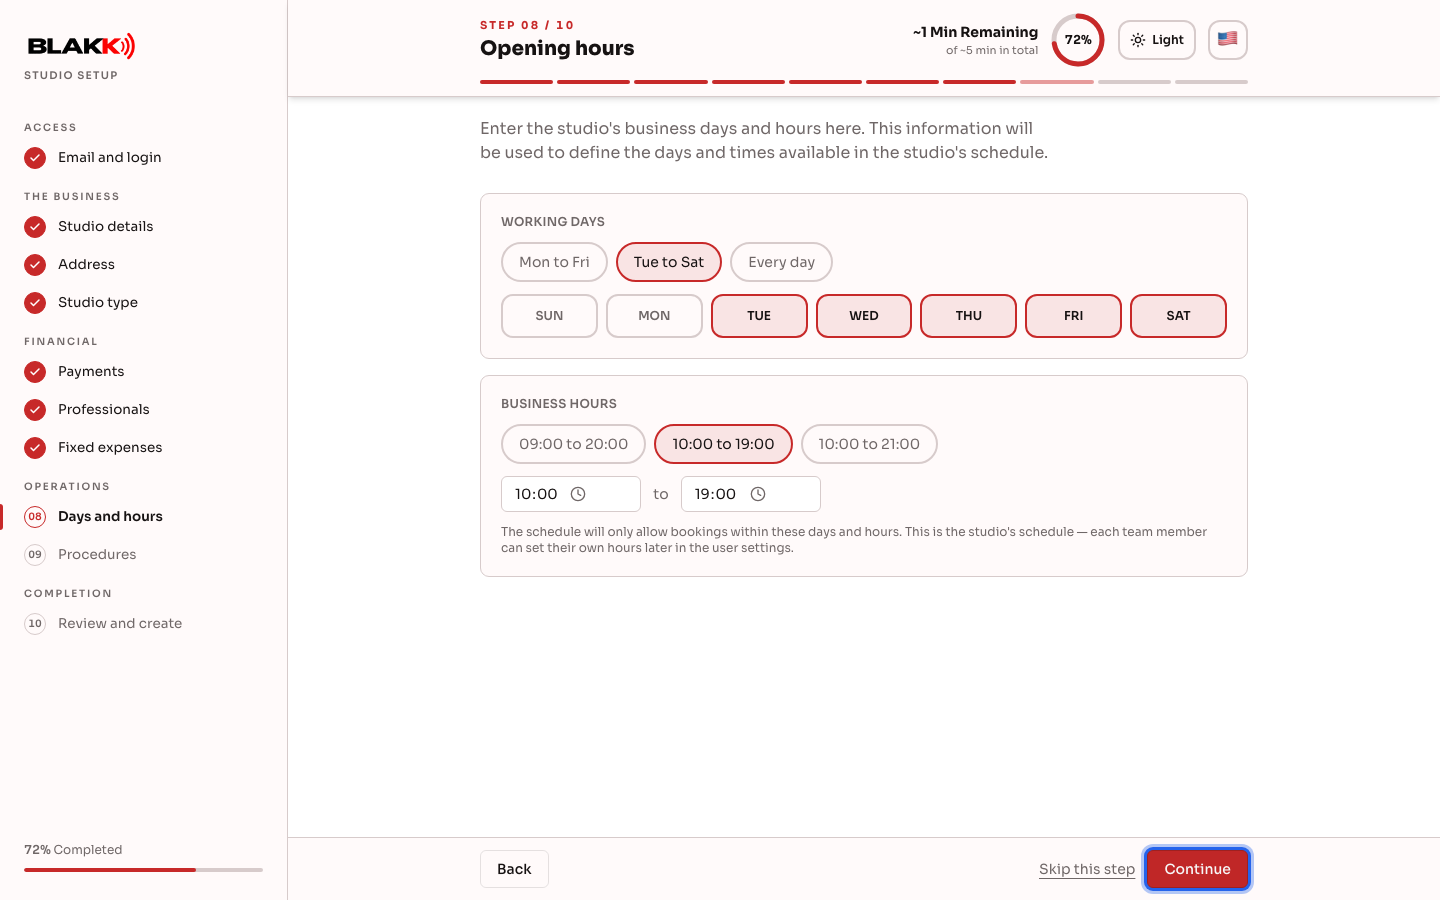
Section titled “Step 9 — Business days and hours”Choose the days and hours your studio is open — this information is used for your schedule. You can set up a separate schedule for each tattoo artist later from the Users screen. This step is optional — if you leave everything as is, the default schedule is Tuesday through Saturday, 10 AM to 7 PM.
Step 10 — Procedures and prices
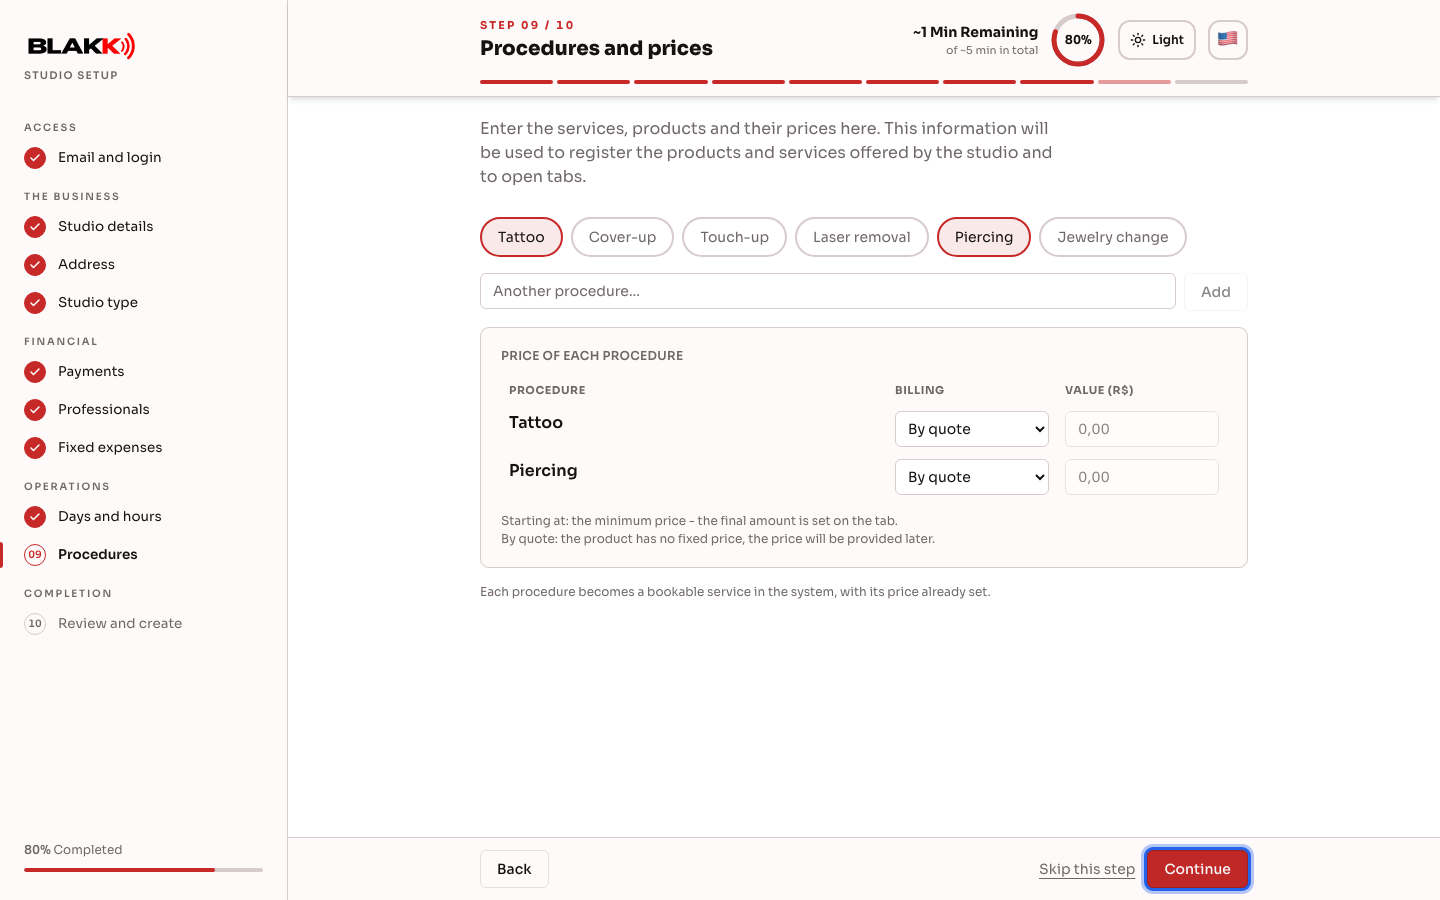
Section titled “Step 10 — Procedures and prices”Select the suggested procedures (based on the studio type you chose in Step 5) or enter another one. For each procedure, choose how to charge: Fixed price, Starting at (minimum) (the final price is set on the service ticket), or By quote (no set price; you can adjust it when the service is performed). Each procedure becomes a bookable service in the system, with its price already set. This step is optional — you can set up your service list later.
Step 11 — Final review
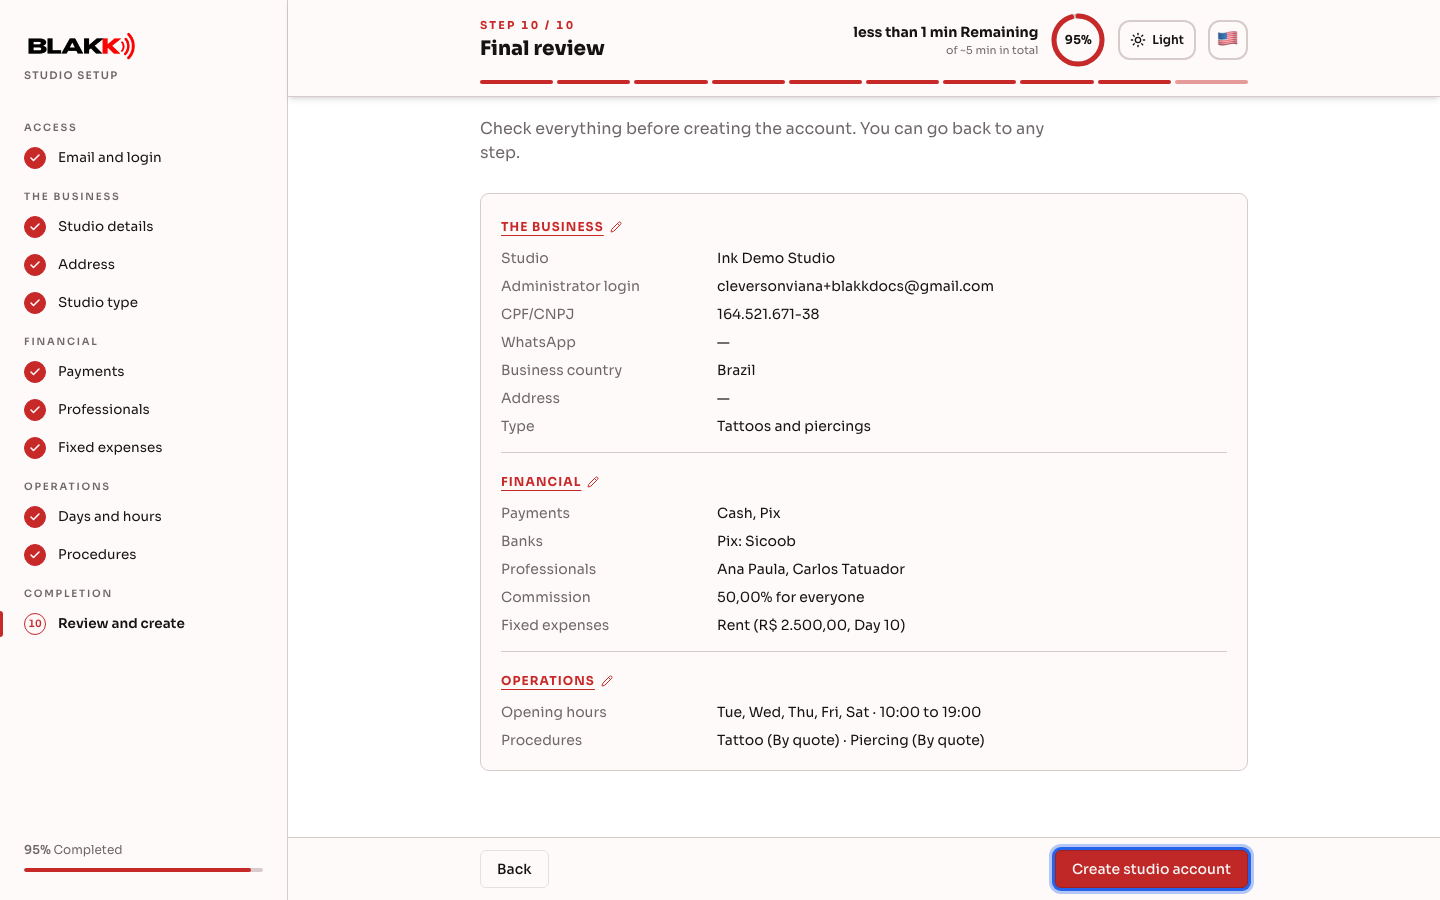
Section titled “Step 11 — Final review”Review everything before creating your account. The summary shows each step and which ones you skipped. Each section heading (Business, Finance, Operations) is a link — click one to return to the first step in that section and make any changes. When everything looks right, click Create studio account.
What happens next
Section titled “What happens next”- The screen shows activation progress (account creation is a single server request — the item-by-item animation is just there to keep you updated). When it’s done, you’ll see a welcome message and the Enter the system button, which signs you in as your studio’s administrator.
- The first time you sign in, the Home page displays the Start here guide with anything you still need to set up. See Home page.
- Nothing you set up here is permanent — each step becomes a regular screen in the system (Users, Payments, Catalog, Settings, and so on) that you can revisit whenever you like.
- Skipped steps aren’t left blank: the system uses sensible defaults (for example, cash payments and business hours of Tuesday through Saturday, 10 AM to 7 PM) until you set them up your way.
Common mistakes and questions
Section titled “Common mistakes and questions”Q: I got the code, but the screen didn’t validate it automatically. What should I do? A: Check that the code has all 6 digits — automatic validation only starts after you enter the sixth digit. If you pasted the same code again, click Validate. If the code expired, click Resend code.
Q: I got “Please confirm you are not a robot and try again.” when I tried to send the code. What should I do? A: This is the sign-up security check. Most of the time, it runs in the background. If a box appears asking you to check a box, do so and click Send verification code again. If you see “Couldn’t load the security check. Please reload the page.”, reload the page. If the problem continues, turn off your ad blocker or try another network.
Q: I signed in with Apple and chose to hide my email address. Is that a problem? A: Not for creating an account: your account will use the address generated by Apple, and our emails will reach your inbox through Apple’s forwarding service. However, if you already have a Blakk account with your actual email address, the hidden email won’t find it, and sign-up will create another account. In that case, sign in with your existing email and password, then link your Apple account under Link Apple in your Profile.
Q: Sign-up rejected my email address, saying it’s temporary. What should I do? A: The email address you entered is from a temporary email service, which creates an inbox that disappears after a short time. Your account needs an email address you can keep receiving messages at. You’ll get alerts, password reset emails, and receipts there. Use your regular email address (Gmail, Outlook, or your business email). The same rule applies to team members’ email addresses.
Q: Can I go back to an earlier step before I finish signing up? A: Yes — click Back or select any step you’ve already visited in the side menu. From the final review, click a section heading (for example, Finance) to go directly to the first step in that section.
Q: What happens if I accidentally skip a step? A: Any information entered in a skipped step isn’t saved. The final review (Step 11) clearly marks skipped steps as “Step skipped.” You can go back and fill them in before creating your account. After your account is created, you can set them up as usual from the system screens.
Q: I went back to a step I had already filled in and clicked Skip. Will I lose what I entered? A: Yes. The screen will first ask Skip this step?. If you choose Skip and lose the data, the information from that step will be deleted, and the step will be left out of your account setup. If you choose Cancel, nothing changes and you stay on the step.
Q: This CPF/CNPJ is already registered. What should I do? A: It means an account already exists with that document. Ask the person who administers the account for the login, or ask them to add you as a user.
Q: Can I sign up if my business is outside Brazil? A: Yes. In Step 4, select your country under Business country. The address fields will follow that country’s format, and your account will use its currency, without Pix, and will include the basic payment methods (cash, credit card, debit card, and prepaid card). The time zone is based on your device. If needed, you can change it later under Company → Hours.
Q: I live in Portugal and don’t have an NIF. Can I use my CPF? A: Yes. In Step 3, leave CPF/CNPJ selected and enter your CPF, even if your country is Portugal. If you have a local document, choose Document from another country.
Q: I chose a document from another country, and the screen asked me to select a country. Why? A: A document from another country is only accepted for businesses outside Brazil. Go back to Step 4 and select your business’s country under Business country, or go back to Step 3 and enter a CPF or CNPJ.
Q: Do I need to know the price of all my services before I finish? A: No — choose By quote for services that don’t have a set price yet, or skip the entire step and add your services later.
Q: Is the commission I set up here permanent? A: No, it’s just a starting point — you can adjust each tattoo artist’s percentage later at any time.
Q: Will the professionals I add here receive an invitation email? A: Yes, each tattoo artist you add (in addition to you, the administrator) will receive an email to set their own password and create their schedule.
Related
Section titled “Related”- Appointments: how to schedule, track, and complete an appointment
- Service ticket: how to open one, add items, and receive payment
- Payment methods: add payment methods, set up accounts, and configure fees
- Chart of Accounts: organize your business’s accounts
- Data migration: import your records from another system