Accounts Receivable Report: Follow Up on Outstanding Payments
What it is
Section titled “What it is”This is the main report for everything a customer still owes you — installment sales and recurring charges — including the due date and outstanding balance for each item.
When to use it
Section titled “When to use it”- See what’s overdue and needs follow-up, grouped by how long it’s been overdue.
- Record a payment for an installment the customer paid outside the system (for example, by check).
- Receive payment for multiple installments from a customer at once in a single transaction.
- Check the payment history already recorded for a specific installment.
Before you start
Section titled “Before you start”If you can’t access this report, ask the studio owner to grant you access under Access → Profiles. Recording a payment requires a different permission: editing access to Customer Payments (in the Customers group) or to Customer Payment (in the Point of Sale group). Either one is enough. Without either permission, you can still see the entire report but won’t be able to mark anything as paid.
Step by step
Section titled “Step by step”Step 1 — View the list and due date cards
Section titled “Step 1 — View the list and due date cards”When you open the report, it automatically selects the first card that has an item — the cards group items by due date (not yet due: up to 30, 30 to 60, and 60 to 90 days, plus Total Receivable Not Yet Due) and by how overdue they are (past due: up to 30 days, 30 to 60, 60 to 90, More Than 30 Days Overdue, and Total Overdue). Only cards with at least one item are shown. On mobile, the cards appear in a carousel: swipe sideways to see the others, and the dots below show which page you’re on.
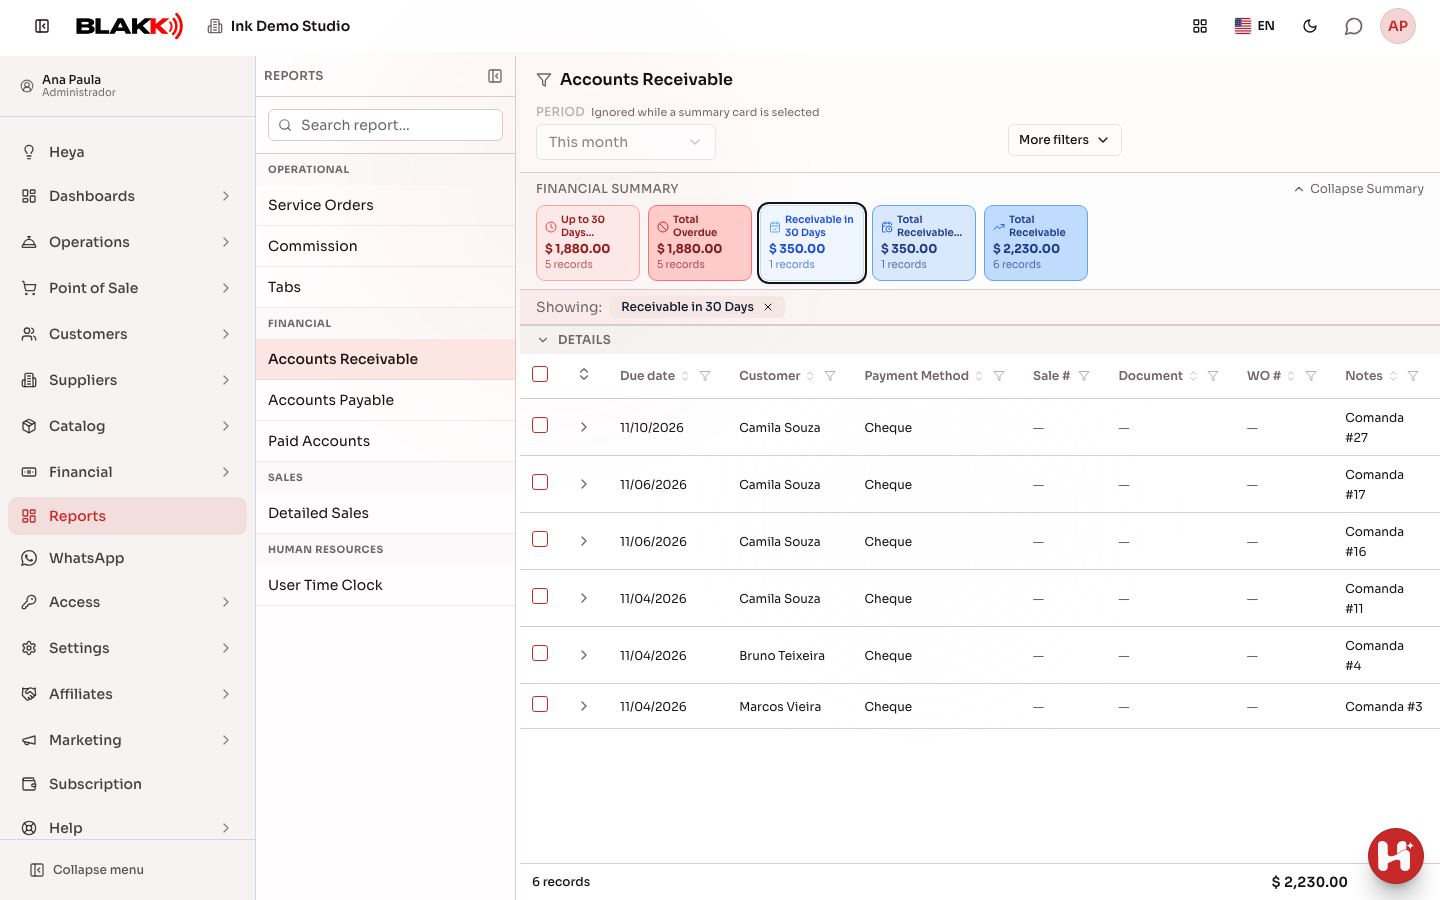
Step 2 — Filter by a due date card
Section titled “Step 2 — Filter by a due date card”Click the Total Receivable card — the list shows everything with an outstanding balance, and the Period field is disabled because the card controls the list while it’s active. The overdue cards (Total Overdue and the day ranges) work the same way, but only appear when there’s something past due. To use the date range again, click the × next to the card name under Showing.
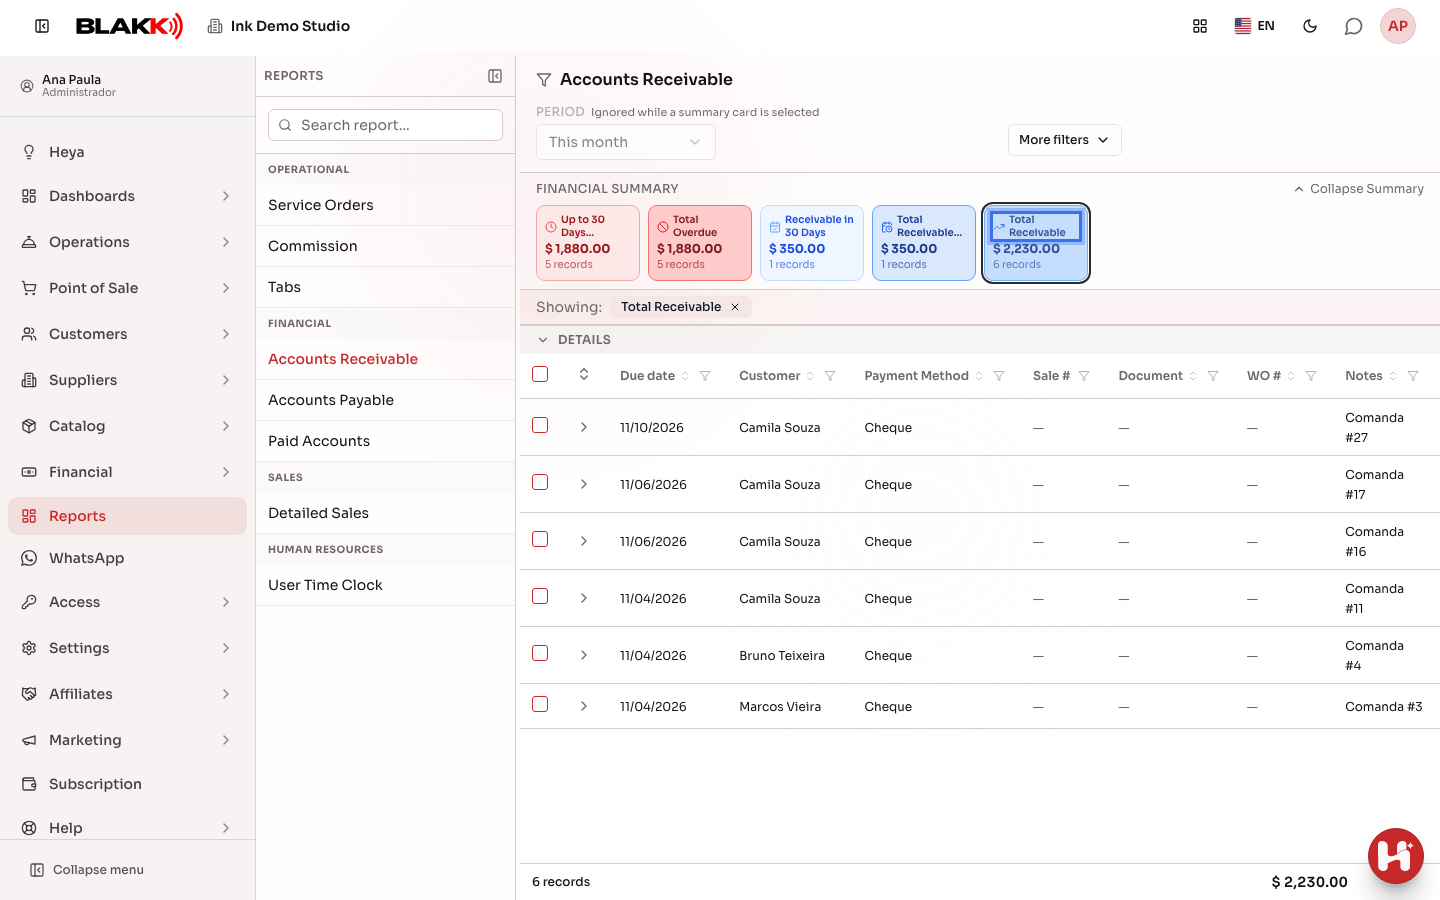
Step 3 — View an installment’s payment history
Section titled “Step 3 — View an installment’s payment history”Click the arrow at the beginning of a row (or Expand all in the header) to see payments already recorded for that item — if there are any, you’ll see who recorded them, when, which payment method was used, and the amount. An item with no payments shows “No payments recorded.”
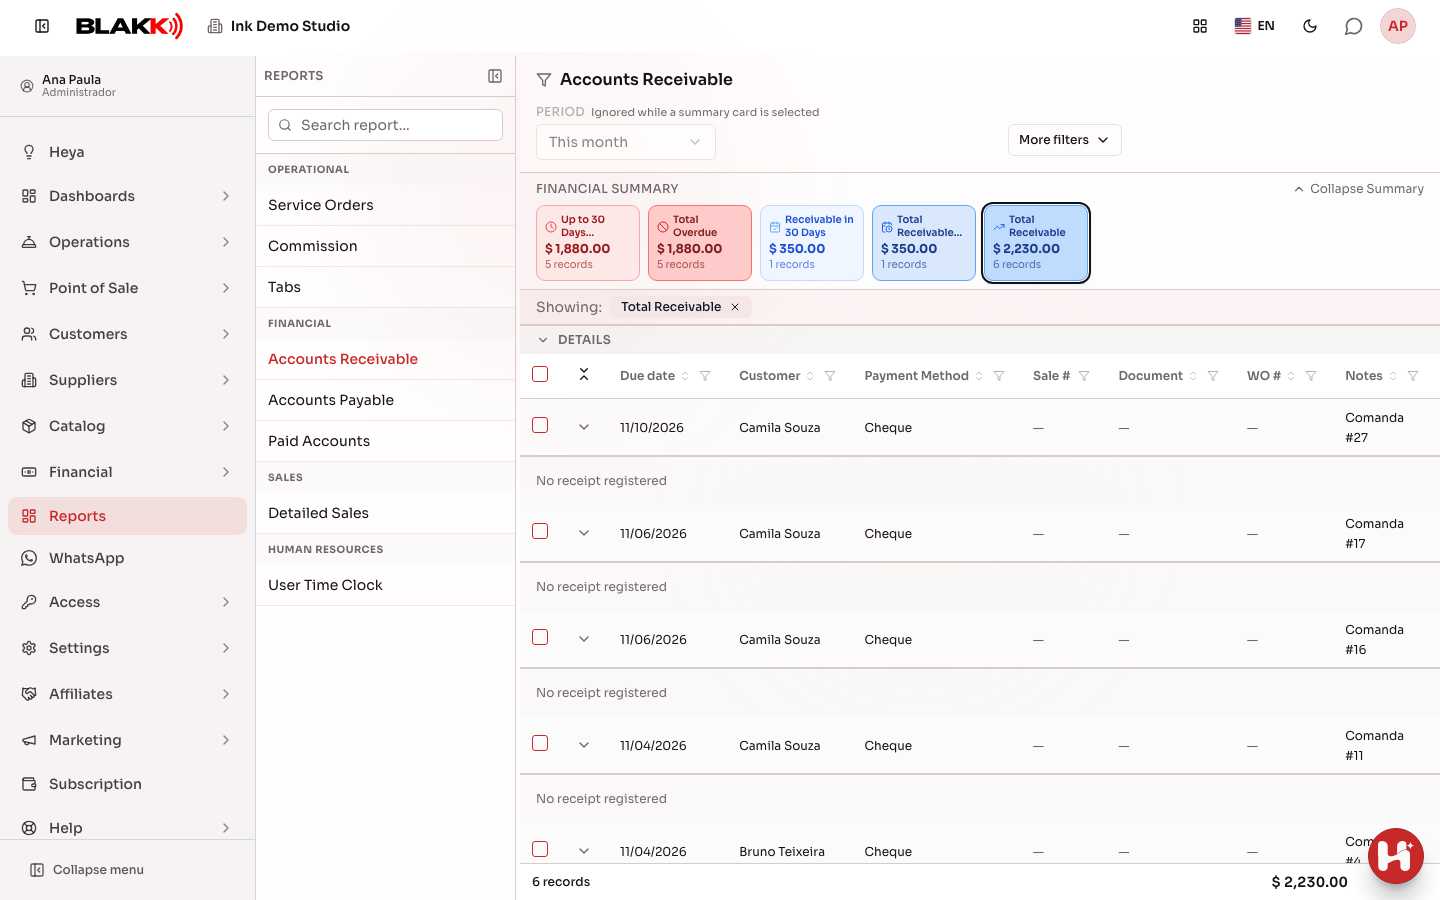
Step 4 — Record a payment for an installment
Section titled “Step 4 — Record a payment for an installment”Click the green dollar sign icon (Register Receipt) and fill in the Credit Account, Payment Method, Amount Received, and Receipt Date fields, then click Confirm Receipt. If the payment method charges a fee or allows installments, the window also shows the fee and net amount.
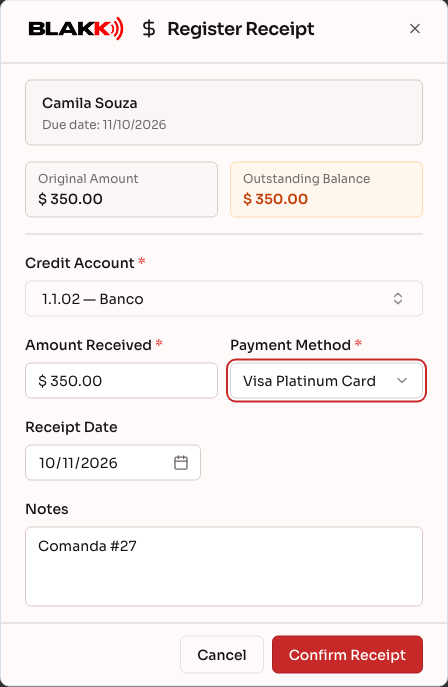
Step 5 — Receive payment for multiple installments at once
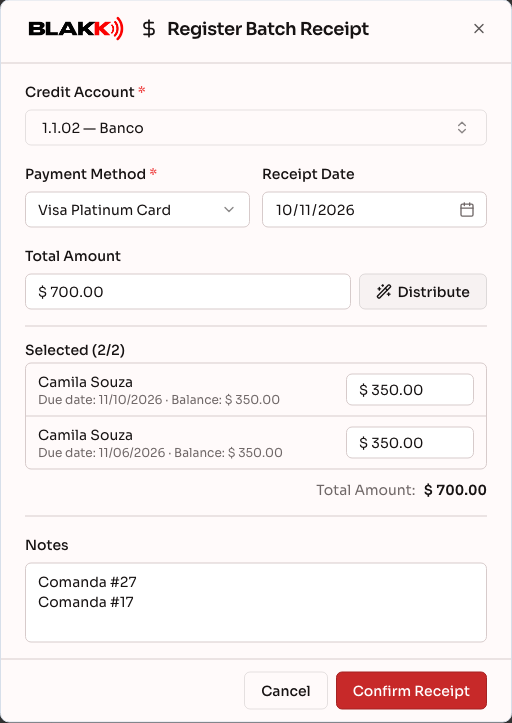
Section titled “Step 5 — Receive payment for multiple installments at once”Select multiple rows and click Batch Receipt. The Distribute button splits a total amount across the selected installments, starting with the oldest. The Credit Account and Payment Method at the top apply to every installment in the batch.
What happens next
Section titled “What happens next”- A card and date range can’t be used together — whenever a card is active, it controls the filter on its own, even if the date range field shows a value saved from a previous visit.
- The card totals include the entire studio, regardless of any Customer, Payment Method, or Notes filters you’ve entered — those filters only affect the list, not the cards.
- Recording a payment (for one installment or a batch) automatically creates the corresponding accounting entry — no extra manual steps are needed.
- You can receive only part of an installment’s amount — the item stays in the list with a reduced balance until it reaches zero.
- There’s currently no button on this screen to undo a confirmed payment — check the details carefully before saving.
Common mistakes and questions
Section titled “Common mistakes and questions”Q: Why is the Period field grayed out and unavailable? A: A due date card is active — while it’s selected, it determines which items appear, and the date range is ignored. Click the × next to the card name to use the date range filter again.
Q: Do the card totals change if I filter by a specific customer? A: No — the cards always include the entire studio, regardless of the other filters entered. Only the list below uses the Customer filter.
Q: Can I record a payment for only part of an installment’s amount? A: Yes — the Amount Received field is prefilled with the full outstanding balance, but you can lower the amount. The item stays in the list with the remaining balance until it’s paid in full.
Q: I recorded a payment incorrectly — how do I undo it? A: There’s currently no button on this screen to reverse a payment. Check the details carefully before confirming. If you need to undo something that’s already been recorded, contact support.
Q: What is the “Document” column? A: It’s only filled in for recurring charge items — it shows the billing period for that charge (for example, “09/2026”). This column is blank for regular sales.
Q: Does a sale paid in full at the time of purchase appear in this report? A: No — only items with an outstanding balance appear here (amounts that still need to be collected). A sale paid in full at the time of purchase doesn’t create an item in this report.