Product Groups: Organize Your Catalog into Groups and Subgroups
What it is
Section titled “What it is”Groups are the “folders” in your catalog. Use them to organize items—for example, Tattooing, Piercing, Jewelry, and Aftercare (where you might put Healing Ointment). A group can have subgroups, a photo, a color, its own availability schedule, and can be hidden from the public menu. The same groups organize tickets, the POS, the QR Code menu, your booking page, and your studio website.
When to use it
Section titled “When to use it”- You’re setting up your catalog and want customers and staff to quickly find what they’re looking for— for example, all piercings in a “Piercing” group, with “Ear” and “Nose” subgroups.
- You have a line of products or services that should only appear on certain days or at certain times (such as a weekend promotion or a flash day).
- You want to keep an internal group that staff can use on tickets but that customers can’t see in the public menu.
Before you start
Section titled “Before you start”If you can’t create, edit, or delete groups, ask the studio owner to grant you access under Access → Profiles. Creating and editing groups requires edit permission for Groups; deleting requires the highest permission level.
You don’t need to have any products set up first. You can create groups and add products and services to them later.
Step by step
Section titled “Step by step”Step 1 — Open the Groups page
Section titled “Step 1 — Open the Groups page”Go to Catalog → Groups. The list shows all groups in a tree, along with the number of products in each. Use Expand All and Collapse All to expand or collapse subgroups, and the Search group… field to find a group by name.
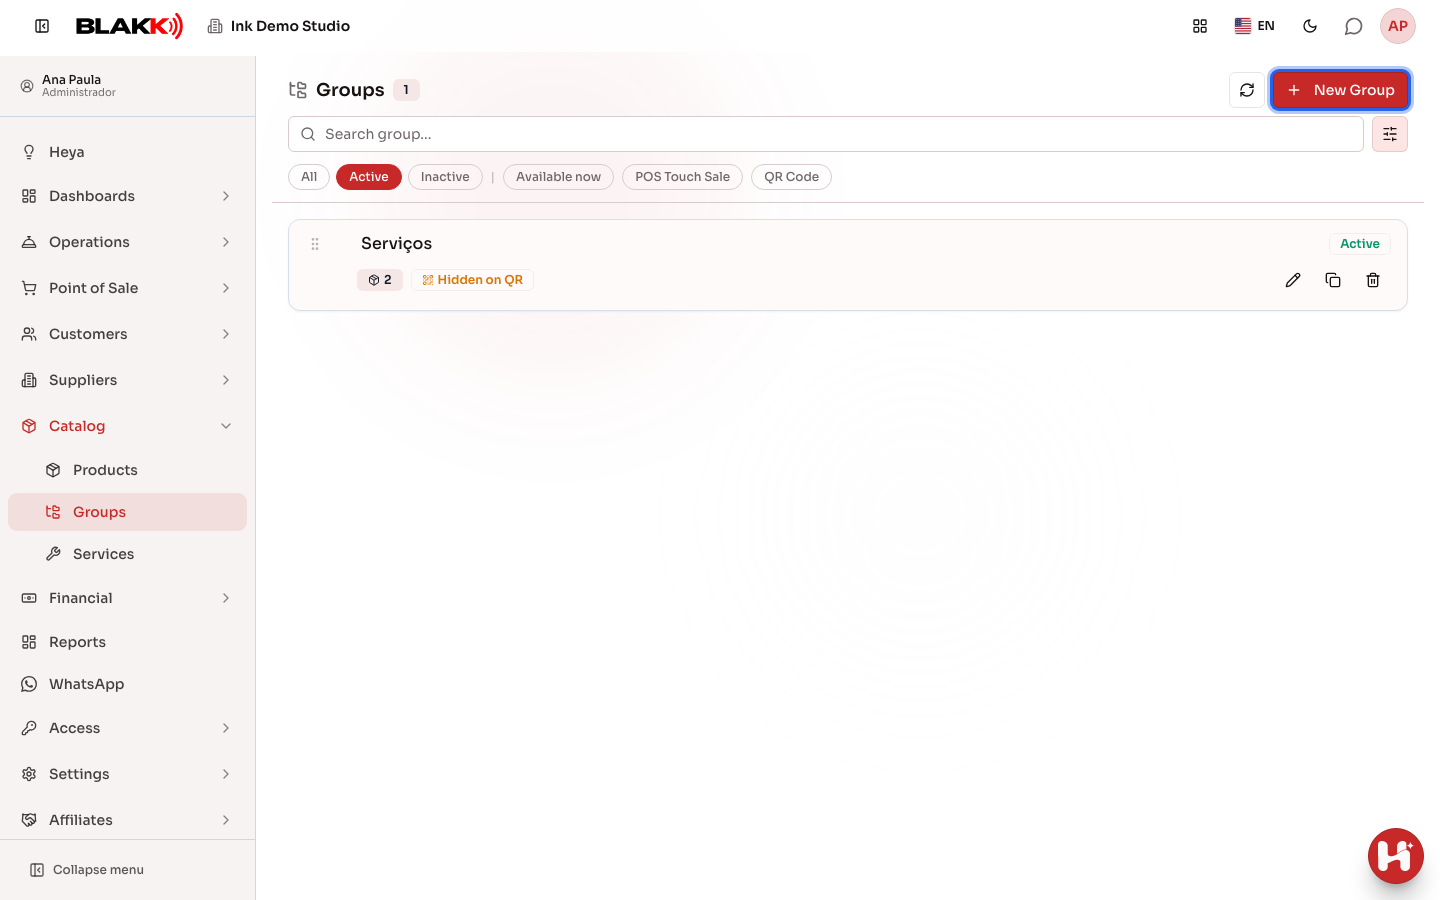
Step 2 — Create a group
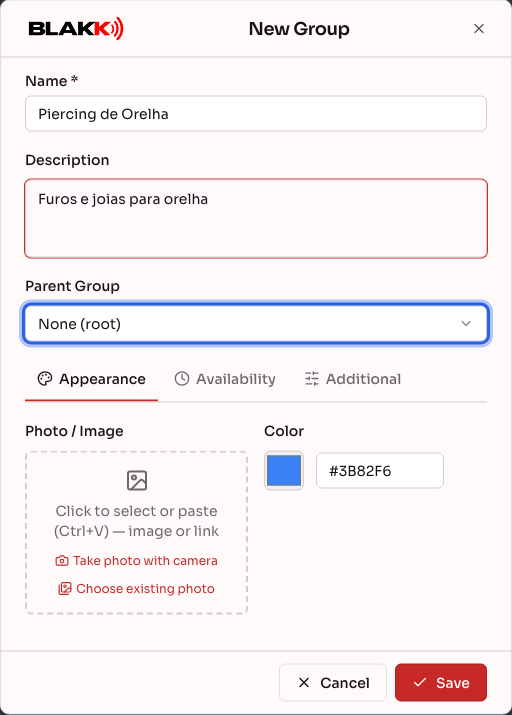
Section titled “Step 2 — Create a group”Click New Group and enter a Name (the only required field) and, if you want, a Description. To create a subgroup, select its parent under Parent Group. Leave None (root) selected for a top-level group.
The group tabs appear below these fields, all in one row:
- Appearance: Set the group’s Photo / Image and Color to make it easier to identify in the POS and public menu.
- Printers: Only appears if your studio has a printer set up (see Step 3).
- Availability: Set visibility in the QR Code menu and availability schedules (see Step 3).
- Additional: Adjust tip settings and minimum age requirements, such as For ages 21 and older only. These settings are mainly used by bars and restaurants.
- Translations: Only appears when editing a saved group. Use it to add the group’s name and description in other languages for the public menu.
Click Save at the bottom to save the group.
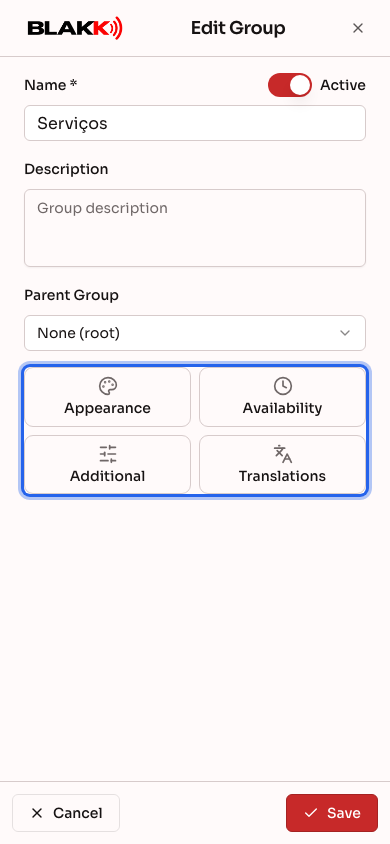
On a phone, the tabs appear as large buttons below the Parent Group field. Tap a button to open that tab full screen. To return to the group, tap Done or the X at the top.
Step 3 — Choose where and when the group appears
Section titled “Step 3 — Choose where and when the group appears”Once the group is saved, open it again by clicking Edit on its row, then go to the Availability tab:
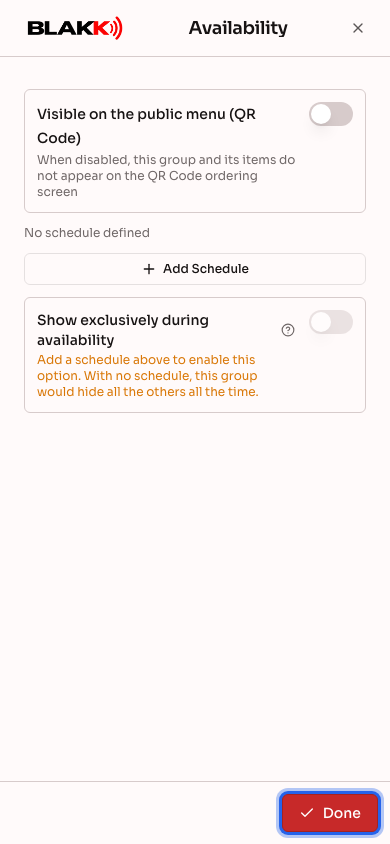
- Visible on the public menu (QR Code): When turned off, the group and everything in it are hidden from the QR Code menu and website, but remain available to staff in the POS and on tickets.
- Add Schedule: Limit the group to Every day, selected Days of week, or a Specific date, and set the Start time and End time (leave blank for all day). Save each schedule using the Save button in its schedule panel.
- Show exclusively during availability: During the scheduled hours, the POS and QR Code menu show only this group, hiding all the others. You can only turn this on after adding at least one schedule.
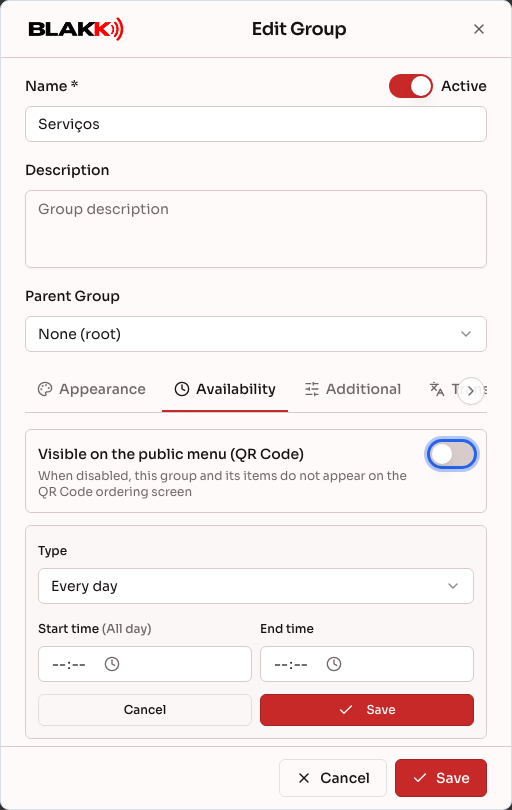
On a phone, the Availability tab opens full screen with the same controls:
If the group has subgroups, Apply availability to subgroups copies the schedule, QR Code visibility, and exclusive display settings to all its subgroups at once.
The Printers tab only appears if your studio has a printer set up. Select which printer should receive orders for items in this group and how many Copies to print. This tab is also available only for saved groups.
Step 4 — Add products to a group
Section titled “Step 4 — Add products to a group”When setting up a product or service (Catalog → Products or Catalog → Services), select a group in the Group field. If the group doesn’t exist yet, click Create Group next to the field to create one without leaving the form.
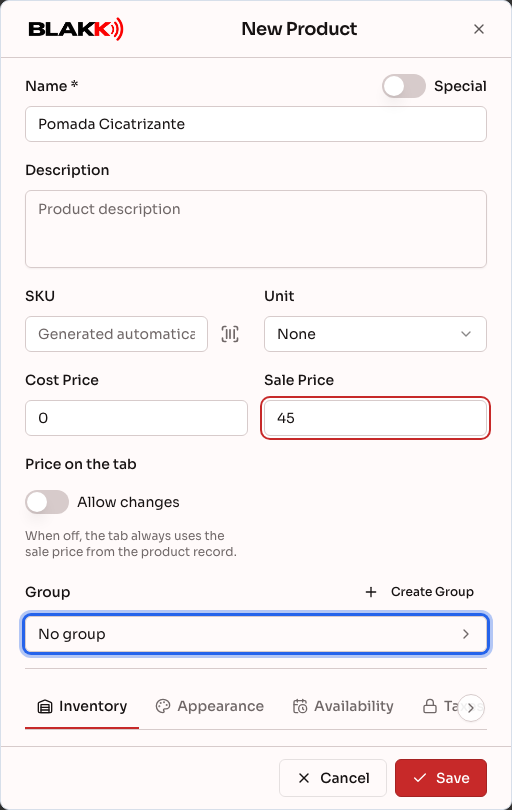
In the Groups list, click a group’s product count to open the Products page filtered to that group.
Step 5 — Change the order of groups
Section titled “Step 5 — Change the order of groups”In the Groups list, drag a group using the handle on the left of its row and drop it in the desired position. The order applies to groups at the same level (top-level groups among themselves, and subgroups within the same group). Dragging is disabled while a search or filter is active, so clear the search first.
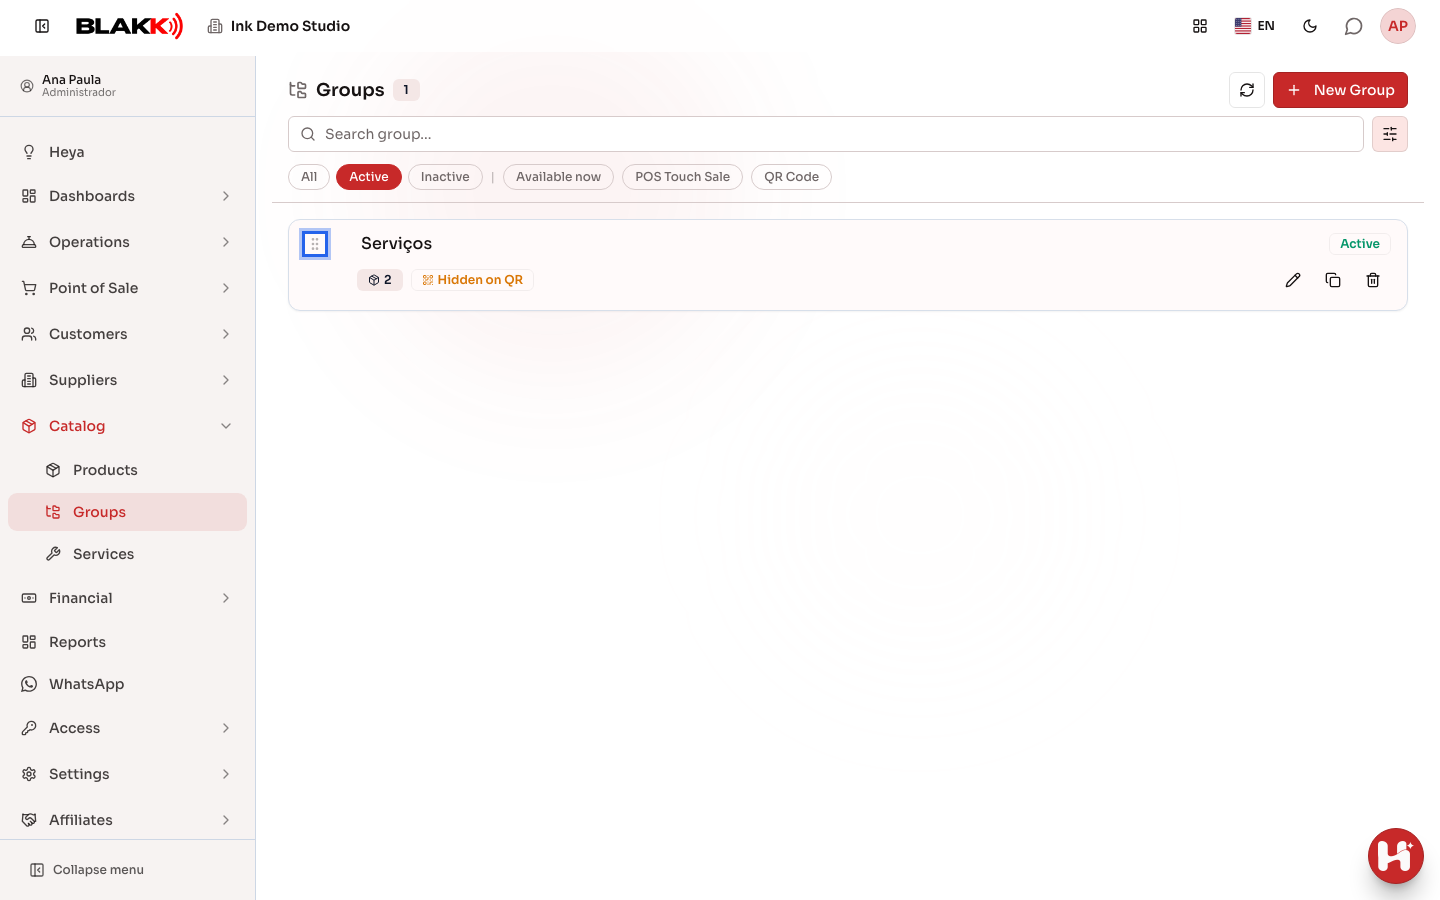
To change the order of products within a group, use Sort products on the Products page (explained in the Catalog article).
Step 6 — Clone or delete a group
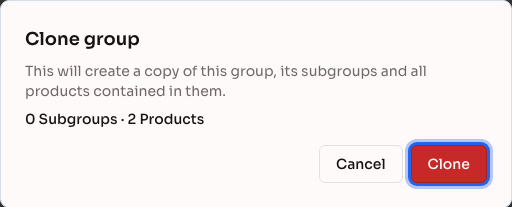
Section titled “Step 6 — Clone or delete a group”On the group’s row, Clone creates a copy of the group, its subgroups, and all products within them. This is useful for setting up a similar line without adding everything again. Delete only works when the group is empty, with no products or subgroups.
What happens next
Section titled “What happens next”- The new group is available to select when setting up products and services, and appears on tickets and in the POS. If it’s visible in the public menu, it also appears in the QR Code menu and on your website.
- Hiding a group from the QR Code menu also hides all its subgroups. The Hidden on QR badge in the list shows which groups are hidden.
- A group with a schedule disappears from the POS and QR Code menu outside its scheduled hours, then appears again automatically when the schedule starts. In the Groups list, the red Products unavailable now badge shows how many products in the group can’t be sold right now. Click it to see which products they are.
- The Available now filter at the top of the list shows only groups that are currently available.
- Deleting a group doesn’t delete past sales. The sales history remains in your reports.
Common mistakes and questions
Section titled “Common mistakes and questions”Q: I tried to delete a group, but the system wouldn’t let me. Why? A: A group can only be deleted if it’s empty. If it still contains products or subgroups, the system will notify you and stop the deletion. Move the products to another group using the Group field in each product’s setup, or delete them. Do the same for any subgroups.
Q: I can’t turn on “Show exclusively during availability.” The button is disabled. A: You can only turn it on after adding at least one schedule using Add Schedule. Without a schedule, the group would hide all the others all the time, so the system won’t allow it.
Q: The Availability and Printers tabs say “Save the group first.” What should I do? A: You can only set up schedules and printers for a group that already exists. Enter a name, click Save, then open the group again by clicking Edit.
Q: The Printers tab doesn’t appear for my group. A: It only appears when your studio has at least one printer set up. Without a printer, there’s nowhere to send the group’s orders.
Q: I created the group, but it doesn’t appear in the QR Code menu. A: Check three things: whether Visible on the public menu (QR Code) is turned on for the group; whether its parent group is also visible (a hidden parent group hides its subgroups); and whether the group has a schedule that isn’t active right now. Also make sure the group contains active products.
Q: Can I place a group inside one of its own subgroups? A: No. The Parent Group field hides the group itself and its subgroups, and the system won’t allow a group to be placed inside itself.
Q: On my phone, the group tabs turned into buttons. How do I get back to the group form? A: Tap a button to open its tab full screen. To return, tap Done or the X at the top (the phone’s Back button also works). Leaving a tab doesn’t save or discard anything. The group’s fields are still saved using Save at the bottom.
Q: Does cloning a group also copy its products? A: Yes. The copy includes the group, all its subgroups, and all the products within them. Before you confirm, the window shows how many subgroups and products will be copied.