Marketing: Create and Schedule Instagram Posts
What it is
Section titled “What it is”The Posts page in the Marketing group is your studio’s Instagram publishing calendar. There, you can put together a post (image or video, caption, and format), choose a date and time, and schedule it. Drafts, scheduled posts, published posts, and failed posts all appear together, each in a different color.
When to use it
Section titled “When to use it”- You’ve finished a sleeve and want to schedule a post with the photo for the best time of the week.
- You want to prepare a whole week of posts at once and just keep track of them in the calendar.
- Plans have changed, and you need to move a post to another day: just drag it on the calendar.
Before you start
Section titled “Before you start”The Marketing group only appears when the social media module is enabled for your type of business. To schedule posts, first connect your Instagram account under Marketing → Settings (see the related article). You can create drafts even without a connected account.
If you can’t create or schedule posts, ask the studio owner to grant you access under Access → Profiles.
Step by step
Section titled “Step by step”Step 1 — Open the calendar
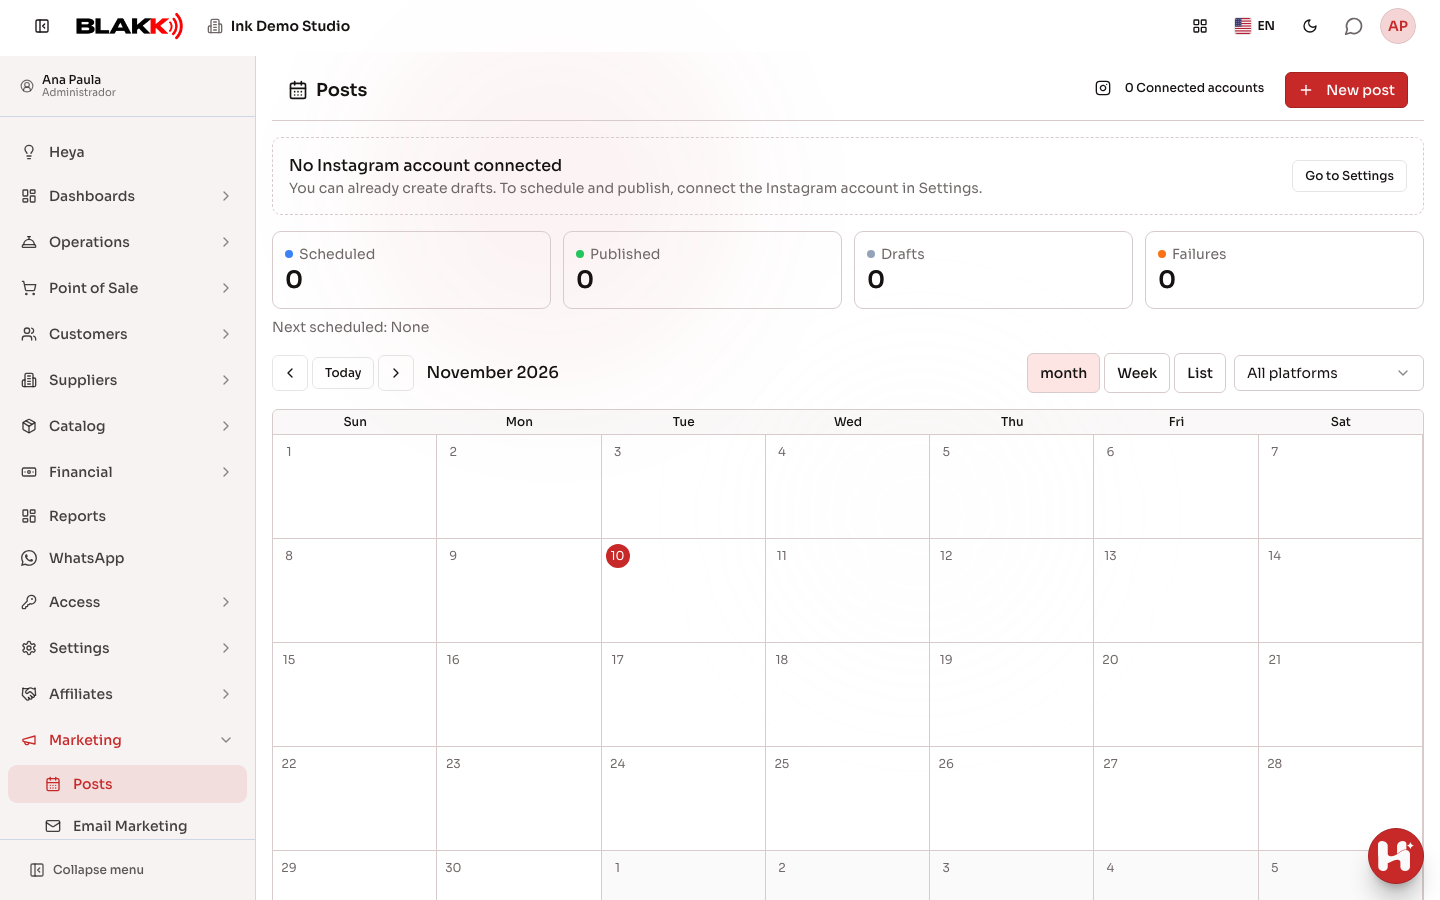
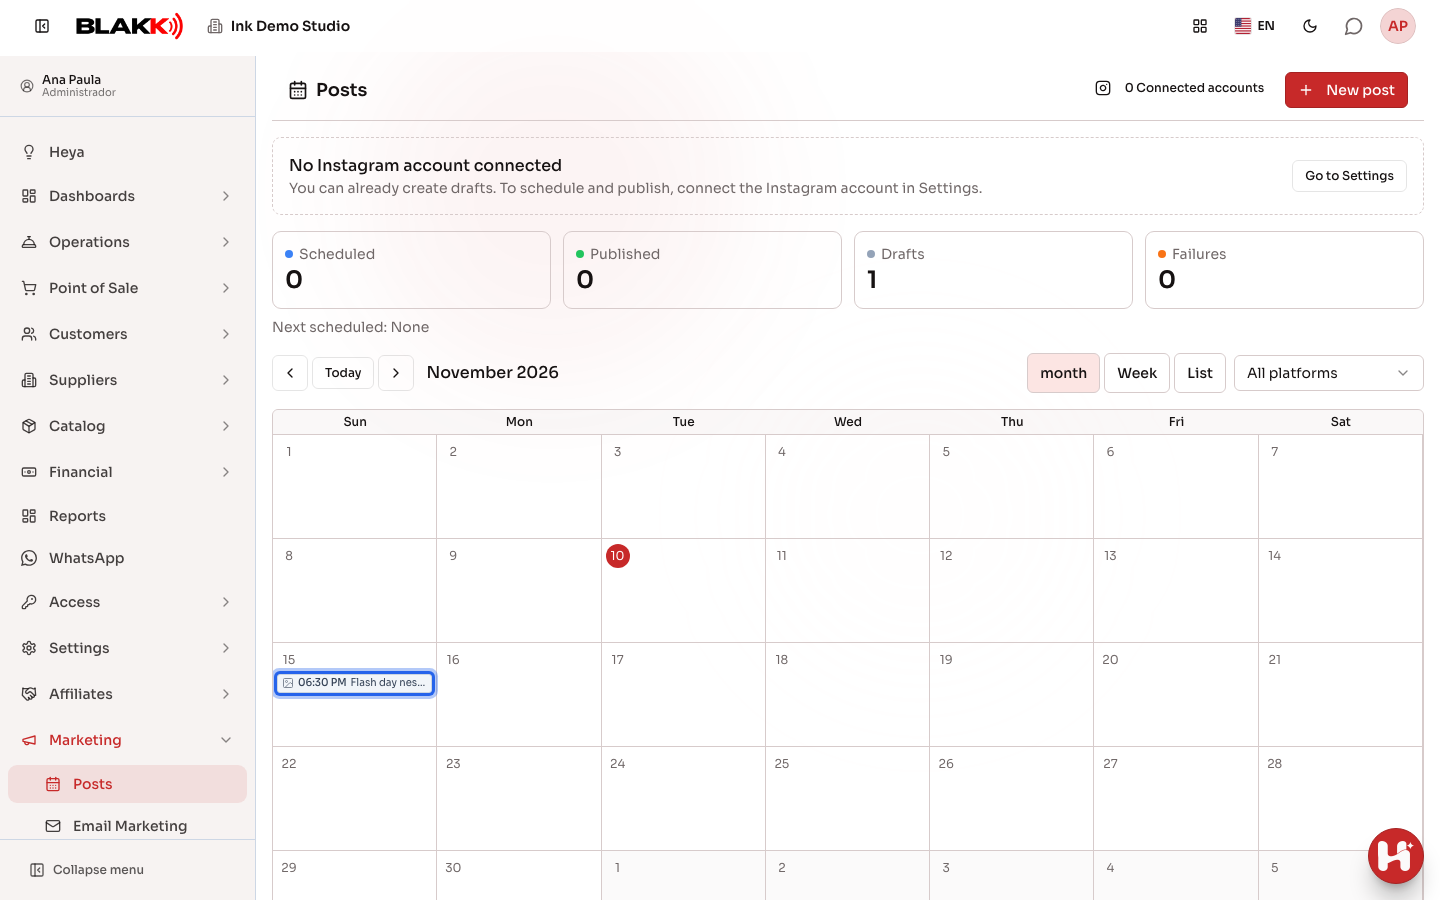
Section titled “Step 1 — Open the calendar”From the menu, open Marketing, then Posts. At the top, you’ll see the monthly stats (scheduled, published, drafts, and failed posts) and the next scheduled post. Use Month, Week, or List to change the view. The list also shows undated drafts.
Step 2 — Create a post
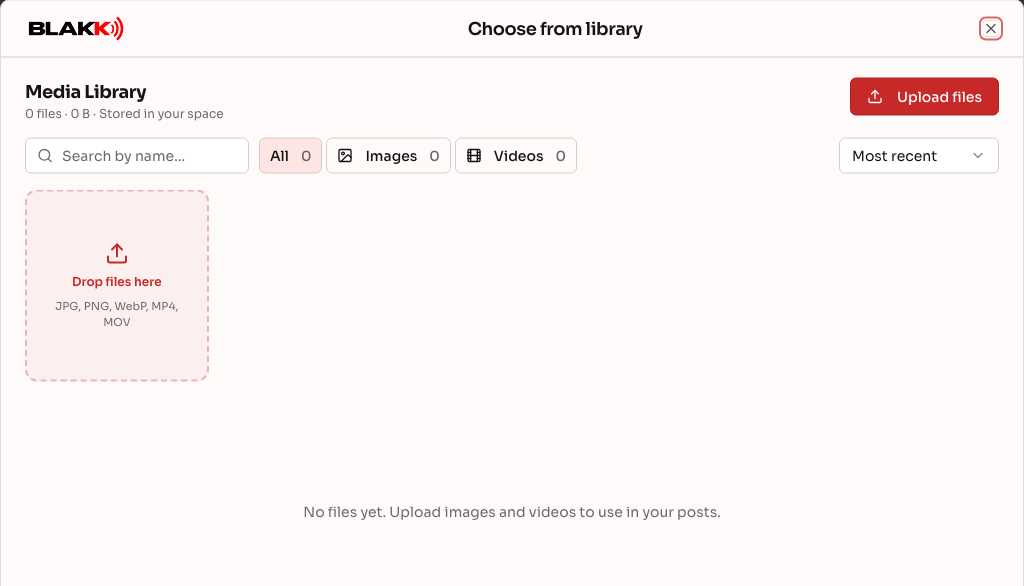
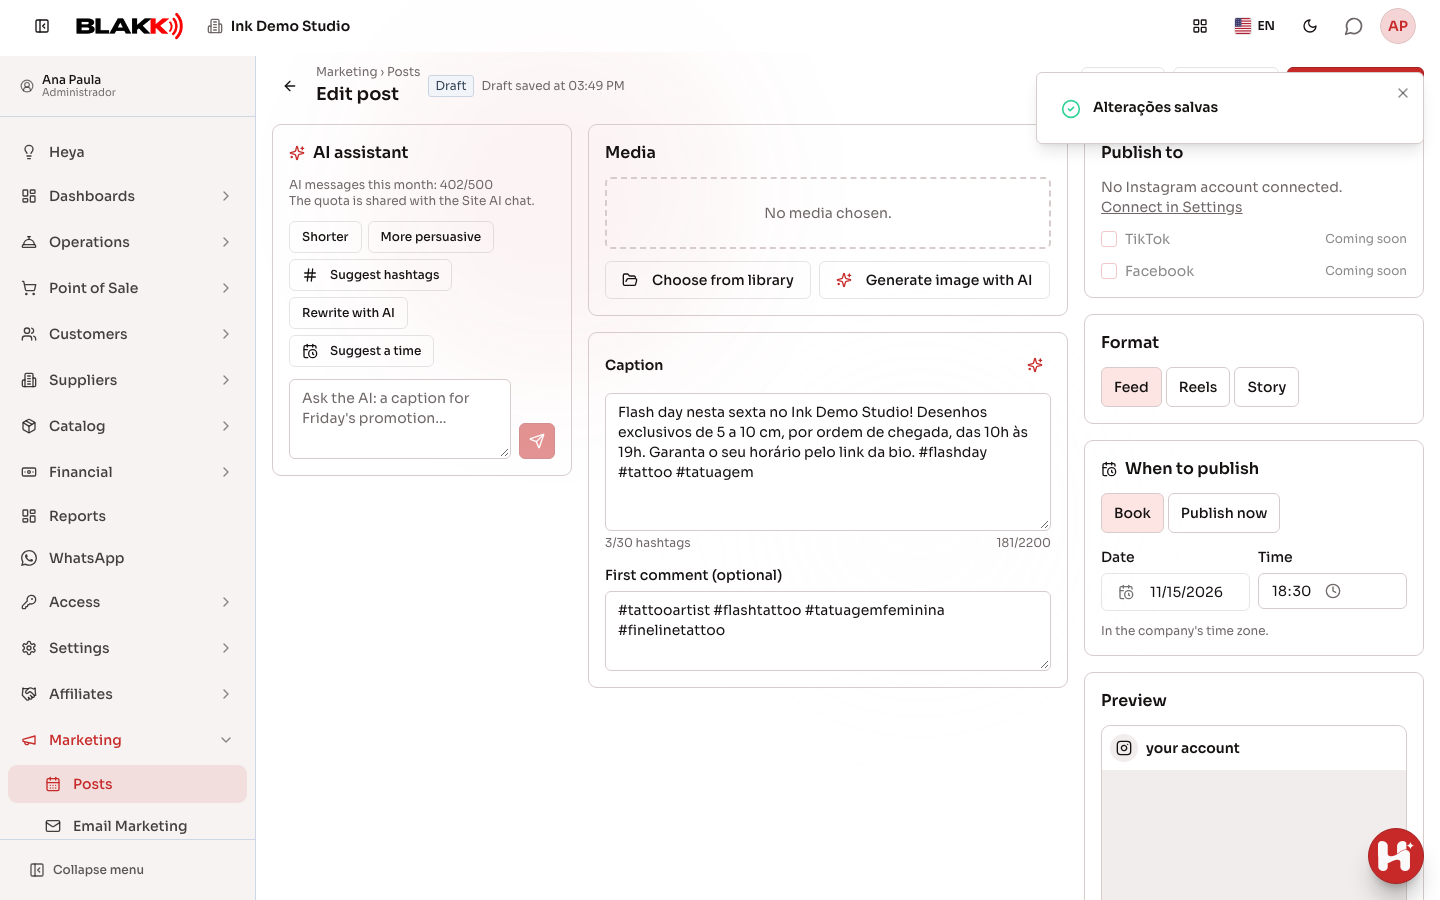
Section titled “Step 2 — Create a post”Click New post, or click an empty day on the calendar to start with that date. Under Media, click Choose from library to open the same media library used by the Website, with photos from your site and those uploaded through Marketing. From there, you can upload new files (Upload files, or drag them onto the page — JPG, PNG, or WebP up to 10 MB; MP4 or MOV up to 200 MB), search, filter by type, and select a file with Use (or double-click it).
To create a new image, use Generate image with AI: describe what it should look like (for example, “birthday cake with strawberries, light background”) and click Generate image. AI generates images only, not videos — square images for the Feed and vertical images for Stories. The image is saved to the library and added to the post. Generating an image uses 50 of your plan’s AI messages (and writing the caption afterward uses one more). If generation fails, you won’t be charged. If you have fewer than 50 messages left for the month, the button is disabled, and the reason appears right below it.
Step 3 — Write the caption
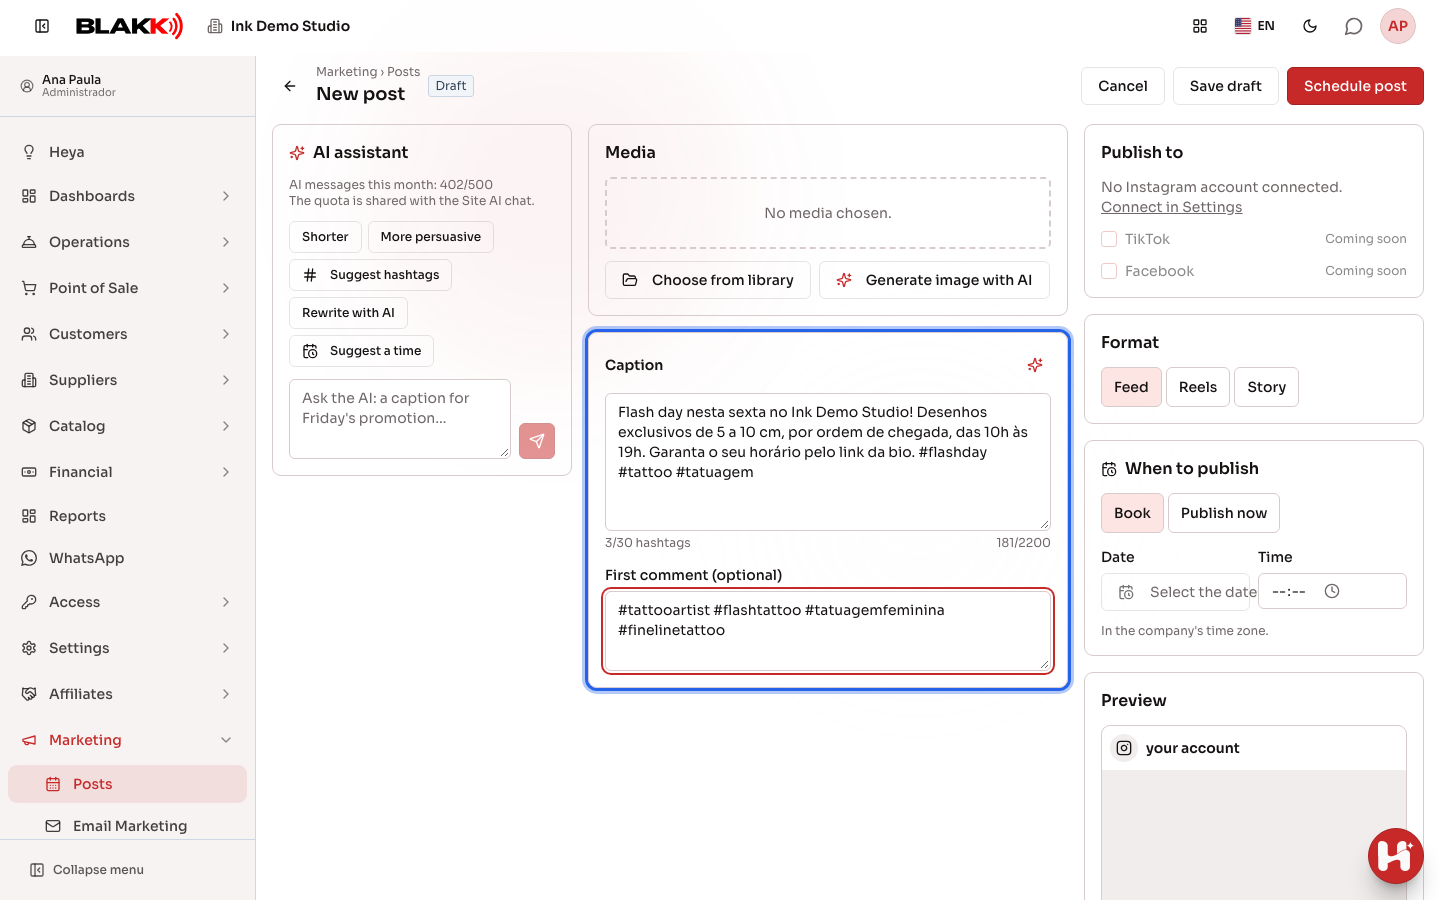
Section titled “Step 3 — Write the caption”Write your caption: the counter shows the character count (up to 2,200) and the number of hashtags (up to 30). The First comment (optional) field is published right after the post — useful for keeping hashtags out of the caption.
The AI icon next to Caption (Write caption and first comment with AI) writes both at once based on the selected image — and replaces anything already in those fields. When you select or generate an image, AI automatically fills in the caption and first comment if those fields are empty; anything you’ve already written stays as is. For Stories, it only writes the caption (Stories don’t have comments).
If AI assistant appears in the editor, it can help you write:
- Shorter and More persuasive rewrite the caption already in the field;
- Rewrite with AI improves the caption (or writes one if the field is empty);
- Suggest hashtags suggests hashtags; Add hashtags adds only the ones that aren’t already in the caption to the end, without exceeding 30;
- In the message field, ask for anything you want (“a caption for Friday’s promotion”). AI can also suggest an image from the library (Use this media) and a time (Use this time).
AI only makes suggestions: nothing is published until you schedule it. Suggested captions, images, and times are added automatically only if the field is empty (or still contains the latest AI suggestion). If you’ve already chosen something, a button appears (Apply caption, Use this media, Use this time) — anything you’ve written or selected is never replaced unless you ask. Each request uses one AI message from your plan for the month; the panel shows how many you’ve used. If AI is unavailable, the request isn’t charged. For a new post, the first request saves the post as a draft (that’s where the conversation is saved); if you leave without writing anything, the empty draft is deleted.
Step 4 — Choose an account, format, and time
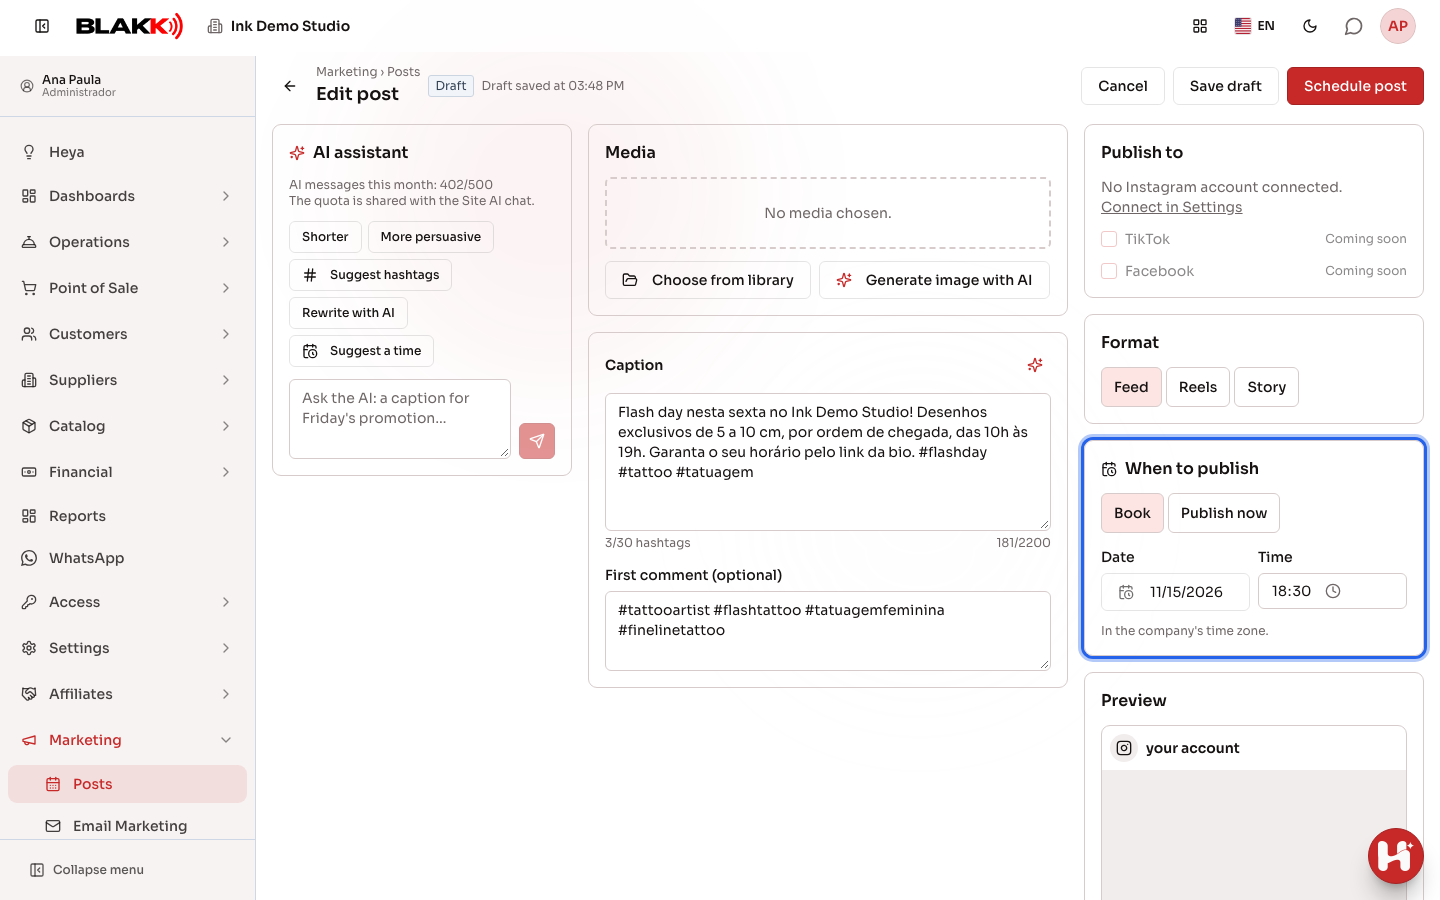
Section titled “Step 4 — Choose an account, format, and time”Under Publish to, select the Instagram account. Choose a format: Feed (image, with an aspect ratio between 4:5 and 1.91:1), Reels (video from 3 seconds to 15 minutes), or Story (image or video up to 60 seconds). Under When to publish, choose Book and enter a date and time — always in your business’s time zone — or choose Publish now to send the post to Instagram right away. To set the date, click the field and choose a day from the calendar. The date appears in your business’s country format (for example, month/day/year in the U.S. and day/month/year in Brazil). If you haven’t set a time yet, 10:00 AM is suggested when you choose a day. Preview shows how the post will look.
Step 5 — Save or schedule
Section titled “Step 5 — Save or schedule”Save draft saves the post so you can finish it later (drafts are also saved automatically every 30 seconds). Schedule post checks that everything is ready and adds the post to the queue for the selected time. If Publish now is selected, the button changes to Publish now and the post goes live within moments — the page shows “Publishing” and updates automatically. If anything is missing, the field with the issue is highlighted.
Step 6 — Reschedule or cancel
Section titled “Step 6 — Reschedule or cancel”On the calendar, drag a draft or scheduled post to another day: the time stays the same, and a notification offers Undo. You can’t drag a failed post: open it, fix the issue (for example, choose another account), and use Schedule again. To change the time or content, open the post and use Save Changes. To prevent it from being published, use Cancel appointment. You can delete drafts with Delete draft.
Step 7 — When a post fails
Section titled “Step 7 — When a post fails”A failed post appears in orange on the calendar. Its reason appears when you hover over it and at the top of the post. Open the post, fix the issue (for example, reconnect the account or replace the image), and use Try again now or Schedule again. If the post didn’t go out at the scheduled time (the calendar shows Missed time), the Reschedule button on the calendar schedules it for the same time on the next available day with one click.
What happens next
Section titled “What happens next”- The scheduled post appears in blue on the calendar. At the scheduled time, the system sends it to Instagram automatically. Once it’s published, it turns green and gets a View on Instagram link. The first comment is published right afterward.
- If “Email notifications” is turned on under Settings, the person who created the post gets an email when it’s published or fails (with the reason) — one email per post, even if it’s going to more than one account.
- If Instagram is unavailable, the system tries again after 15 minutes. If the account reaches its daily posting limit, the post waits for the next available window for up to 24 hours (if “Try again if it fails” is turned on). Before trying again, the system checks Instagram to make sure the same post is never published twice.
- If the account’s access expires or is removed, the post fails and asks you to reconnect. The person who connected the account gets an email.
- If a post can’t be published for more than 6 hours (for example, because the module is turned off), it won’t be published late. Instead, it becomes Missed time so you can reschedule it.
- If the Instagram account is disconnected, its queued posts turn orange and show the reason for the failure. Reconnect the account, or open a post, unselect the disconnected account, choose another one, and use Schedule again.
- The image or video for a scheduled post that hasn’t been published yet can’t be deleted or replaced in the Website library, so the post won’t go out with a different file.
Common mistakes and questions
Section titled “Common mistakes and questions”Q: Why doesn’t the caption appear in my Story? A: Instagram doesn’t show captions on Stories. When you choose Story, the page lets you know; the caption stays saved with the post but isn’t published to the Story. The first comment also doesn’t apply to Stories.
Q: I saw “Choose a date and time in the future.” Why? A: To schedule a post, the time must be later than the current time in your business’s time zone. Choose a future time and schedule the post again.
Q: I chose a video, and the format changed to Reels. A: In this version, the Feed only supports images. Videos are published as Reels (or as a Story if they’re up to 60 seconds long).
Q: My image was rejected because of its aspect ratio. What should I do? A: For the Feed, the image must be between portrait 4:5 and landscape 1.91:1. Crop the image to fit those proportions or publish it as a Story.
Q: Can I publish the same post to more than one account? A: Yes. If your studio has more than one Instagram account connected, select the accounts under Publish to.
Q: I edited a post while it was “Publishing.” What happens? A: If Instagram is still processing the media, the system discards the old upload and sends the new version — it never publishes outdated content. Editing is locked for a few seconds at the exact moment of publication.
Q: Why doesn’t the AI assistant appear in the editor? A: The assistant only appears when the Blakk team enables Marketing AI. Without it, the editor still works normally — you can write the caption and choose the time yourself.
Q: Why are the AI buttons disabled? A: The Blakk team hasn’t enabled Marketing AI yet. Without it, choose an image from the library and write the caption yourself — the rest of the editor works as usual.
Q: Why is only the “Generate image with AI” button disabled? A: There are two possible reasons. Image generation is enabled separately by the Blakk team: while it’s turned off, Generate image with AI is disabled. The button is also disabled when you have fewer than 50 AI messages left for the month, because each image uses 50. In that case, the reason appears right below the button. As long as you have messages left, the rest of the assistant (captions, hashtags, and times) works normally — and you can choose an image from the library.
Q: How does “Suggest a time” work? A: Suggest a time looks at the times when your posts have already been published. If there’s no history, it suggests a time one hour before the sales peak from the last 90 days. If there’s no data, it suggests late afternoon. It doesn’t use AI or use any messages from your plan.
Q: I saw “You’ve reached your plan’s AI message limit for this month.” A: Your plan includes a set number of AI messages per month. The assistant panel counts messages from posts and the Website’s AI chat together. The Subscription page shows the total for the month, which also includes messages for Heya. The count resets the following month. To get more messages, check out the plans under Subscription.
Q: I saw “Each generated image uses 50 AI messages, and you don’t have enough messages left in your plan this month.” A: Generating an image with AI uses 50 messages from your plan because it costs much more than generating text. You still have messages to write captions and ask the assistant for help, but not enough to generate an image. Choose an image from the library, wait for the count to reset next month, or check out the plans under Subscription.
Q: I saw “Each generated image uses 50 AI messages, and your plan doesn’t include enough messages to generate an image.” A: Your plan includes fewer than 50 AI messages per month, so you can’t generate an image, even at the start of the month. Choose an image from the library or check out the plans under Subscription.
Q: Someone edited the same post in another tab. What now? A: The page lets you know the post was changed in another tab and won’t overwrite it. Reload to see the latest version, then make your changes again.