Studio Printers and Print Templates
What it is
Section titled “What it is”This is where you set up the studio’s thermal printer (the receipt printer at the counter or front desk) and create templates for what gets printed, such as customer receipts. Each template is text with formatting options (center, bold, large text, logo, paper cut) and variables, such as the customer’s name or item list, which Blakk replaces with real data when you print.
Printing tabs isn’t available in Blakk yet, but it’s coming in a future update. You can set up your printer, prepare your templates, and check the results with a test print.
When to use it
Section titled “When to use it”- When setting up the studio’s receipt printer: add it and print a test page.
- To prepare a customer receipt with the studio’s logo, name, and details.
- When replacing the printer or front desk device: update the printer details or pair it again.
Before you start
Section titled “Before you start”- The printer must be a receipt thermal printer that supports ESC/POS (the standard used by most receipt printers). For a regular sheet printer, use the Local option.
- For a network printer, have its address and the port it uses to receive tickets ready. The person who set up the printer on the studio network can provide these details.
- If you can’t add printers or edit templates, ask the studio owner to grant you access under Access → Profiles.
Step by step
Section titled “Step by step”Step 1 — View your printers
Section titled “Step 1 — View your printers”From the menu, open Settings → Printers. Each card shows the printer’s name, address, and paper width. After the printer receives its first ticket, the card also shows its counters: In queue, Scheduled, Printed, and Errors. If the last print job failed, the reason appears on the card.
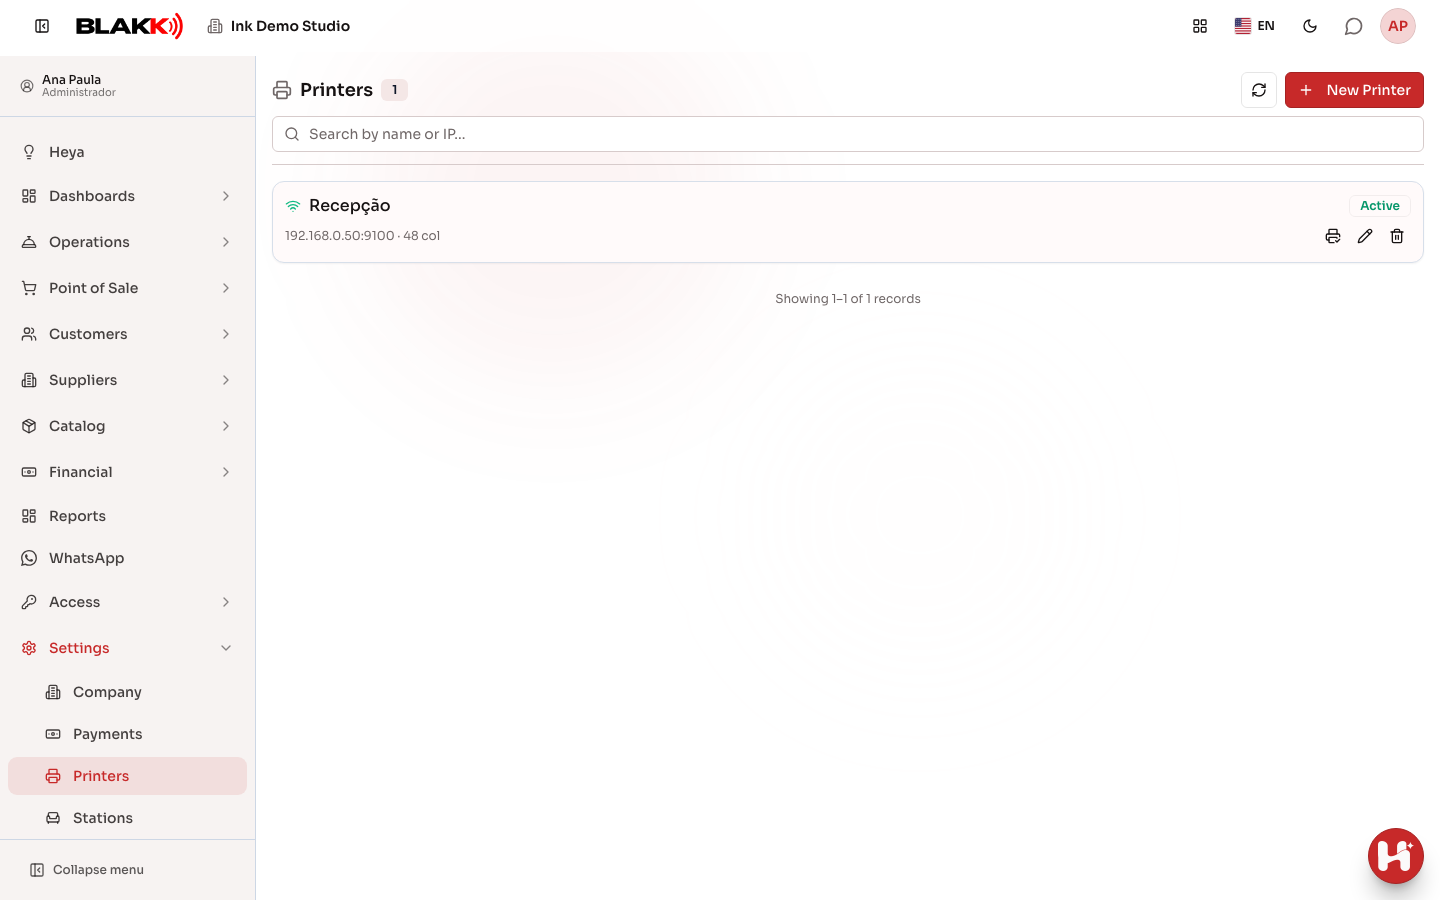
Step 2 — Add a network printer
Section titled “Step 2 — Add a network printer”Click New Printer, enter an easy-to-recognize Name (“Front Desk,” “Counter”), and choose Network (IP) under Connection type. Enter the IP Address, Port (usually 9100), and Paper Width in columns: 48 for 80 mm paper, 32 for 58 mm paper (42 for some 80 mm models). Click Save.
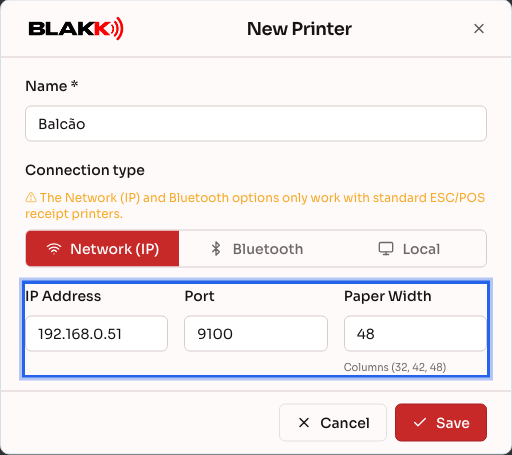
Step 3 — Or add a Bluetooth printer
Section titled “Step 3 — Or add a Bluetooth printer”In the same setup form, choose Bluetooth and click Pair Bluetooth printer. Your browser will show a list of nearby devices so you can select the printer. Enter the paper width and save. The Bluetooth printer prints from the device it was paired with (the front desk tablet or computer), which must have Blakk open.
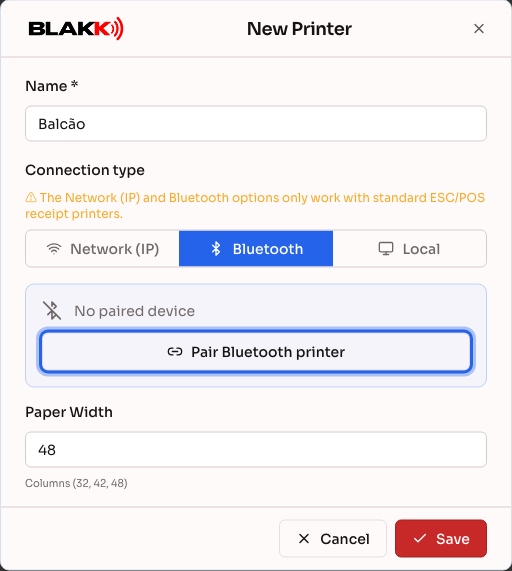
Step 4 — Test the printer
Section titled “Step 4 — Test the printer”In the list, click Test print on the printer’s card. A test page should print right away. If it doesn’t, make sure the printer is on and loaded with paper, and that the address and port are correct.
Step 5 — View print templates
Section titled “Step 5 — View print templates”Open Settings → Print Templates. Each card shows the template name, ticket type, and whether it’s Active. Click the pencil icon to edit a template.
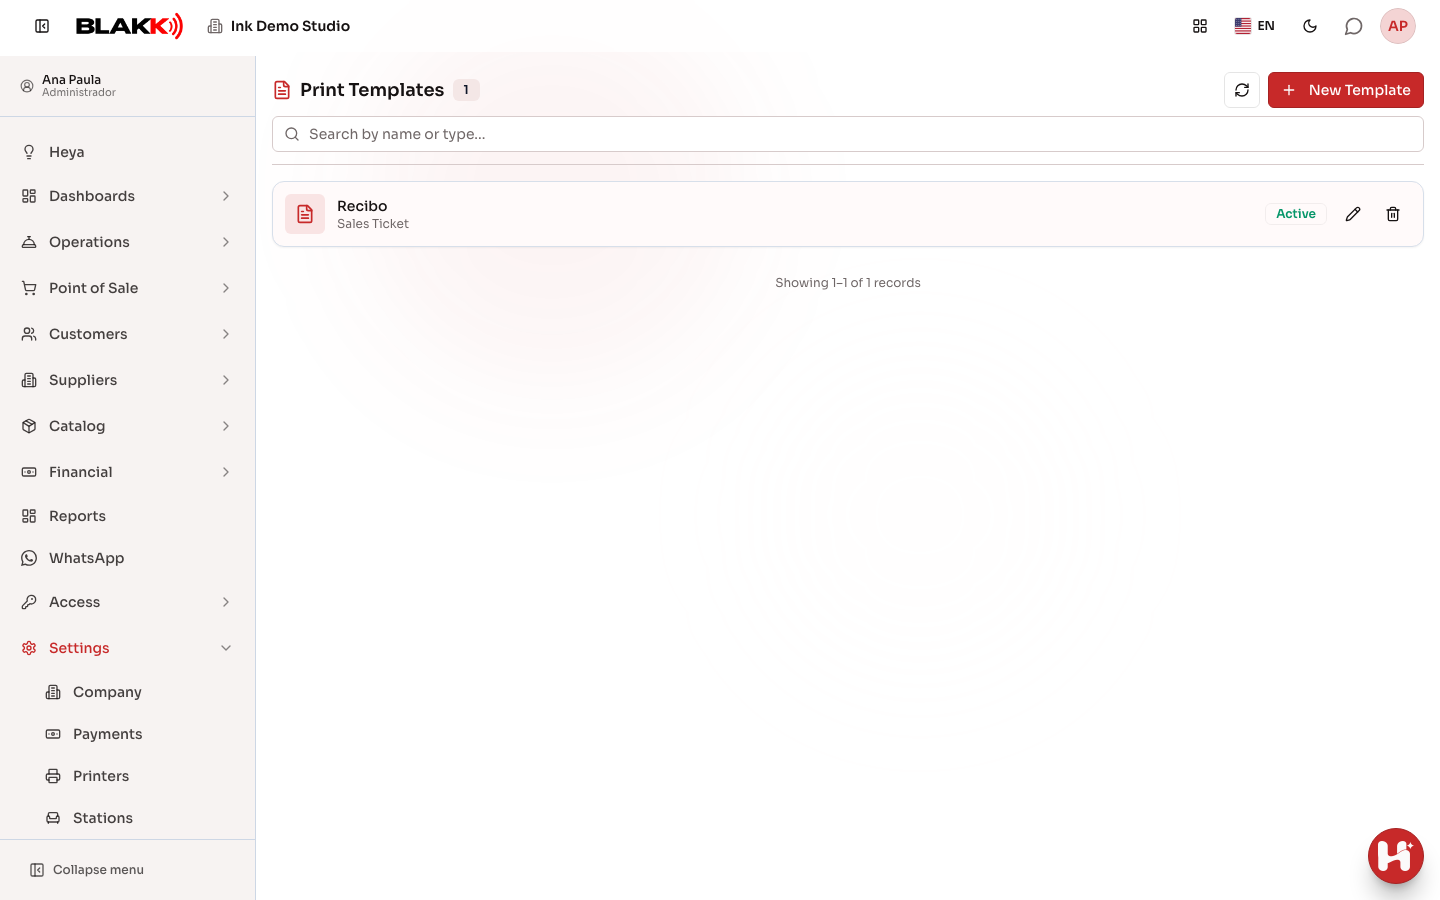
Step 6 — Create a template and choose a type
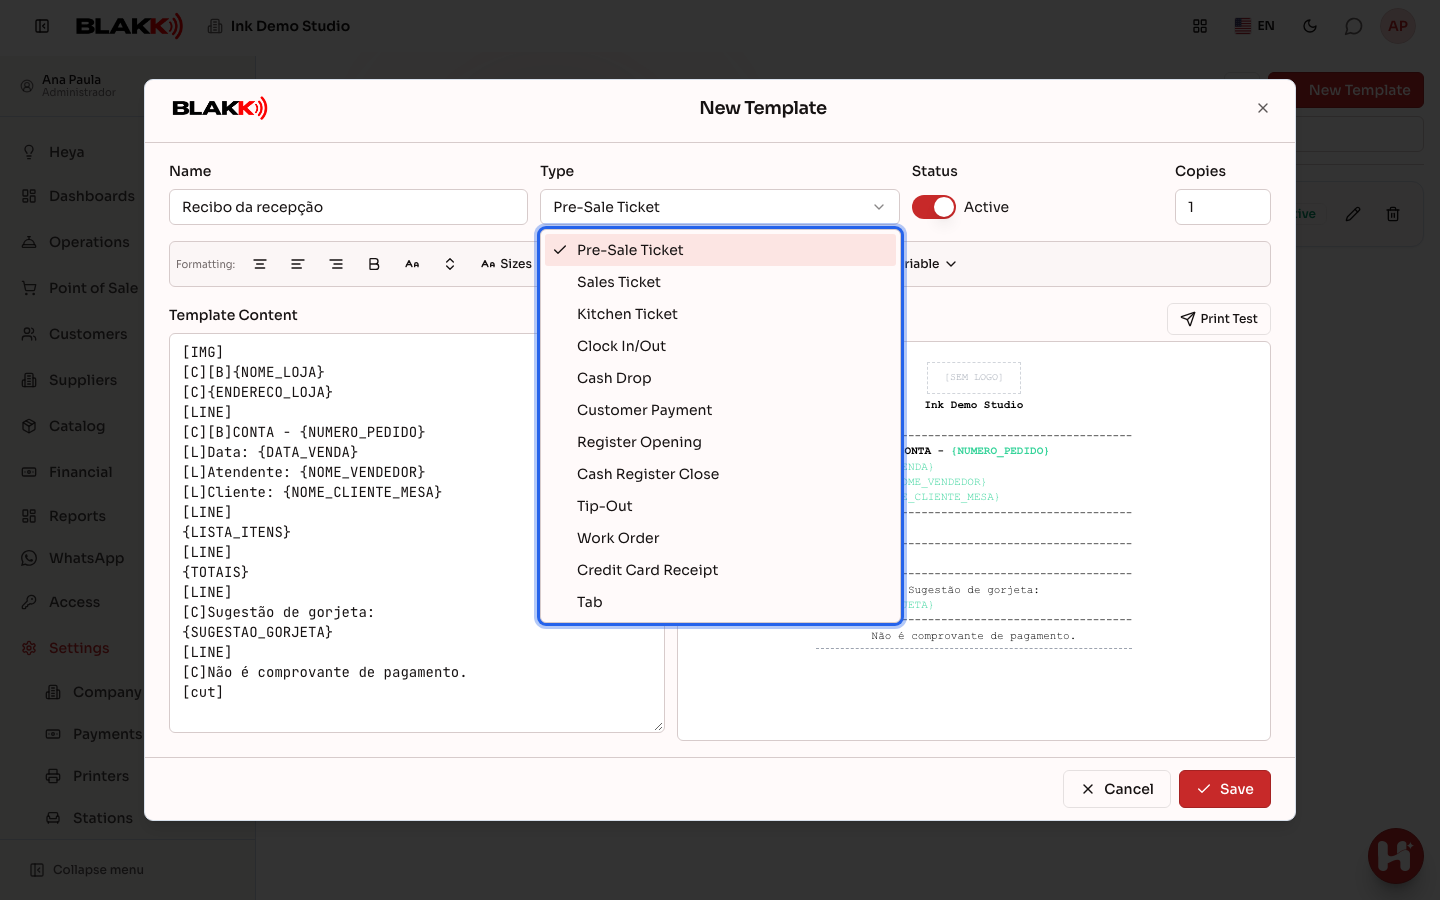
Section titled “Step 6 — Create a template and choose a type”Click New Template, enter a Name, and choose a Type. The type determines what the ticket is for: Sales Ticket is the customer receipt after payment, and Pre-Sale Ticket is the bill the customer can review before paying. When you choose a type, Template Content is filled in with a ready-to-use template containing the most commonly used information. Use it as a starting point. Under Copies, enter how many copies to print each time.
Step 7 — Build the template content
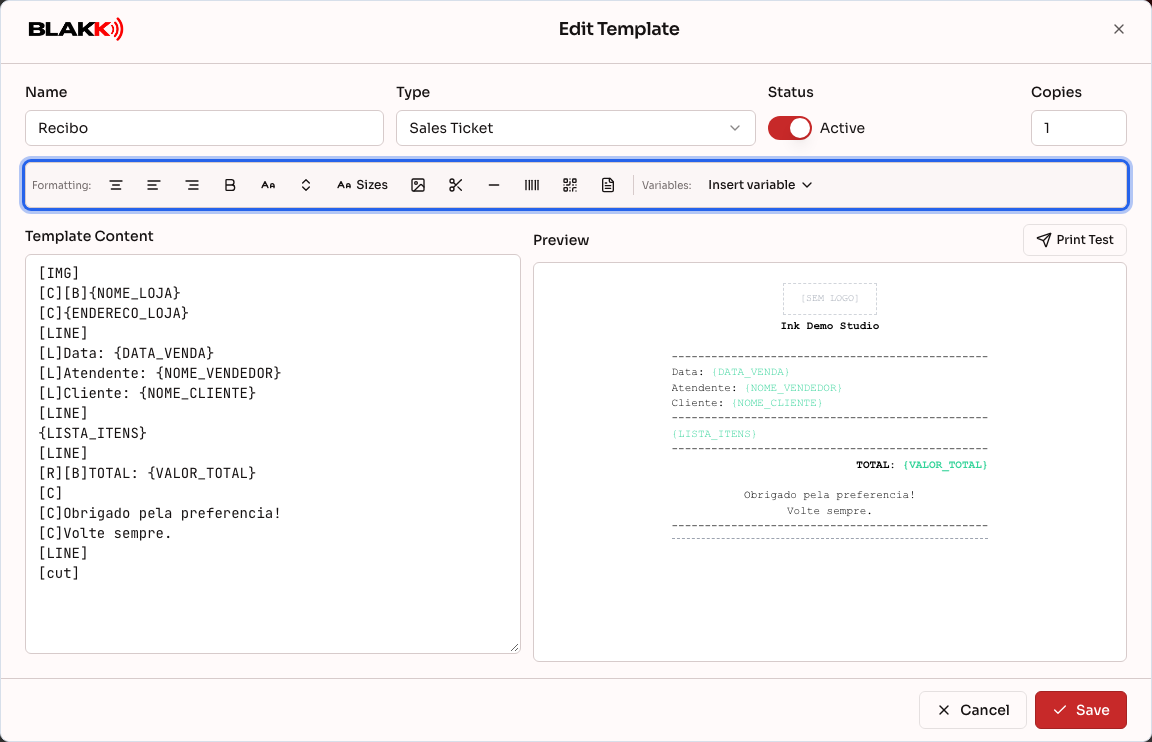
Section titled “Step 7 — Build the template content”Write the ticket in Template Content, one line at a time, as it should appear on the paper. The Formatting buttons add formatting: Center, Bold, Large text, Logo, Separator line, QR Code, Cut paper, and more. Click Use this type’s default template to restore the ready-to-use template. The Preview next to the editor shows how the ticket will look on paper.
Step 8 — Insert variables
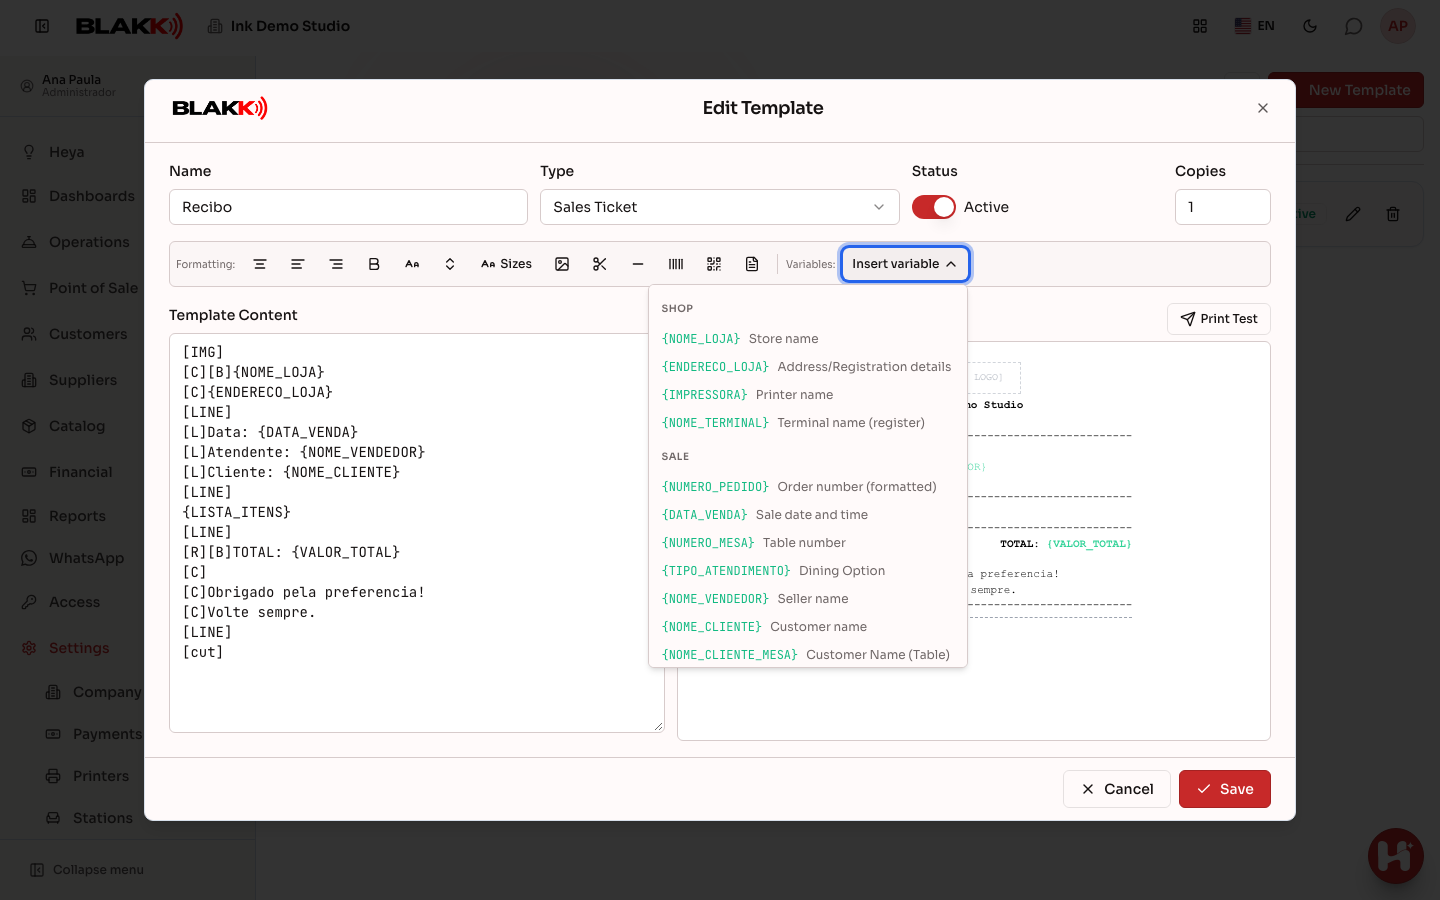
Section titled “Step 8 — Insert variables”Click Insert variable and choose the information to include on the ticket. The list only shows variables that work with the template type. For example, a receipt can include the sale number, customer, item list, totals, and payment methods. The variable is inserted wherever your cursor is, inside curly braces, and replaced with real data when you print.
Step 9 — Print a test and save
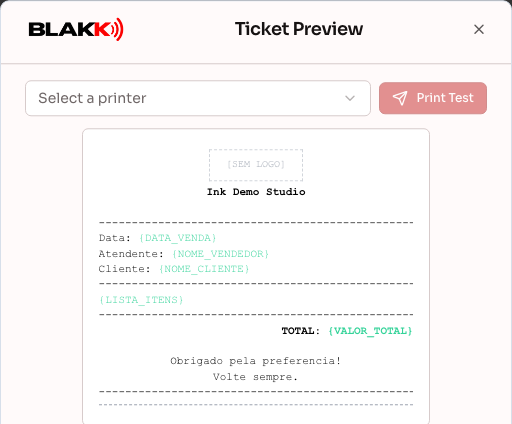
Section titled “Step 9 — Print a test and save”Click Print Test to open the larger Ticket Preview. Choose a printer and click Print Test to see how it looks on actual paper. When you’re happy with it, click Save on the template.
Step 10 — Create a tab template for a regular printer (A4)
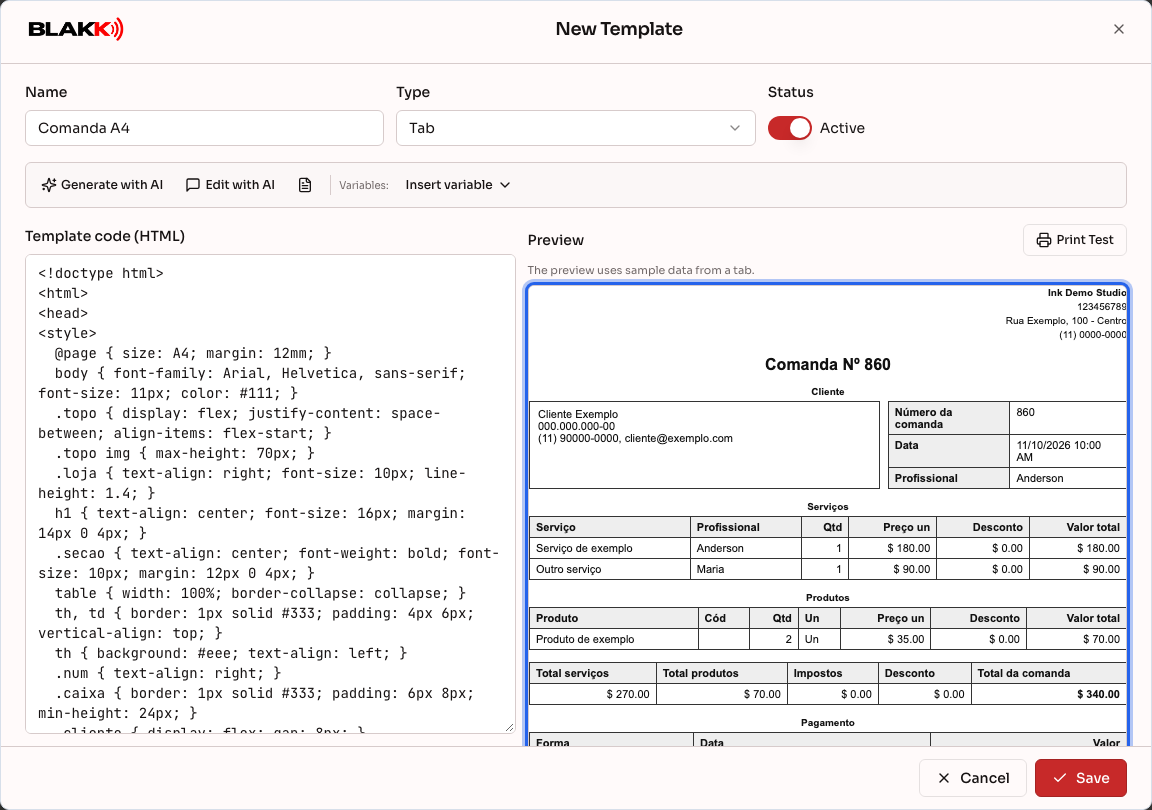
Section titled “Step 10 — Create a tab template for a regular printer (A4)”Tabs print on a regular printer on A4 paper (on a phone, they’re generated as a PDF you can share). Click New Template and choose Tab under Type. The editor changes: Template code (HTML) appears on the left, and the page Preview appears on the right with a sample tab. The template is ready to use and includes the studio logo and details, the customer, services and their assigned artists, products, totals, payments, and notes.
To change the layout, use Generate with AI (from a photo, PDF, or DOCX of a tab you already use), Edit with AI (describe what to change, such as “move the logo to the right”), or Insert variable. Make sure the template is Active, then click Save. Tab templates can’t be used with thermal printers.
What happens next
Section titled “What happens next”-
With an active Tab template, the Print button on a tab (and in the appointment’s Tab section) prints the tab on A4 paper. If more than one template is active, the button asks which one to use.
-
Blakk uses one active template per type. If two templates of the same type are active, only one is used. Keep the one you want active and turn the other one off.
-
A variable with no data for that ticket prints as blank. Some variables remove the entire line so you don’t get blank lines on the paper.
Common mistakes and questions
Section titled “Common mistakes and questions”Q: How do I print a tab? A: Create a Tab template (Step 10) and make sure it’s active. On the tab, click Print. On a computer, your browser’s print window opens so you can choose any installed printer without setting it up in Blakk. On a phone or tablet, the tab is generated as a PDF that you can share or print. If no tab template is active, the screen displays No active Tab template for a regular (A4) printer..
Q: The test page didn’t print. What should I check? A: Make sure the printer is on, loaded with paper, and connected to the same network. Check that the address and port in the printer settings are correct. For a Bluetooth printer, make sure the device it was paired with is on, nearby, and has Blakk open.
Q: What paper width should I use? A: This is the number of columns (characters per line): 48 for most 80 mm printers and 32 for 58 mm printers. If the ticket is cut off or the lines break, try 42.
Q: How do I add the studio logo to a receipt? A: Click Logo to insert the logo tag on a line by itself, usually as the first line of the template. The logo is the one added under Settings → Company.
Q: I replaced the front desk tablet and the Bluetooth printer stopped working. A: The printer works through the device it was paired with. Edit the printer on the new device and click Re-pair printer.
Q: Can I print on a regular sheet printer? A: Yes. Use the Local option. When you print, your computer’s print window opens so you can choose a printer. This option is saved only on the device where you set it up.
Q: I can’t find the variable I want in the list. A: The list only shows variables that Blakk can fill in for that ticket type. Make sure the template Type is correct.
Q: Can I print a Work Order on A4 paper? A: Yes. Create a Work Order template and choose Regular printer (A4) under Printer. The editor shows the template code and page preview. The template is ready to use, and Generate with AI can create a template from a photo, PDF, or DOCX of the work order you already use. To adjust the template without editing the code, use Edit with AI. Describe what to change, such as “make the title bigger,” and the preview updates right away (Undo reverts the change). On the Work Order screen, printing opens your browser’s print window (on a phone, it generates a PDF).