Users: Invite, Edit, and Deactivate Team Access
What it is
Section titled “What it is”This is where you invite each tattoo artist to use Blakk, set their access profile (what they can see and do—configured in Access Profiles), create the PIN they use to sign in to the Point of Sale, and keep track of active sessions, access history, and invitations that haven’t been accepted yet.
When to use it
Section titled “When to use it”- A new tattoo artist joins your studio team and needs access to the system.
- Someone leaves the studio and you need to remove their access.
- A tattoo artist forgets their Point of Sale PIN and needs a new one.
- You want to see who’s currently signed in or end a session on a specific device.
Before you start
Section titled “Before you start”If you can’t invite, edit, or deactivate a user, ask the studio owner to grant you access under Access → Profiles. Before inviting someone, it’s a good idea to have their access profile ready— see Access Profiles.
Step by step
Section titled “Step by step”Step 1 — View the user list
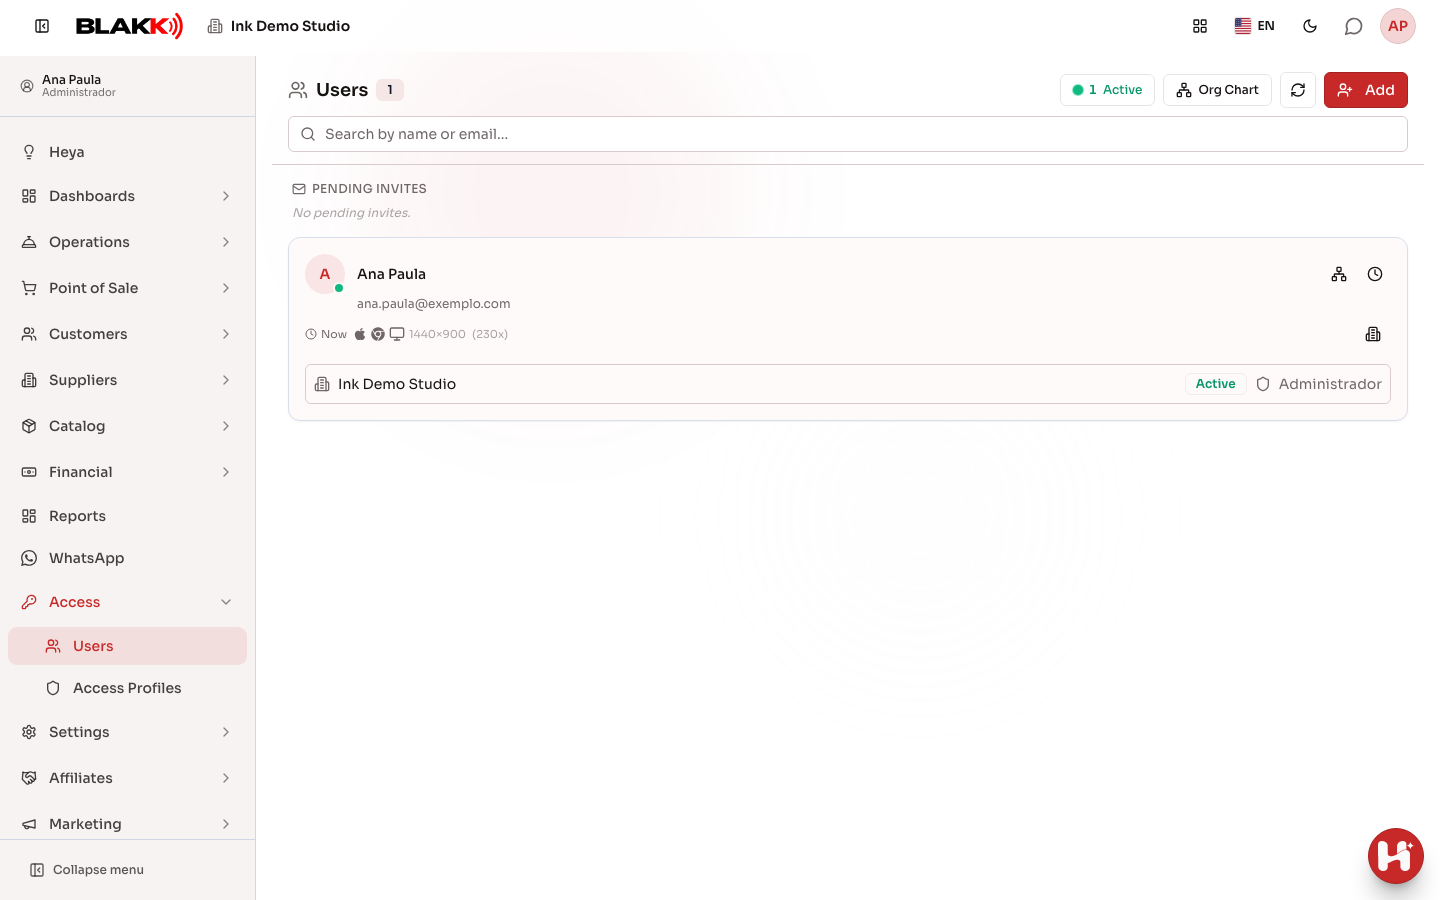
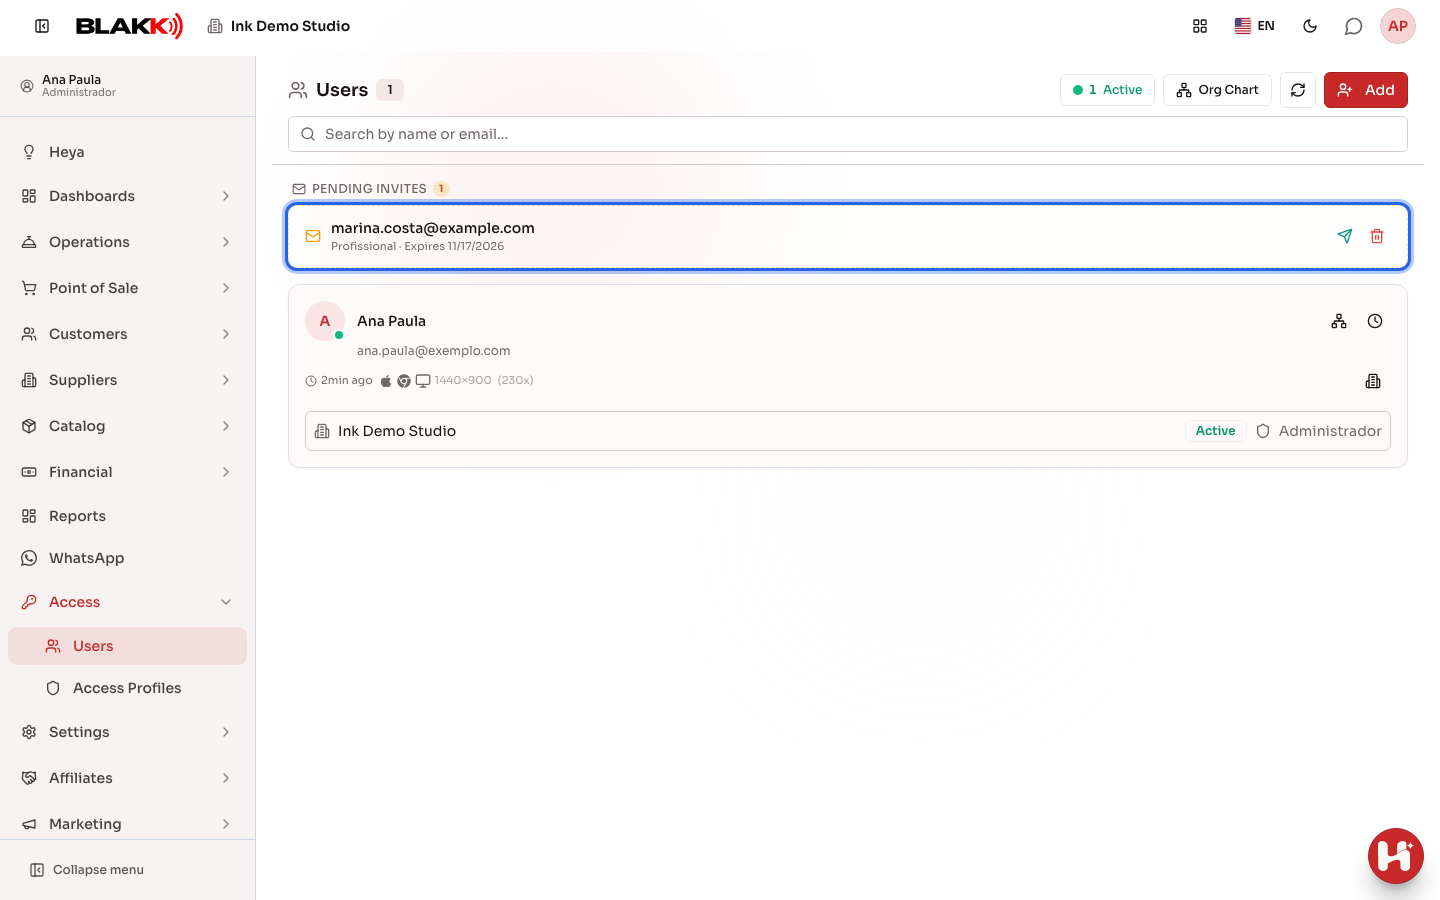
Section titled “Step 1 — View the user list”Open Users from the Access menu. The list shows everyone with access to Blakk: their name, email, last access (including the device and browser used, and the city, state, and country flag for where they accessed from), the companies they can access, and each company’s profile and status (Active or Inactive). It also shows the PIN and Face badges when they have a PIN or face registered for the Point of Sale. A green dot on the photo indicates who currently has the screen open.
At the top are the search field (Search by name or email…), the count of people Active now, and the Org Chart button. Invitations that haven’t been accepted yet appear in a separate section, Pending Invites, above the list.
Step 2 — Invite a new user
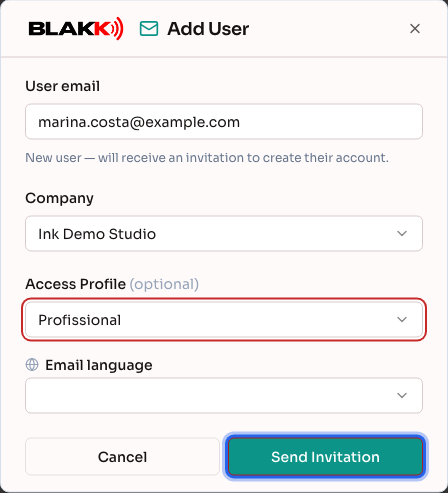
Section titled “Step 2 — Invite a new user”Click Add, enter the email address, and choose the Company. The screen marks Access Profile as optional, but always choose a profile—see the warning below. Also choose the Email language for the invitation, then click Send Invitation.
As you enter the email address, the screen lets you know if it belongs to an Existing user (showing which companies they already have access to) or if there’s already a Pending invitation for them, with buttons to resend or cancel the invitation right there. Once you send it, Invitation sent! appears. If the company’s WhatsApp is connected and you have access to it, you can also send the same invitation using Send invite via WhatsApp.
⚠️ Never intentionally leave “Access Profile” blank. Despite what “(optional)” suggests, an invited person with no profile selected gets full, unrestricted access to the system as soon as they accept the invitation—not no access. That’s why only someone who already has full access to that company can invite someone without a profile or leave the profile blank. For everyone else, the screen says a profile must be selected and won’t save. If you haven’t decided which profile to use yet, create a temporary one in Access Profiles before inviting, or choose the most restrictive profile available. After inviting, check Step 3 to make sure a profile was assigned.
Step 3 — Edit a user
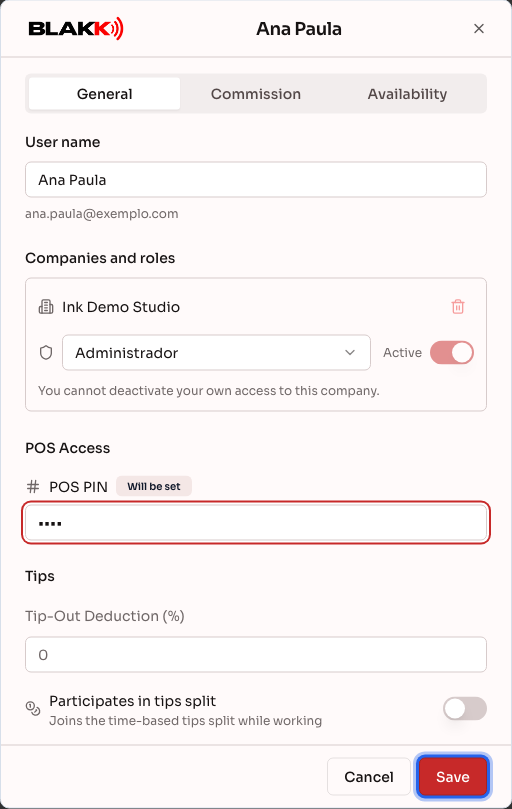
Section titled “Step 3 — Edit a user”Click the person’s card to open the edit screen. The General tab includes:
- User name;
- Companies and roles: each company’s access profile and Active toggle, the trash icon to remove access to a company, and Add company to grant access to another one of your companies;
- POS Access: the POS PIN, which is 4 to 6 digits and lets them quickly sign in to the Point of Sale (and Facial Recognition, when this feature is enabled on your account);
- Tips: the Tip-Out Deduction (%) and whether they Participates in tips split.
The Commission tab stores the person’s commission percentage (the default rate and, if you want, a different rate for each product). The Availability tab shows their working hours when Scheduling is enabled. Nothing is saved until you click Save at the bottom— including the PIN, profile, and settings on the other tabs.
When you open your own edit screen, the Active toggle and the company trash icon are locked. No one can deactivate or remove their own access, regardless of their profile—even the Administrator. This prevents someone from accidentally locking themselves out of the system. If you need to remove your own access, ask someone who can edit users for that company.
Step 4 — View active sessions
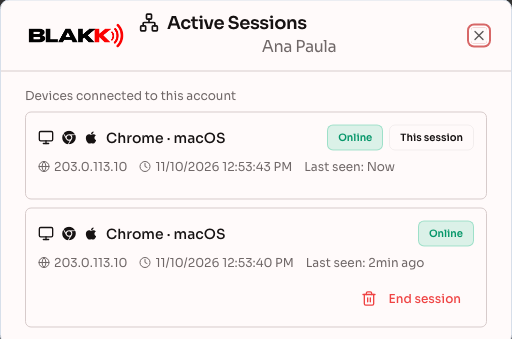
Section titled “Step 4 — View active sessions”Click the Active Sessions icon on the person’s card to see which devices they’re currently signed in on. If needed, click End session to sign out a specific device (for example, a lost phone). The session you’re using is labeled This session and can’t be ended here. The icon next to it, Access History, shows the person’s recent access history, with the IP address, city, state, and country flag for each access, as well as the daily and monthly averages.
Step 5 — Resend or cancel a pending invitation
Section titled “Step 5 — Resend or cancel a pending invitation”Until the person accepts the invitation, it appears in the Pending Invites section, along with the selected profile and its expiration date (invitations are valid for 7 days). The buttons next to it are Resend invite, Send invite via WhatsApp (when WhatsApp is available), and Cancel invite.
What happens next
Section titled “What happens next”- The invited person receives an email with a link to create their own password. Until then, they appear only in the pending invitations section, not in the main list.
- An invitation accepted without a profile assigned grants full, unrestricted access to the system—not no access. Always choose a profile when inviting someone (see the warning in Step 2).
- If the invited email address already has an account in the system, the person doesn’t create a new password. Once they accept, the company is added to their account, and they sign in normally with their existing password.
- Deactivating someone’s access to a company (using the toggle on the edit screen) is reversible— you can reactivate it whenever you want without sending another invitation. The only exception is your own access, which you can’t deactivate (see Step 3).
- Changes to someone’s access profile take effect immediately. They don’t need to sign out and back in—see Access Profiles for details.
- Ending a session signs that specific device out the next time it tries to communicate with the server. The person’s other devices stay signed in as usual.
Common mistakes and questions
Section titled “Common mistakes and questions”Q: Do I have to choose an access profile when I send an invitation? A: The field is marked as optional, but always choose a profile in practice. An invitation accepted without a profile assigned grants full, unrestricted access to the system—not no access, as “optional” suggests. If you haven’t settled on the right profile yet, choose a temporary one and change it later.
Q: Why can’t I view or resend pending invitations? A: Viewing and managing pending invitations requires permission to edit users for that company, not just view them. The invitation link grants access to the company, so only people who can send invitations can see it. Ask the company’s administrator to grant you editing access in your profile.
Q: Why was the email address rejected with a temporary email message? A: The address is from a temporary email service (one that creates an inbox that disappears within minutes or days). Blakk doesn’t accept this type of email for invitations, including for people who already have an account, because it’s often used to create fake accounts. Ask the person for an email address they actually use (Gmail, Outlook, or their work email) and send the invitation again.
Q: Can the invited person use the system before accepting the invitation? A: No. While the invitation is pending, they have no access. They get access only after clicking the link in the email and creating a password.
Q: What happens if I forget to click Save after changing the PIN or profile? A: Nothing is saved. The edit screen saves only when you click Save. Closing it without saving discards all changes made there, including the PIN, profile, and name.
Q: How do I remove access for someone who left the studio? A: Open their edit screen and deactivate their access to that company using the Active toggle. You don’t need to delete their account—just deactivate their access.
Q: Why can’t I deactivate (or remove) my own access? A: This is a system safeguard that applies to every profile, including the Administrator. When you open your own edit screen, the Active toggle is locked and displays the message “You cannot deactivate your own access to this company.”, while the trash icon displays “You cannot remove your own access to this company.”. Deactivating your own access would end your session right away, and you wouldn’t be able to sign back in to undo it. If you really need to leave, ask someone who can edit users for that company. You can still deactivate someone else’s access as usual, even if they’re also an Administrator.
Q: The invitation I sent didn’t arrive in the person’s email. What should I do? A: In the pending invitations section, click Resend invite or send it through WhatsApp if that option appears. If it still doesn’t arrive, check that you entered the email address correctly. If it’s wrong, cancel the invitation and create a new one. Invitations expire after 7 days; after that, send a new invitation.
Q: How can I see when someone signed in to the system? A: Their card shows their last access. To see more, click the Access History icon. It lists recent access, along with the total and daily and monthly averages.
Q: Where does the city shown for the last access come from? A: It’s based on the IP address used to access the system and checked against a location database on the server itself—the IP isn’t sent to any outside service. The location is approximate. On mobile internet, the city is usually the carrier’s location, not the person’s. If the IP can’t be located (for example, on an internal network), the city won’t appear. The Org Chart shows the same information on each person’s card.