Expenses: create, split into installments, attach documents, and pay
What it is
Section titled “What it is”This is where all your studio’s bills to pay are listed—rent, suppliers, and supplies—with everything a real expense needs: the payee, the number of installments, the attached document (invoice, bill), and the payment history. It’s the same screen opened by the New Expense shortcut in the Finance Hub—here you can see the full list, with filters and search.
When to use it
Section titled “When to use it”- A shipment of healing ointment arrives in 3 installments, and you need to record each due date.
- You receive an invoice from a supplier and want to save the file with the expense entry.
- An expense was entered incorrectly and needs to be deleted before any payment is made.
Before you start
Section titled “Before you start”If you can’t create, edit, or delete an expense, ask the studio owner to grant you access under Access → Profiles. Deleting an expense requires a higher access level (Full) than creating or paying one (Edit).
Step by step
Section titled “Step by step”Step 1 — View the expense list
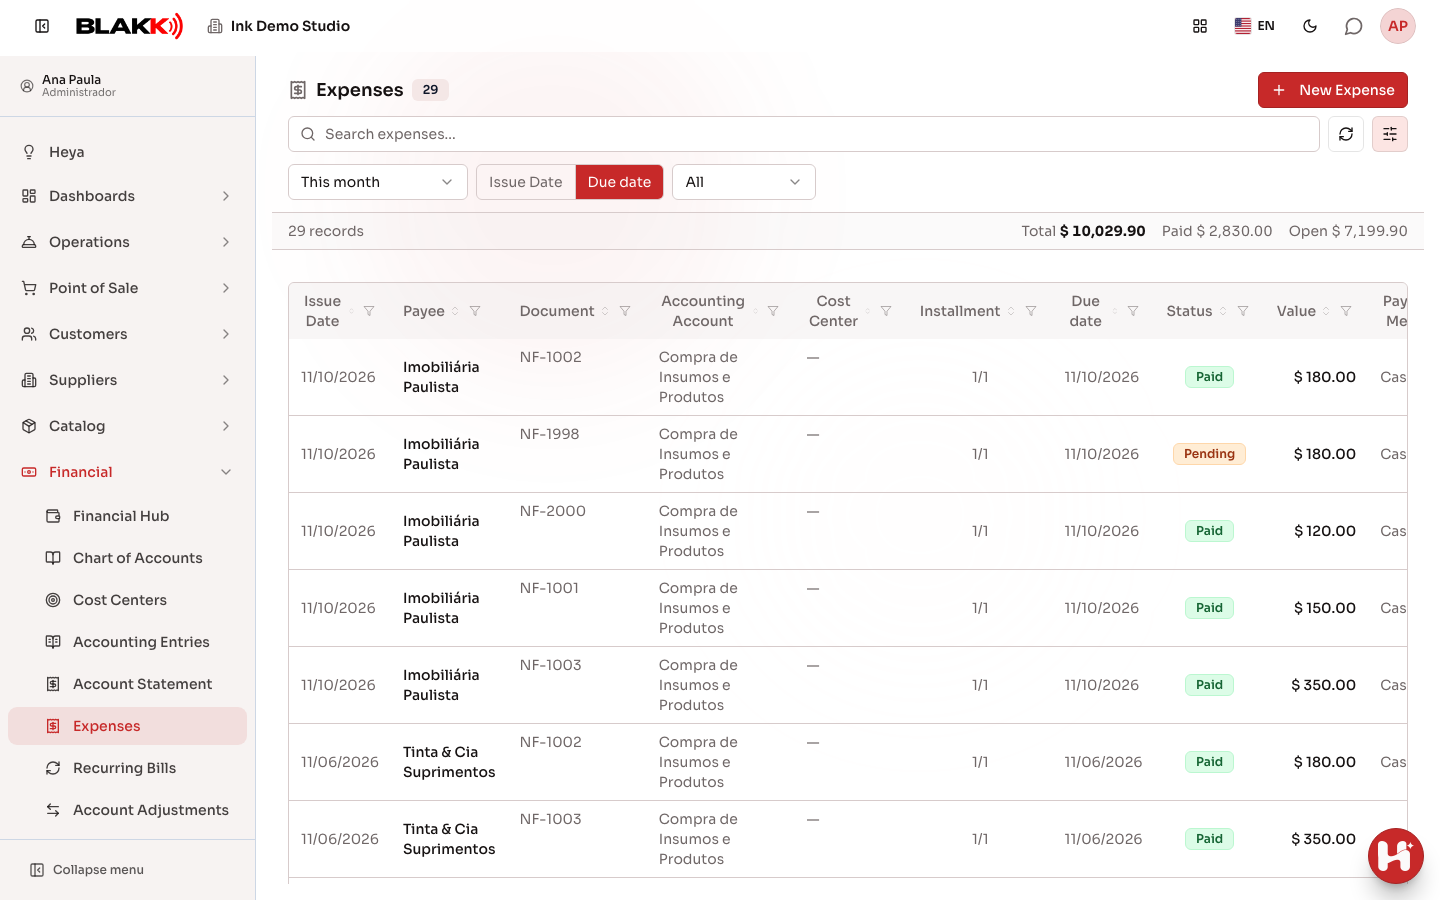
Section titled “Step 1 — View the expense list”The list shows one row per installment, not per expense—a 3-installment expense appears on 3 rows, with the payee, document, and action buttons only on the first row. Use search (Search expenses…) and filters to find a specific expense: the date range (which starts at “This month”), whether the range applies to Issue Date or Due date, and the status (Pending, Partial, Paid, or Cancelled). The filters are in a panel opened with the Filters button next to search. The panel is open by default on computers and closed on phones. The bar above the list shows the Total, the amount already Paid, and the amount Open for the current filters.
Step 2 — Enter an expense in installments
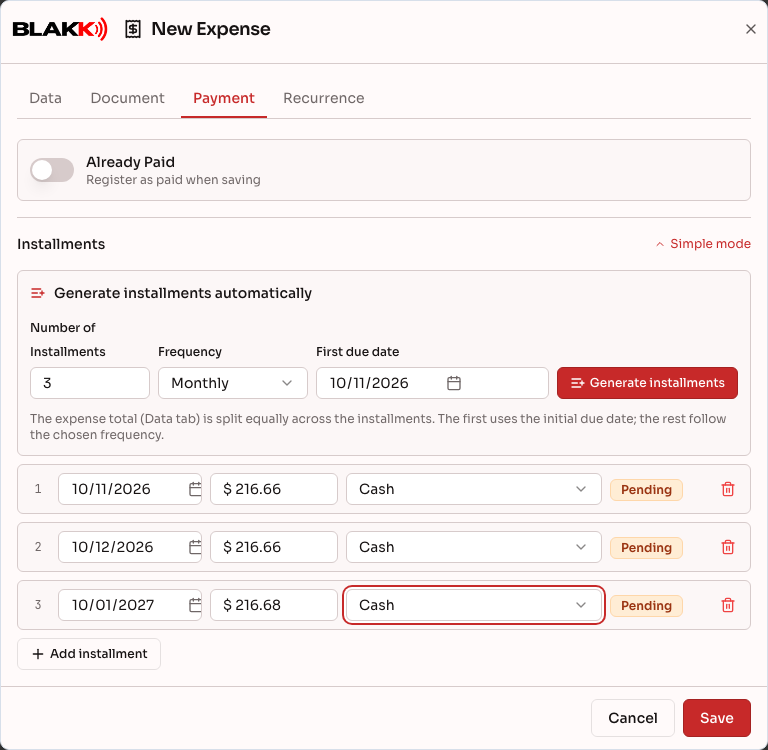
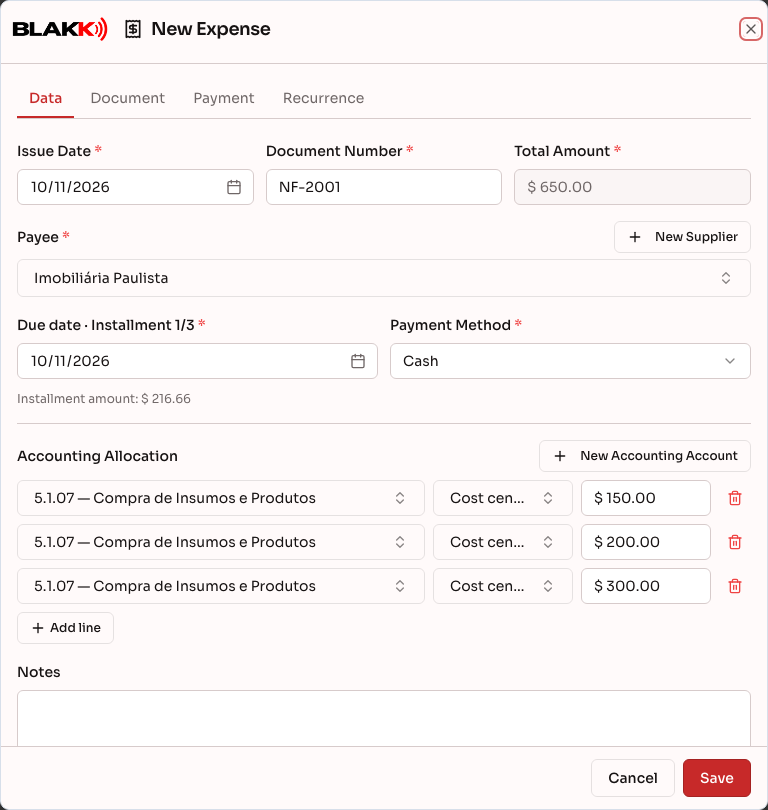
Section titled “Step 2 — Enter an expense in installments”Click New Expense and fill in the Data tab: Payee, Document Number, Issue Date, and at least one Accounting Allocation row (this determines the Total Amount). If the payee has a previous expense, the allocation from their most recent expense is filled in automatically. It only fills in blank rows; anything you’ve already entered is neither erased nor duplicated. If you’ve entered an amount in a row without an account, and the payee’s last expense had just one row, the screen only fills in the account (and cost center, if blank) for that row. Then, in the PAYMENT tab, click Set Installments and select Generate installments automatically. Enter the Number of Installments, the Frequency (Monthly, Biweekly, or Weekly), and the **First due date, then click Generate installments. The system splits the amount evenly, adjusting the cents in the final installment when the amount doesn’t divide evenly. Choose a payment method for each installment before saving; this is required.
Step 3 — Attach the document
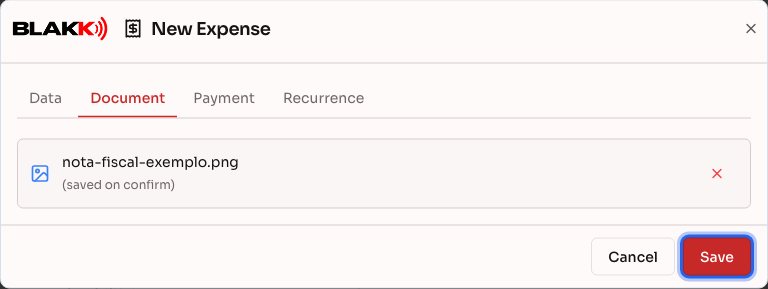
Section titled “Step 3 — Attach the document”In the Document tab, drag the invoice or bill file (image, PDF, or XML, up to 10 MB) into the indicated area, or click to select it. The file is only actually uploaded when you save the expense.
Step 4 — Record a payment
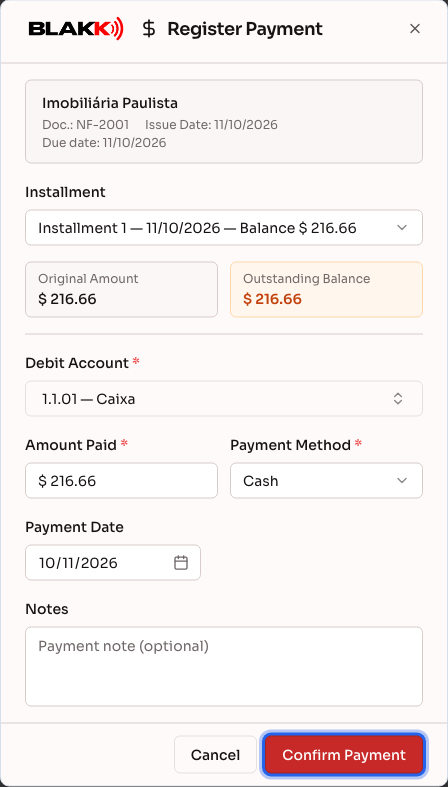
Section titled “Step 4 — Record a payment”In the list, click the Register Payment icon in the first row of the expense. If more than one installment is still open, select the Installment in the dialog. The process is the same as in the Finance Hub: choose the Debit Account and Payment Method, check the Amount Paid (it can be less for a partial payment), and click Confirm Payment.
Step 5 — Delete an expense
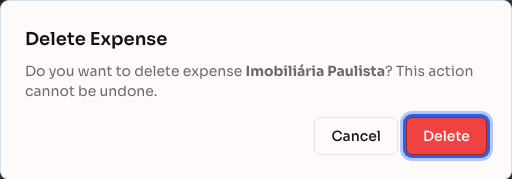
Section titled “Step 5 — Delete an expense”Click the Delete icon in the first row of the expense, then confirm. This icon is only available to users with Full access to Expenses, and disappears when the expense has been paid in full. Deleting an expense removes the entire expense, including all its installments.
Step 6 — Clone a similar expense
Section titled “Step 6 — Clone a similar expense”To enter an expense similar to one that already exists (with the same supplier and accounting allocation) without filling everything in again, click the Clone icon next to the edit pencil. You can do this even for an expense that has already been paid. The dialog opens as a New Expense, already filled in with the payee, document number, accounting allocation, and installments from the original expense. You can adjust anything that’s different and save. Cloning requires the same access as creating an expense (Edit).
What happens next
Section titled “What happens next”- An expense marked Recurring Expense (in the Recurrence tab) creates a template that automatically enters the next occurrence each month. After that, manage the template on the Recurring Expenses screen, not in the Expenses form.
- A dimmed row with the Forecast badge is a future occurrence of a recurring expense that hasn’t actually been entered yet. You can’t pay or delete it until it becomes a real expense. If you need to enter it before its due date, click the pencil icon.
- A fully paid expense opens in view-only mode: the pencil is replaced by the View icon, and the fields are locked.
- Attaching a document doesn’t prevent you from saving the expense. If the file upload fails for any reason, the expense is still saved, and you can try attaching the file again later.
- Cloning creates a completely new and independent expense—the original expense is not changed in any way. The clone always starts as Pending, even when it’s cloned from an expense that has already been paid.
Common mistakes and questions
Section titled “Common mistakes and questions”Q: An expense split into 3 installments, where I’ve already paid the first one, appears as how many rows in the list? A: It still appears as 3 rows—one per installment. The paid installment shows the Paid status, and the other two remain pending.
Q: I clicked to edit installment 2 of an expense split into installments. Which due date appears in the Data tab? A: The due date for the installment you clicked. The field shows its number (for example, “Installment 2/4”), with Installment amount right below it. Total Amount and the accounting allocation are for the entire expense and include all installments. If you opened the expense from a report, the first installment that is still open appears. To view or change the other installments, use the PAYMENT tab. You can’t change the due date of an installment that has already been paid.
Q: If I generate installments automatically, will they always have the same amount? A: Almost always—the system splits the total evenly between installments. If it doesn’t divide evenly (for example, $100.00 in 3 installments), the difference in cents is added to the final installment, not spread across all of them.
Q: Can I delete an expense that has a partial payment recorded? A: The delete icon only disappears when the expense has been paid in full. You can still delete an expense with a partial payment, and that also removes its payment history. Before deleting an expense with a partial payment, it’s best to reverse the payment already recorded (in the expense’s Payment tab) to keep an accurate history. Deleting it directly is permanent and doesn’t record who did it.
Q: What is the “Recurring” badge (different from “Forecast”)? A: “Forecast” is a future occurrence that hasn’t become a real expense yet. “Recurring” (in amber) appears on an expense that is real but was created from a recurring template. The different colors help you tell them apart.
Q: I’ve already paid the bill. Do I need to enter it and then record the payment? A: No. When entering a new expense, turn on Already Paid in the PAYMENT tab and select the Debit Account the money came from. When you save, the expense is already marked as paid.
Q: Do I need to attach a document to enter an expense? A: No—it’s optional. You can enter the expense without a file and attach one later by editing it.
Q: When I clone an expense, are its payment and attached document copied too? A: No. The cloned expense always starts as Pending, with no payments and no document attached from the original. Only the details (payee, document number, accounting allocation, and installments) are copied. The installment due dates are also recalculated starting from today, while keeping the same intervals between them (for example, monthly installments remain monthly).
Related
Section titled “Related”- Finance Hub: track and record payments and receipts
- Chart of Accounts: organize your business’s accounts
- Cost Center: organize expenses by business area
- Recurring Expenses: manage expenses that repeat every month
- Accounts Payable Report: track what your studio needs to pay
- Paid Bills Report: payment history and how to reverse a payment
- General Ledger: daily cash flow, with corrections made right in the row
- Commission Report: calculate and pay what each professional is owed
- Financial Dashboard: understand your studio’s financial health over time