Your Own Website: Create, Publish, and Use Your Domain
What it is
Section titled “What it is”Your studio’s website, built and published from Blakk—no need to hire anyone or use another tool. Start with a ready-made template, customize it by asking the AI assistant or editing each section, and publish it with one click. Your website is connected to your groups, products, services, tattoo artists, and schedule. When you change a price in your catalog, the website updates automatically.
When to use it
Section titled “When to use it”- You don’t have a website and want a professional page featuring your work, tattoo artists, address, and a button customers can use to book an appointment.
- You already have a domain (for example,
www.yourstudio.com) and want it to display a website that always reflects your current catalog. - You want to sell products online, such as healing ointment (see also the article about dynamic data and the online store on your website).
Before you start
Section titled “Before you start”- Website access must be included in your plan. If Settings → Website doesn’t appear in the menu, contact Support.
- The editor only works on a computer. On a phone, the screen displays Editor available on desktop only—your published website will still work normally on visitors’ phones.
- Get your catalog in order first. Groups, products, and services appear on your website with the photos and prices you’ve entered.
- The AI assistant uses the AI messages included in your plan, which are shared with Marketing Posts.
- If you can’t open or edit the website, ask the studio owner to grant you access under Access → Profiles.
Step by step
Section titled “Step by step”Step 1 — Choose a starting point
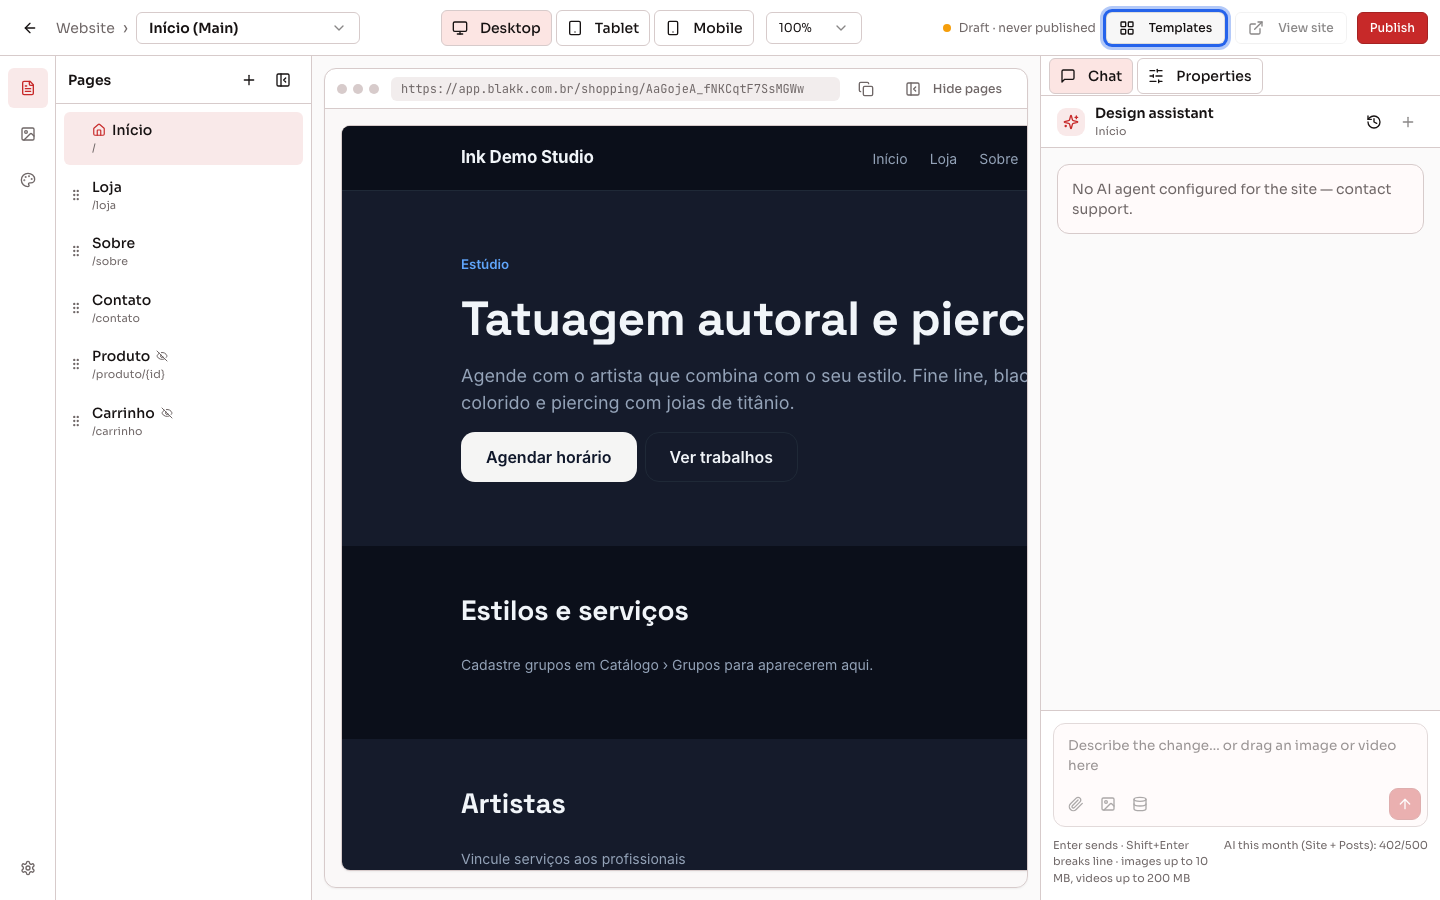
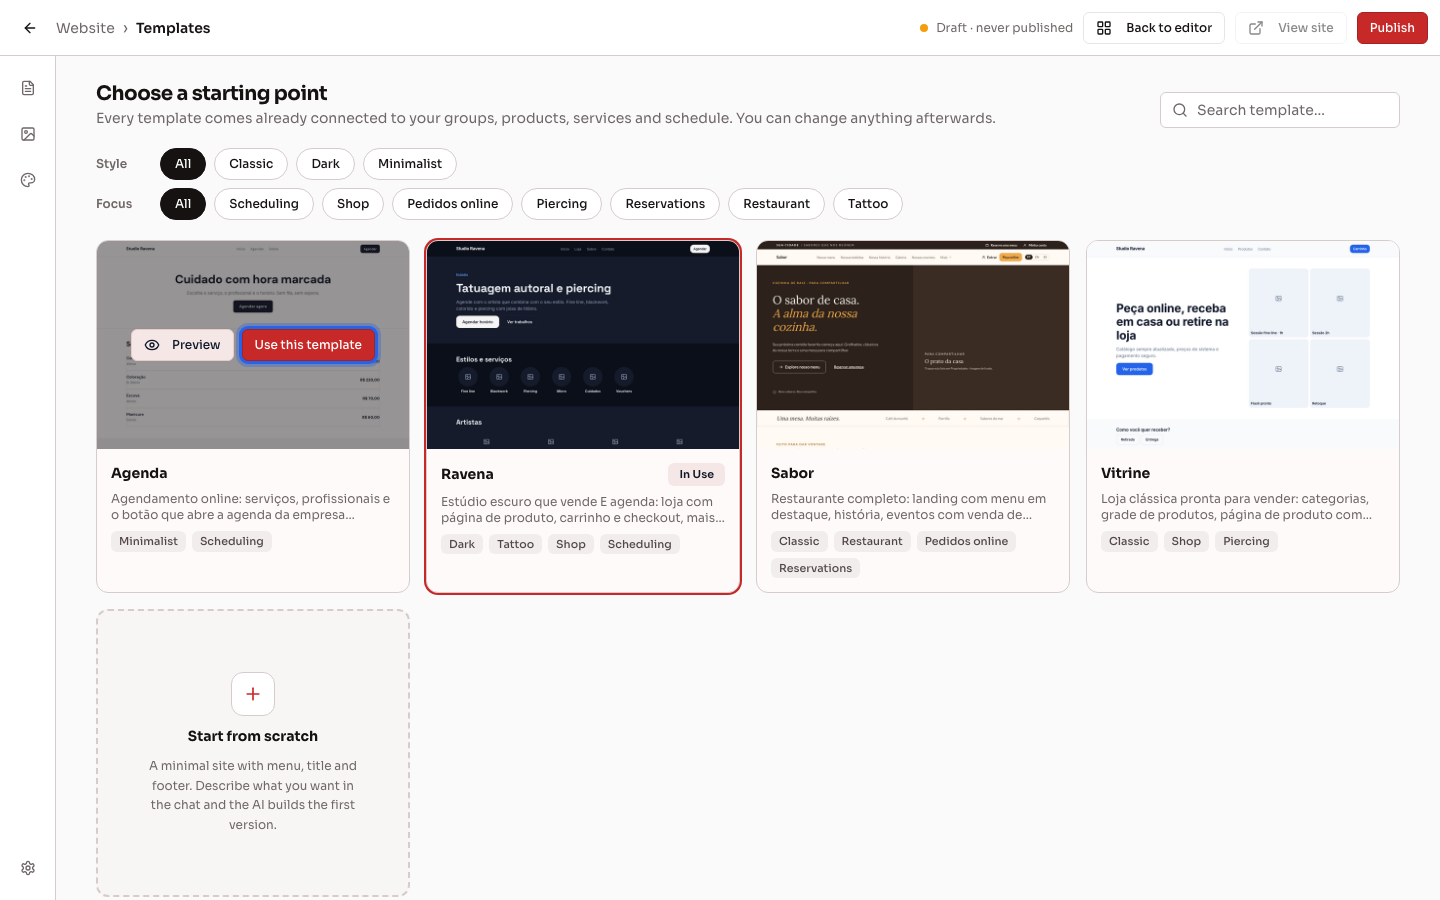
Section titled “Step 1 — Choose a starting point”Go to Settings → Website. The first time you open it, the Choose a starting point screen shows the available templates. You can filter them by Style and Focus (for example, tattooing, piercing, appointments, or online store). Hover over a template and click Preview to see what it looks like. To use it, click Use this template.
Want to start from scratch? Choose Start from scratch. Your website will start with just a menu, title, and footer, and you can describe what you want in the chat.
To switch templates later, use the Templates button at the top of the editor. Your current draft is saved in the version history.
Step 2 — Customize your website with the AI assistant
Section titled “Step 2 — Customize your website with the AI assistant”The Chat with the Design assistant is on the right side of the editor. Describe what you want to change in plain language: “change the title to Downtown Tattoo Studio,” “make the colors black and red,” or “add a section featuring our tattoo artists.” You can also click a section in the preview to specify exactly what to change, or drag an image into the chat to use it on the page.
Each response lists what was changed, and the Undo button reverses the last change.
Step 3 — Edit a section manually
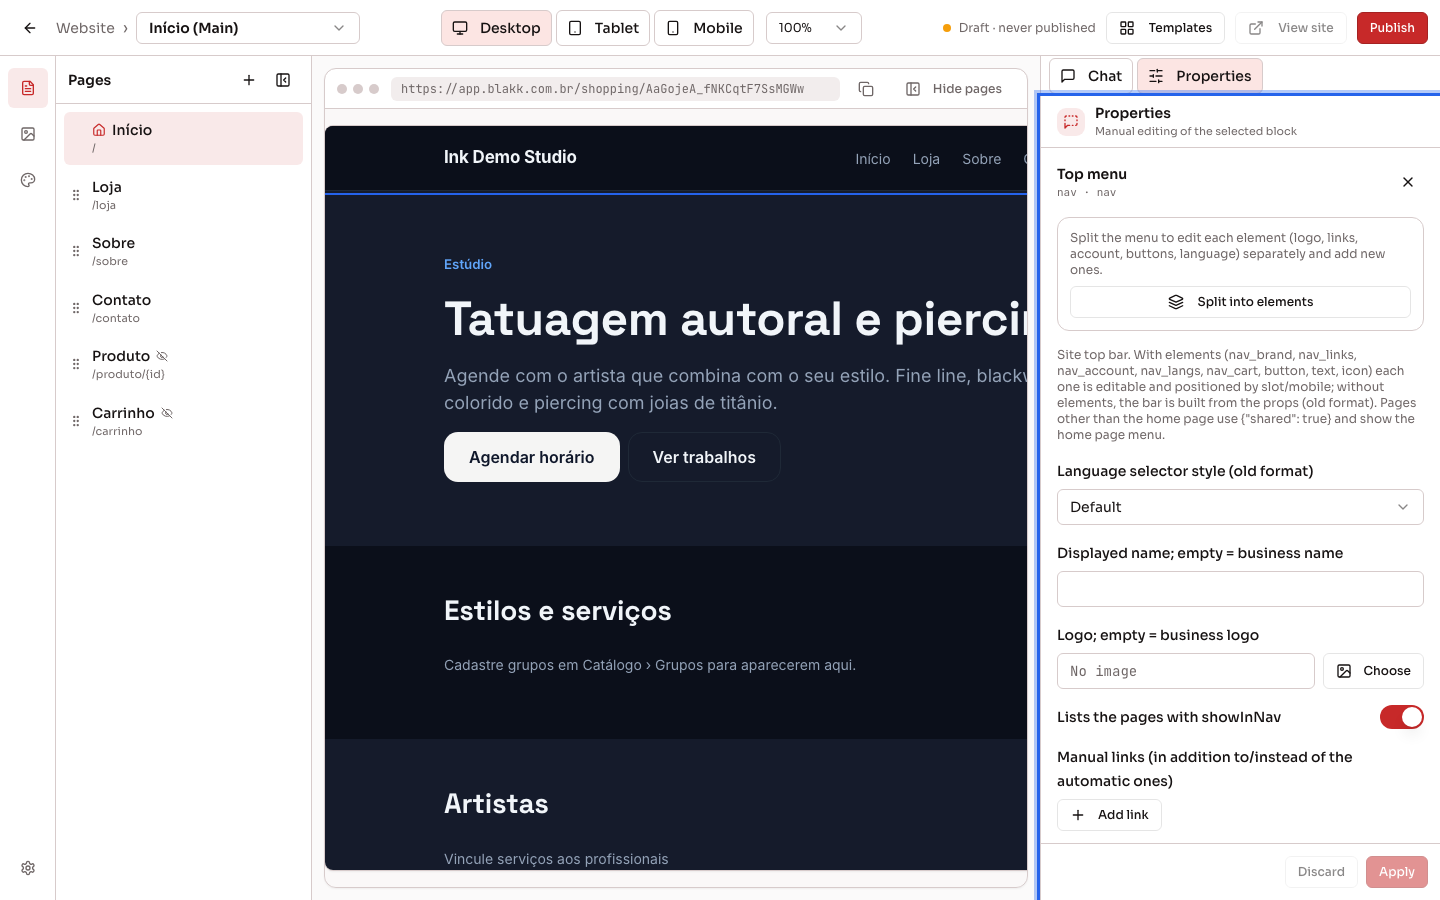
Section titled “Step 3 — Edit a section manually”Click a section in the preview and open the Properties tab next to Chat. It displays the fields for that section, such as text, image, color, and link. After making your changes, click Apply—or Discard to cancel.
The top menu and footer are edited on the home page and apply across the entire website. On other pages, Properties indicates that the page displays the home page’s menu or footer. If an older page has its own menu, click Use the Home page menu (or Use the Home page footer) to display the home page’s menu or footer instead.
When you click the menu or footer, the Menu elements (or Footer elements) list lets you **Add element, reorder, edit, and remove items. Menu items include the logo, links, customer account button, buttons, and language selector. Footer items include the logo, copyright, links, social networks, WhatsApp, email, address, and hours, each in the column you choose. If you see the Split into elements button instead of the list, the menu or footer is still in the old format. Click the button once to split it into separate items.
For the language selector, Language selector style lets you choose between codes, flags, Flags with code beside, and Flags with code below. Display controls how languages appear: Automatic (side by side up to 3 languages) displays the flags in a row and switches to a list when there are more languages; Side by side always displays all flags in a row; Dropdown list always displays only the current language, which opens the list when clicked.
On the home page, selecting Use this footer on every page applies the same footer to all other pages, including pages without a footer, when you click Apply.
Step 4 — Create and organize pages
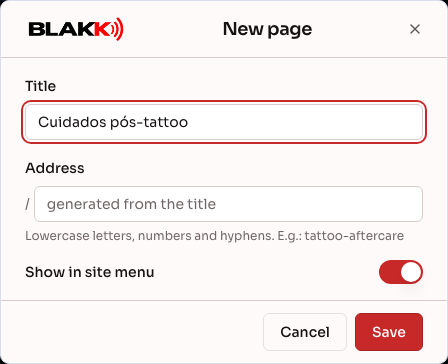
Section titled “Step 4 — Create and organize pages”In the left menu, open Pages and click New page. Enter a Title—the Address is generated from it (for example, aftercare). Select Show in site menu to show the page in the menu, or Set as home page to make it the first page visitors see. In the page list, you can **Rename, **Duplicate, **Delete, and drag pages to change their order.
Step 5 — Photos, videos, and colors
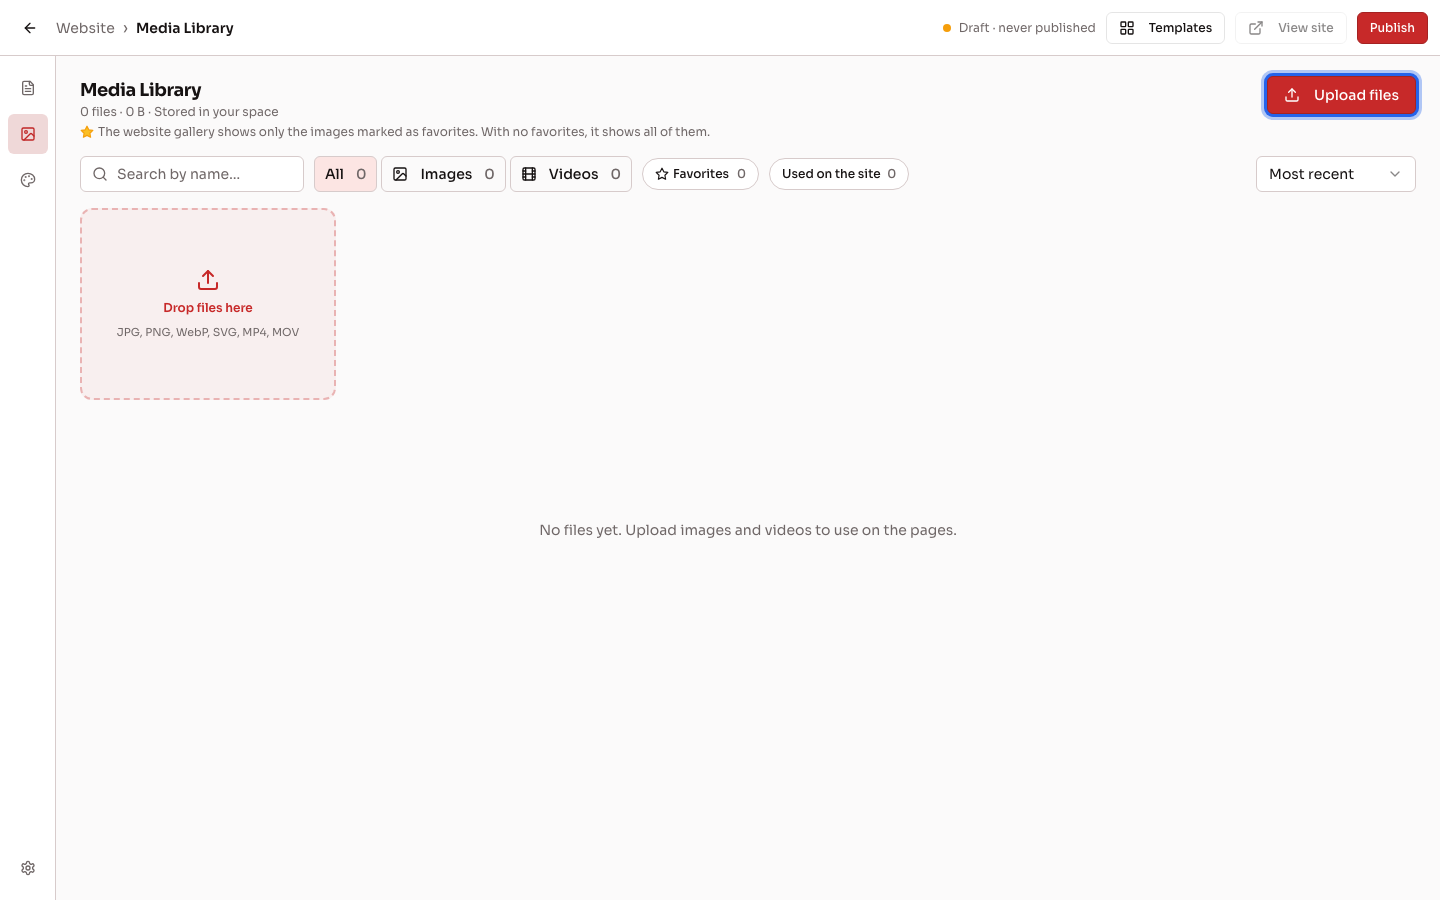
Section titled “Step 5 — Photos, videos, and colors”Under Media, you’ll find the Media Library. Click Upload files to upload photos (up to 10 MB) and videos (up to 200 MB). Mark your best photos as favorites to make the website gallery show only those photos.
Under **Theme, choose the colors, fonts, and corner rounding used across all pages, then click Save theme.
Step 6 — SEO, social networks, and languages
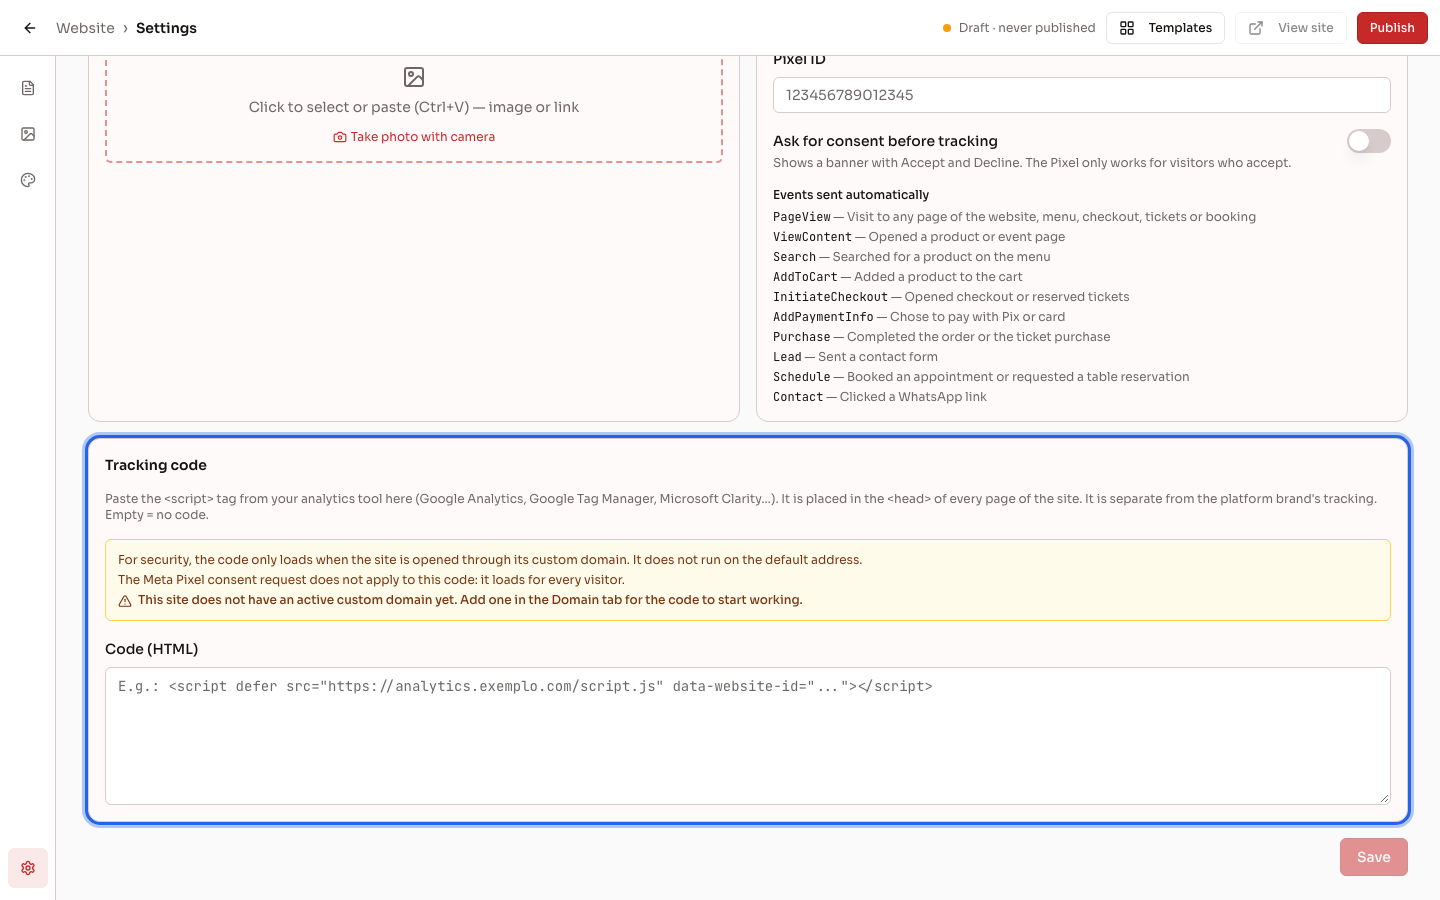
Section titled “Step 6 — SEO, social networks, and languages”Under Settings in the editor’s left menu, the SEO & social tab includes the Default title and Default description that appear on Google, links to your **Social networks, your Favicon (the browser tab icon), and Meta Pixel to track visits and sales from Facebook and Instagram ads. When Ask for consent before tracking is turned on, the website displays a banner with Accept and Decline options, and the Pixel only works for visitors who accept.
At the bottom of the same tab, you can add the <script> tag for any analytics tool to Tracking code (Google Analytics, Google Tag Manager, Microsoft Clarity, and others). For security, the code only runs when the website is opened using your custom domain (Step 8), and only if that domain isn’t also used to log in to the system (for example, the website uses yourwebsite.com and the system uses app.yourwebsite.com). The code isn’t loaded on the default address. The Pixel consent setting doesn’t apply to this code, which loads for all visitors.
The Languages tab lets you set the Language the site is written in and choose which languages to translate the website into automatically. Visitors can choose a language using the menu selector.
Step 7 — Publish
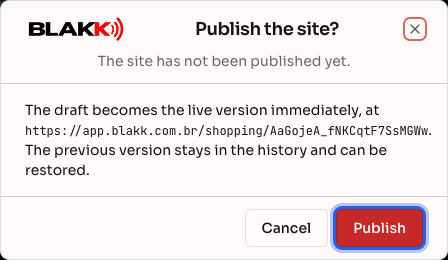
Section titled “Step 7 — Publish”Click Publish at the top of the editor and confirm. Your draft becomes the live version right away. The website address appears under Settings → **Domain, in the Default address (always active) box, with the Copy and Open buttons. You can also click View site at the top of the editor to open the website.
While you’re editing, the live website doesn’t change. The top of the editor shows how many changes haven’t been published yet, or Everything published.
Step 8 — Use your own domain for the website
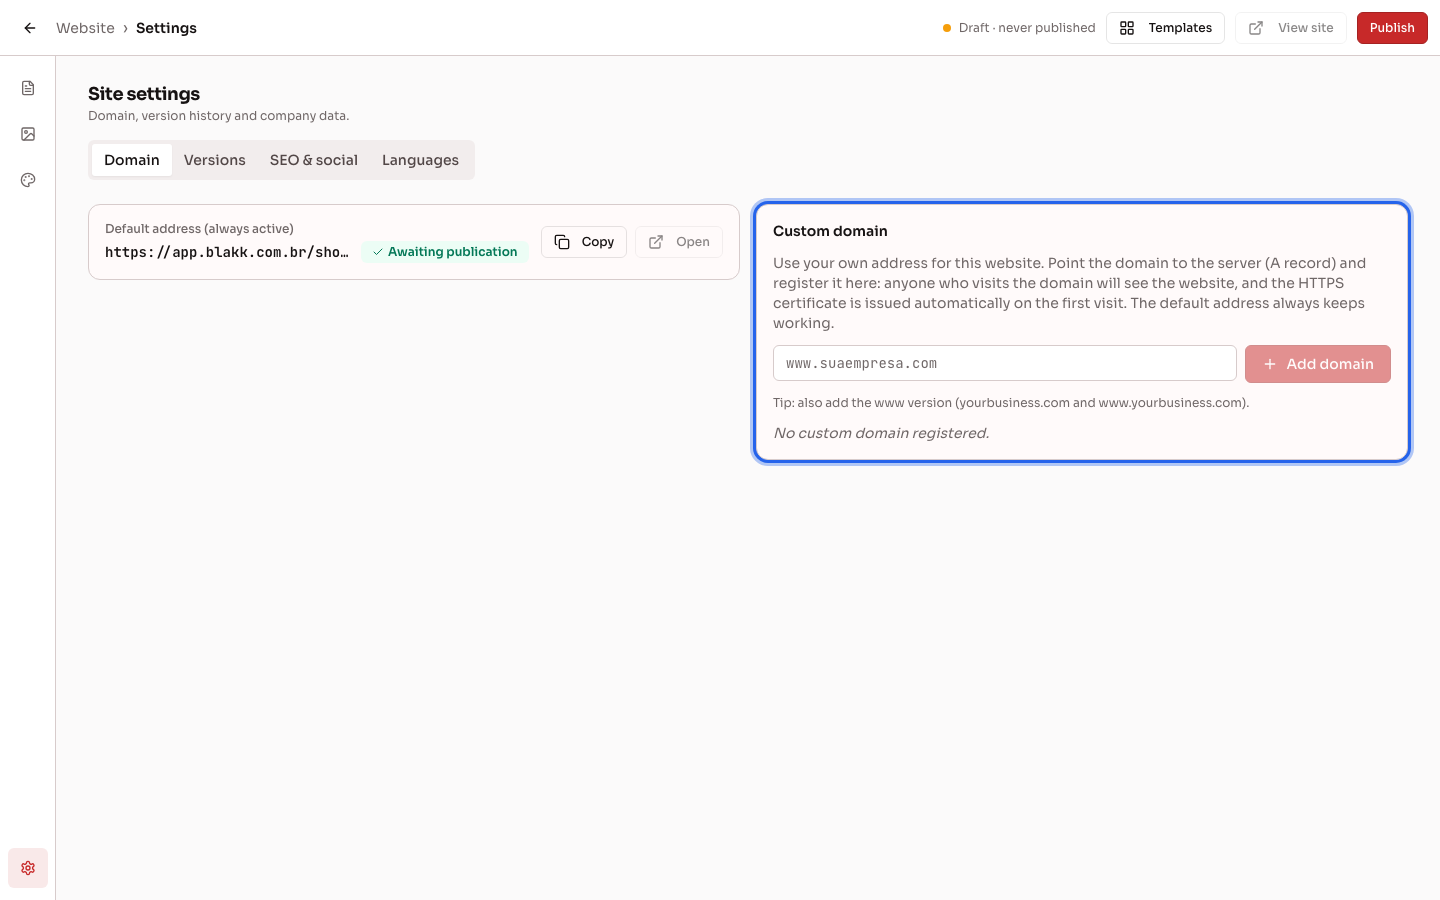
Section titled “Step 8 — Use your own domain for the website”- In the control panel for the service where you bought your domain (GoDaddy, Hostinger, and others), create an A record pointing the domain to Blakk’s server IP. If you don’t know the IP, contact Support.
- Under Settings → **Domain, in the Custom domain box, enter the domain and click Add domain. Add both versions, with and without
www. - Click Check DNS. When DNS pointing to the server appears, the domain will display your website. The security certificate (HTTPS) is issued automatically the first time someone visits.
Step 9 — Restore a previous version
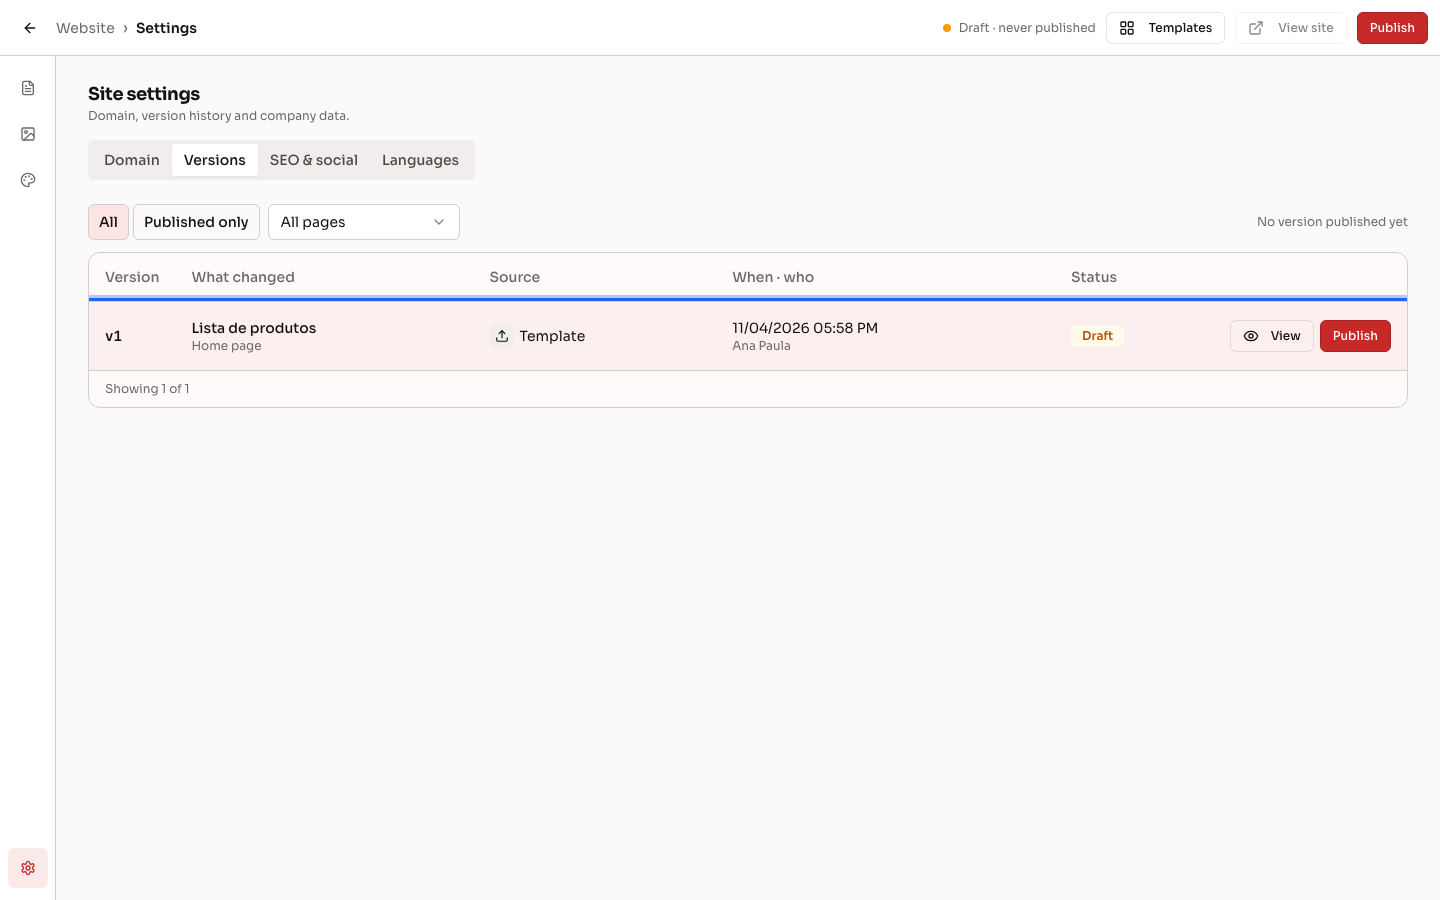
Section titled “Step 9 — Restore a previous version”Under Settings → **Versions, you’ll find all versions of your website, including each publication, applied template, and change made through chat. Click View to preview a version and Restore to restore it as a draft (then publish it), or click Publish to make it live right away.
Step 10 — See where visits and sales come from
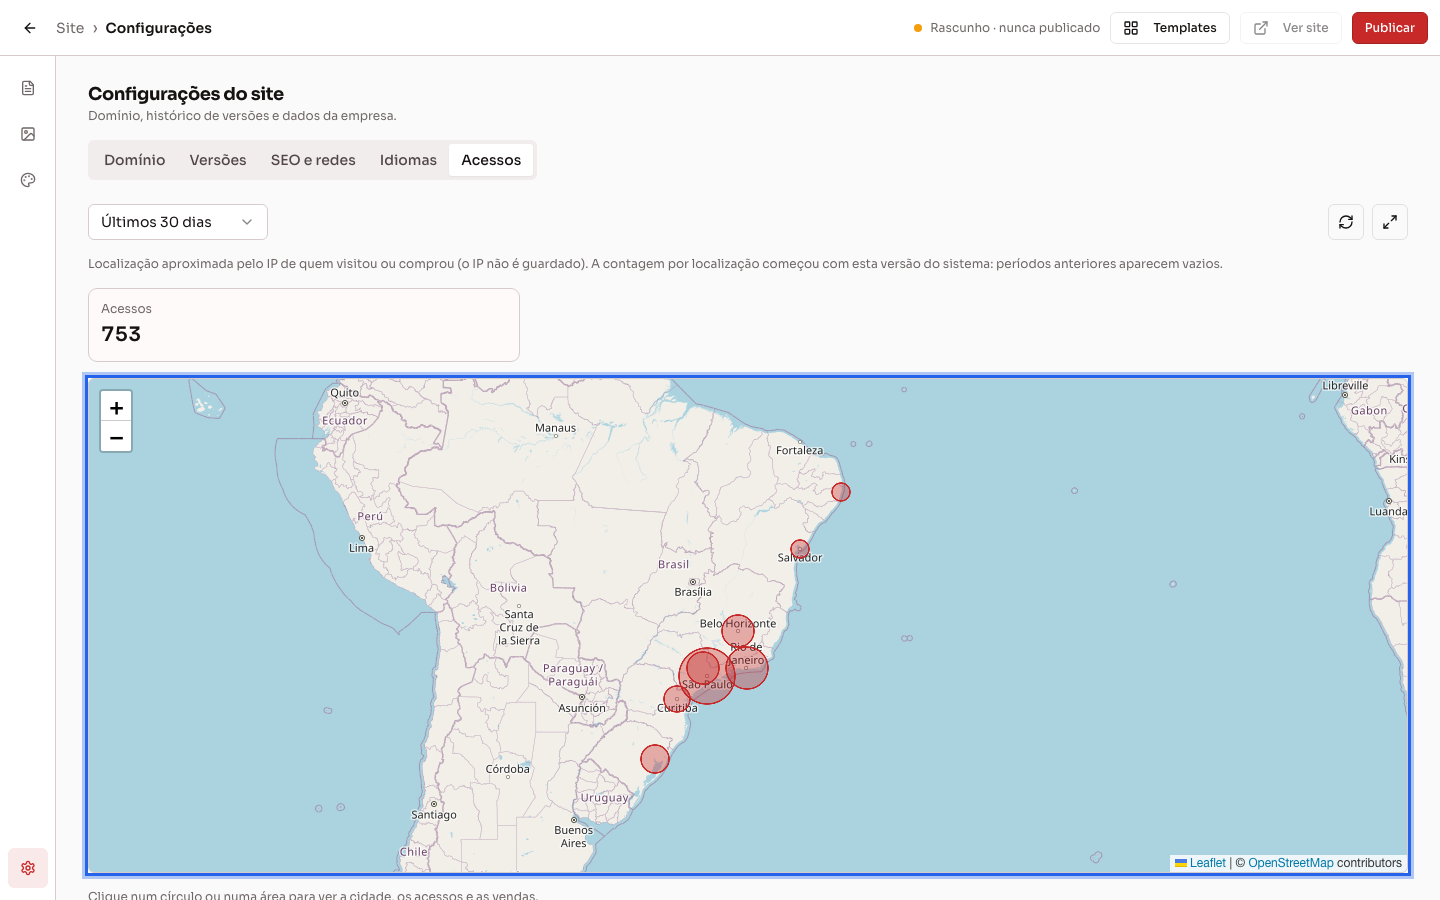
Section titled “Step 10 — See where visits and sales come from”Under Settings → **Access, you’ll find the website map. When you open it, it shows the Last 30 days. Change the time period using the filter at the top.
- The cards show the total number of Access (pages opened on the website), as well as sales data for users who can view the Sales Report.
- Each circle represents a city where someone visited the website. The larger the circle, the more visits.
- Click a circle or an area to see the city, state, and number of visits.
- Click Refresh map data (the arrow button beside it) to refresh visits and sales without leaving the page.
- Click Maximize map to open the map full screen. The time period filter and refresh button also appear at the top of the full-screen view.
Locations are approximate and based on the internet address (IP) of the person who visited or made a purchase. IP addresses aren’t saved. Tracking starts on the day the map becomes available, so earlier periods will be blank.
What happens next
Section titled “What happens next”- Your published website is available at the default address, which continues to work even after you add a custom domain.
- Information from the system—groups, products, prices, services, tattoo artists, gallery photos, hours, and address—updates automatically on your website without republishing. Only layout and text changes made in the editor require you to click Publish.
- Anyone who fills out a contact form on your website is added as a customer under Customers, and their message is emailed to the address in the Email field under Settings → Business.
- When you publish with other languages enabled, new or updated text is translated by AI before it goes live. Translations you’ve edited manually aren’t overwritten.
- Every publication creates a version in the history, and you can restore any version.
- Each page opened on your website counts as a visit. You can find the numbers under Settings → Business, in the Public Pages tab. Click Access statistics, then open the Website tab to see totals, daily, weekly, and monthly averages, a chart of the last 30 days, and Accesses per page. Search engine bots and link previews aren’t counted. To see which cities visits came from, use the Access tab in your website settings (Step 10).
Common mistakes and questions
Section titled “Common mistakes and questions”Q: I can’t find the Website menu.
A: Website access must be included in your plan. Contact Support to enable it. If it’s already enabled for your studio but you still can’t see it, ask the studio owner to grant you access under Access → Profiles.
Q: I opened the website on my phone and can’t edit it.
A: The editor only works on a computer—the screen displays Editor available on desktop only. The published website works normally on a phone.
Q: I made changes, but they don’t appear on the website.
A: Changes stay in the draft until you click Publish. The top of the editor shows how many changes haven’t been published yet.
Q: I added my domain, but it doesn’t open the website.
A: Click Check DNS. If DNS does not point to the server yet appears, check the A record in your domain provider’s control panel. The screen shows the Domain IPs and Server IP so you can compare them. DNS changes can take a few hours to take effect. Also, make sure you’ve published the website at least once.
Q: The chat says I’ve reached the AI message limit.
A: The website chat uses the AI messages included in your plan, which are shared with Marketing Posts. You can keep editing manually in the Properties tab until your monthly limit resets.
Q: The chat says no AI assistant is configured for the website.
A: This depends on a platform setting. Contact Support.
Q: I added the Google Analytics code, but it isn’t recording any visits.
A: The code only runs on your custom domain. Under Settings → **Domain, check that your custom domain’s DNS is pointing to the server, then open the website using that domain instead of the default address. If you also use the same domain to log in to the system, the code won’t load on it. Use a separate address for the system (for example, app.yourwebsite.com). If you turned on **Ask for consent before tracking, note that it only applies to Meta Pixel.
Q: How do I see how many visits my website had?
A: Under Settings → Business, open the Public Pages tab, click **Access statistics, and open the Website tab. Click a bar in the chart to see the most-viewed pages on that day. Tracking starts on the day the feature becomes available.
Q: The visits map shows the wrong city or a nearby city.
A: The city is based on the internet address (IP), which sometimes points to the internet provider’s city instead of the visitor’s city. Use the map to see regional trends, not someone’s exact location.
Q: How many domains can I use for the same website?
A: You can use up to 5 custom domains, in addition to the default address, which always works.
Q: Did I lose my work when I applied a new template?
A: No. Applying a template creates a new version. Your previous version remains under Versions and can be restored at any time.