Projects with multiple sessions: work that spans several tabs
What it is
Section titled “What it is”Some projects take more than one visit. A full sleeve, for example, may take four or five sessions over several weeks. Each session is still a regular tab, with that day’s services, supplies, photos, and payment. The project links those tabs together, showing how many sessions have been completed, the details of each one, and how much is still owed for the entire project.
When to use it
Section titled “When to use it”- A customer books a full sleeve that will take several sessions: create the project on the first tab, and add the next sessions as session 2, session 3, and so on.
- The customer agrees to a set price for the entire project and pays a deposit: the project keeps track of the agreed amount and the deposit, and each session shows how much is still owed.
- The customer books the next session online or by phone: link the appointment (or that day’s tab) to the project, and it becomes the next session.
Before you start
Section titled “Before you start”Projects are managed in Tabs: there isn’t a separate menu. If you don’t see the Link to a project button on a tab, ask the studio owner to enable the Projects with multiple sessions feature for your business type.
The tab must have a customer assigned: every project belongs to one person. To record a deposit, you need the same access used for Customer Payment. If you don’t have access, ask the studio owner to grant it under Access → Profiles.
Step by step
Section titled “Step by step”Step 1 — Link the first tab to a project
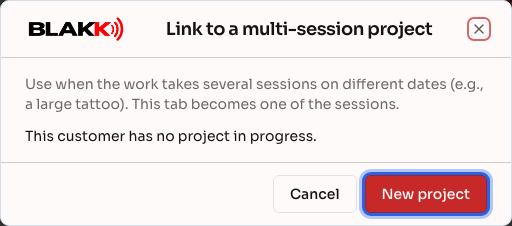
Section titled “Step 1 — Link the first tab to a project”Open the tab for the first session and click Link to a project, next to the tab’s status. If the customer already has a project in progress, it appears in the list. Click it to add the tab as the next session.
Step 2 — Create the project
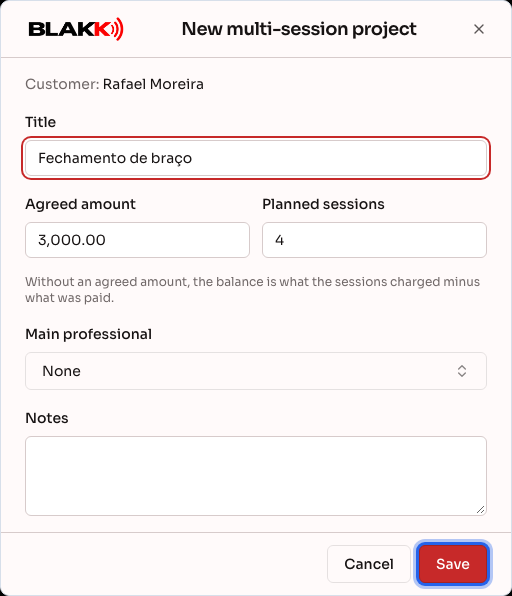
Section titled “Step 2 — Create the project”If this is the first session, click New project. Enter a Title for the project (for example, “Full sleeve”), enter the Agreed amount if there’s a set price, and, if you’d like, the Planned sessions. Click Save. The tab becomes session 1, and its header displays the “Session 1 of 4” label.
Step 3 — View the sessions and amount still owed
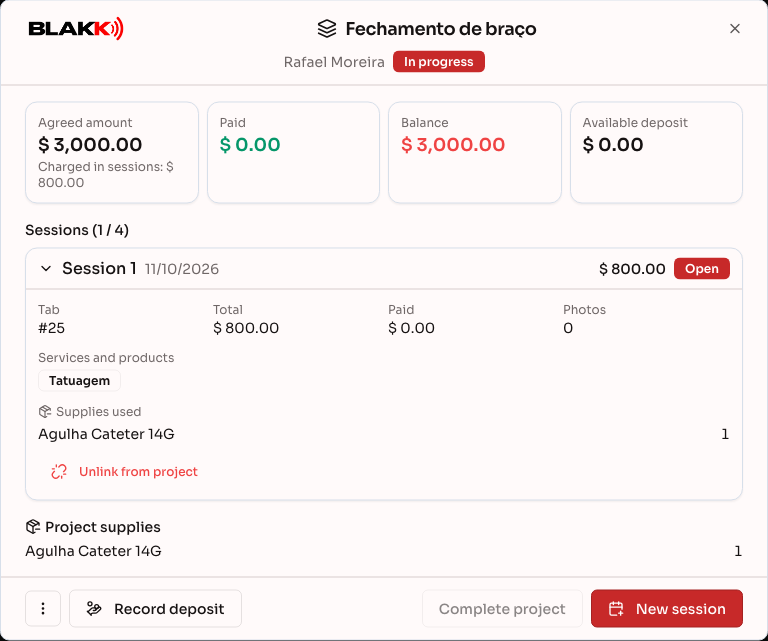
Section titled “Step 3 — View the sessions and amount still owed”Click the Session N of N label on the tab (or appointment) to open the project. At the top, you’ll see the agreed amount (or the amount charged across sessions), Paid, Balance, and Available deposit. Below, the sessions are listed in order. Click one to see its services, Supplies used, and the number of photos taken, or click Open tab to view the full tab.
Step 4 — Open the next session
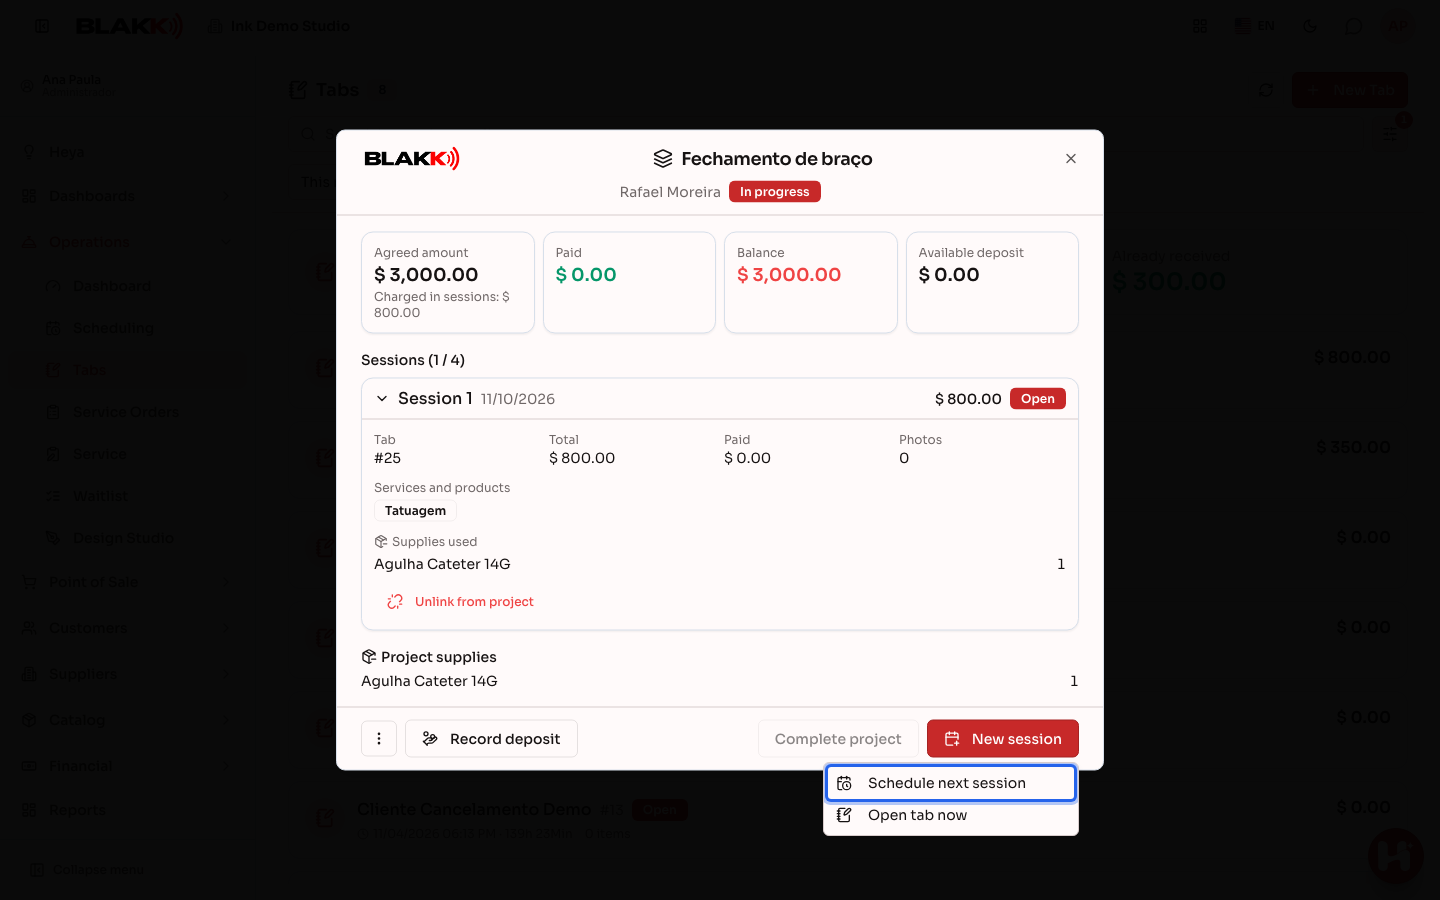
Section titled “Step 4 — Open the next session”In the project, click New session. For a session on another day, select Schedule next session. The appointment form opens with the customer and project already selected, and the tab is created for that day, linked to the project. For a session today, select Open tab now and choose whether to copy the services from the last session to the new tab (Copy services) or start with an empty tab (Empty tab).
Step 5 — Link an appointment to the project
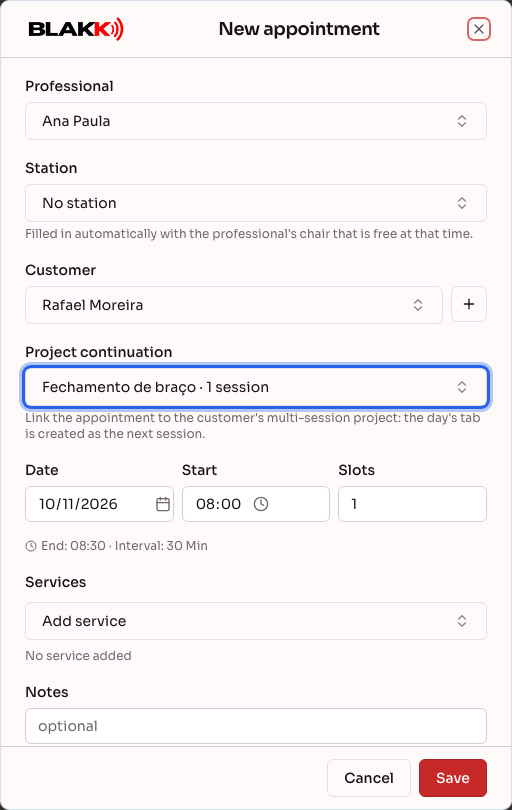
Section titled “Step 5 — Link an appointment to the project”When you create or edit a customer’s appointment in the schedule, select the project in the Project continuation field. This also works for appointments customers book themselves on the website: open the appointment in the schedule, select the project, and save. The tab created from that appointment will automatically be the next session.
Step 6 — Record the deposit
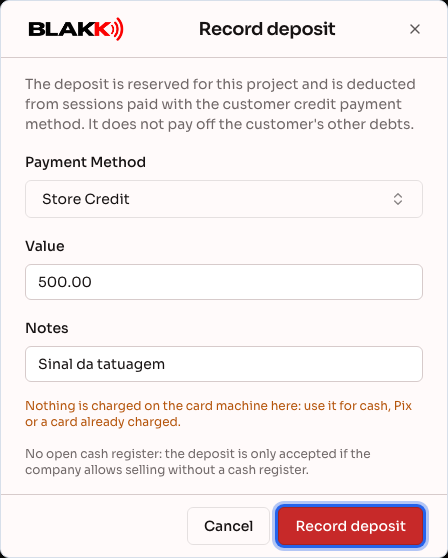
Section titled “Step 6 — Record the deposit”In the project, click Record deposit, choose the Payment Method, enter the Value, and confirm by clicking Record deposit. The deposit is reserved for this project: it can’t be used to pay the customer’s other debts or for any of their other purchases. When paying for a session, use the customer’s credit payment method to deduct the amount from the deposit.
Step 7 — View a customer’s projects
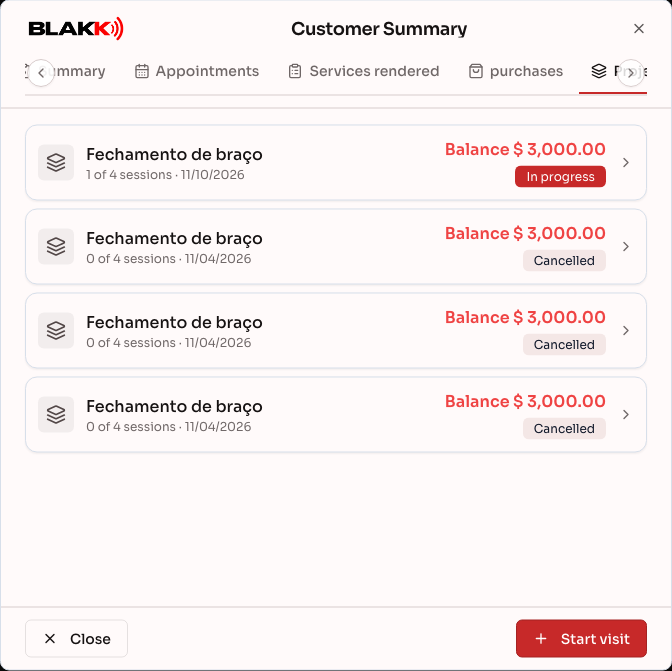
Section titled “Step 7 — View a customer’s projects”In Customer Summary, open the Projects tab. Each project shows how many sessions have been completed, its status, and the balance. Click a project to open it.
What happens next
Section titled “What happens next”- Each session is paid for on its own tab, as usual. The project just keeps a running total of what the sessions charged, what has been paid, and what’s still owed.
- When a session is paid using the customer’s credit payment method, the deposit for that project is deducted first, followed by the customer’s regular credit.
- When you Complete project (or cancel it), any remaining deposit is returned to the customer’s regular credit, and no new sessions can be added to the project.
- Canceling a project tab renumbers the remaining sessions: session 3 becomes session 2.
Common mistakes and questions
Section titled “Common mistakes and questions”Q: I reversed a session’s tab. What happens to it in the project? A: The session appears as Reversed, without a number, and is removed from the project’s charged and paid totals, just like a canceled session. Any deposit used for it is returned to the customer’s credit.
Q: I started with a standalone tab and only later realized the project would need more sessions. What should I do? A: Open the tab, click Link to a project, then click New project. It becomes session 1. Link the customer’s future tabs to the project using the same button.
Q: The customer booked the next session on the website. Will it be added to the project automatically? A: No. The website doesn’t ask which project the appointment is for. Open the appointment in the schedule and select the project under Project continuation. If the tab has already been opened, use Link to a project on the tab.
Q: I linked the wrong tab to the project. How do I undo it? A: Open the project, click the session, then click Unlink from project. The tab will still exist as a standalone tab, and its amounts will no longer count toward the project.
Q: Why can’t I change the customer on a project tab? A: A session always belongs to the project’s customer. To change the customer, unlink the tab from the project first.
Q: Why is the Complete project button disabled? A: There’s still an open session. Close (pay for) or cancel any open sessions before completing the project.
Q: Why wasn’t the deposit deducted from the session? A: The deposit is only deducted when the session is paid using the customer’s credit payment method (the same one used for prepaid balance). If you pay with cash, card, or Pix, the deposit remains available for future sessions.
Q: Do I have to enter an agreed amount? A: No. Without an agreed amount, the project balance is the total charged across sessions minus what has already been paid. With an agreed amount, the balance shows how much is left to reach that amount, and the project lets you know if the sessions have charged more than agreed.